API Key Management
One API key authenticates your integration across the REST API, Zapier, and n8n
Overview
Every request your external system makes to Instafill.ai needs to be authenticated. API keys handle this. You generate a key in your account, include it as a header on every request, and the AI document filler identifies which workspace the request belongs to and what it is allowed to access.
The same key works across direct REST API calls, Zapier workflows, n8n automations, and any other platform that sends HTTP requests. You do not need separate credentials for each integration type.
Keys are workspace-scoped. A key created in one workspace cannot access forms, sessions, profiles, or batch jobs in another workspace, regardless of how the request is made. This matters in multi-tenant setups where each client, team, or environment runs in its own workspace.
Keys are displayed only once, immediately after creation. If you close the page before copying the key, it cannot be retrieved. Delete the old key, create a new one, and update your integration.
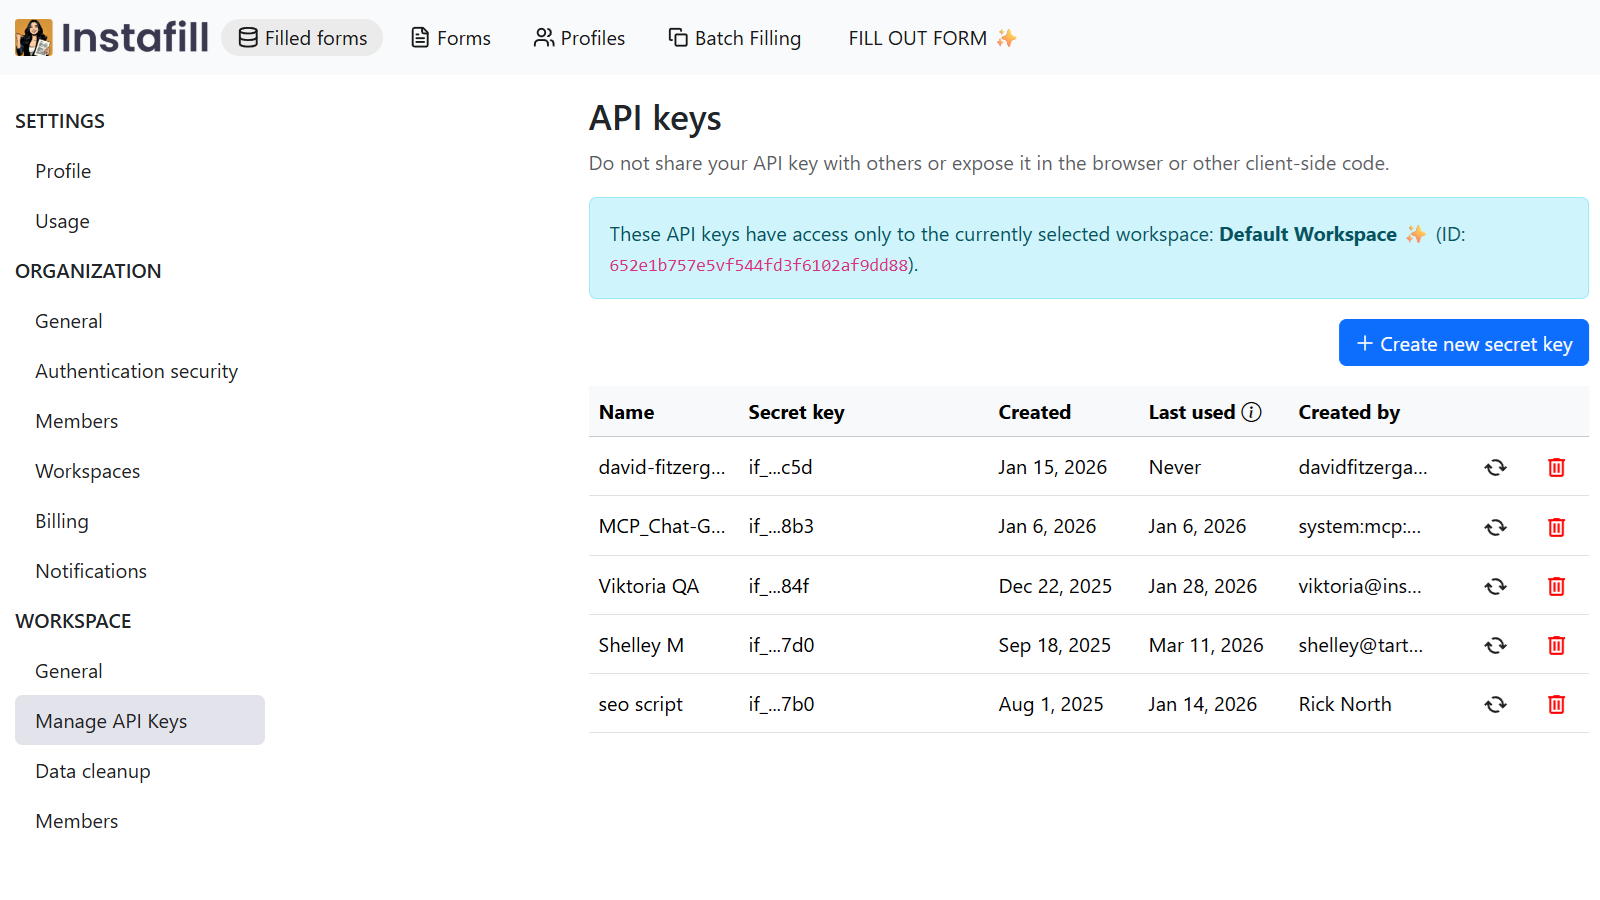
Where to Find API Keys
Go to Settings -> Workspace -> Manage API Keys in your dashboard, or directly to instafill.ai/settings/workspace/api. You can create, rename, and delete keys there.
How It Works
Create a key
- Open Settings -> Workspace -> Manage API Keys
- Click "Create New API Key" and give it a descriptive name - for example "Production", "Zapier", or "n8n staging"
- Copy the key immediately. It is shown only once. If you close the page without copying it, you will need to create a new one
Use a key
Include it as a Bearer token on every request:
Authorization: Bearer YOUR_API_KEY
Or, for some endpoints, as an x-api-key header:
x-api-key: YOUR_API_KEY
See the REST API docs for which header each endpoint accepts. All requests must use HTTPS - plain HTTP calls will fail.
Rotate a key
- Create a new key
- Update your integration to use the new key
- Confirm the new key is working
- Delete the old key - revocation takes effect immediately on the next request
Using API Keys with Zapier
Instafill.ai connects to Zapier without any code. Before setting up a Zap, generate an API key in Settings -> Workspace -> Manage API Keys, then paste it into Zapier when prompted.
The Zapier integration supports four triggers and actions:
| Name | Type | What it does | Required input |
|---|---|---|---|
| Form Converted | Trigger (instant) | Fires automatically when a flat PDF finishes converting to fillable | None |
| Convert PDF | Action | Converts a flat PDF into a fillable form | PDF file URL |
| Check if PDF is Flat | Action | Returns whether a PDF is flat or already fillable | PDF file URL |
| Check Conversion Status | Action | Returns the status and result of a conversion job | Job ID |
Example Zapier workflows:
- Slack notification - Instafill.ai (Form Converted) -> Slack (Send Message). Post a message to your team channel the moment a conversion finishes.
- Auto-save to Google Drive - Instafill.ai (Form Converted) -> Google Drive (Upload File). Keep fillable forms in a shared folder automatically.
- Convert flat PDFs from incoming email - Gmail (New Attachment) -> Instafill.ai (Check if PDF is Flat) -> Filter (only continue if flat) -> Instafill.ai (Convert PDF).
- Track every conversion in a spreadsheet - Instafill.ai (Form Converted) -> Google Sheets (Create Row). Log every conversion with a timestamp and review link.
Note that Convert PDF runs asynchronously - it starts processing and returns a job ID immediately, but the converted form is not ready yet. Use the Form Converted trigger in a separate Zap to be notified when it finishes, or add a Check Conversion Status step to poll for the result before continuing.
API access for Zapier is available on all paid Instafill.ai plans. Zapier's own plan limits apply on the Zapier side. Each conversion counts as one operation regardless of how many pages the PDF has. File URLs passed to Convert PDF must be direct, publicly accessible links - Google Drive preview or share links will not work.
Using API Keys with n8n
For teams that prefer self-hosted automation, Instafill.ai has a native n8n integration. The same API key used for REST API calls authenticates n8n workflows.
A ready-to-use workflow template covers the full sequence: upload a form, start a fill session with your input data, wait for completion, and download the finished PDF. Once imported, replace the sample form and data with your own, connect a real trigger (a Google Sheets row, an incoming email, a webhook from your CRM), and set where completed PDFs should be delivered.
For a full setup guide with screenshots, see How to connect n8n and Instafill.ai. The starter workflow is available at github.com/Instafill/public.
Use Cases
Teams using the REST API for backend form automation - filling mortgage applications, onboarding packets, insurance claims, or credentialing forms - typically create separate keys for each environment: one for development, one for staging, one for production. If a key is compromised in one environment, revoking it has no effect on the others.
For Zapier-based workflows, a dedicated "Zapier" key makes it easy to spot that integration's activity and revoke it independently without touching any backend integrations running on separate keys.
For batch processing triggered via API - generating hundreds of filled PDFs from a spreadsheet - a dedicated key per job type keeps usage clearly attributable in the API dashboard.
Healthcare credentialing at scale - EightAI automated insurance credentialing and billing onboarding forms for over 1,250 healthcare providers using the Instafill.ai API connected through n8n. Before the API integration, manual processing capped growth at 350 customers. After deployment, EightAI onboarded 900 additional providers without adding administrative staff.
Construction subcontractor prequalification - Fender Strategic Group built an email-to-PDF pipeline that receives prequalification forms as email attachments, calls the Instafill.ai API, fills each form using a stored profile, and routes completed PDFs back for human review. Forms that used to take 15 to 60 minutes manually now complete in 30 to 60 seconds.
Benefits
- One key, all integrations - The same key works for REST API calls, Zapier, and n8n - no separate credentials per channel
- Shown only once - Keys are never retrievable after creation, which pushes secure storage from the start
- Instant revocation - Deleting a key blocks it immediately, with no propagation delay
- Per-environment isolation - Separate keys for dev, staging, and production mean a compromised key in one environment cannot affect another
- No 2FA prompts for server calls - API keys authenticate server-to-server requests without triggering interactive login or 2FA flows
Security
Store API keys in environment variables or a secrets manager - never in source code or version control. Rotate keys periodically, and rotate immediately if you suspect a key has been exposed. Review key names and delete any that belong to integrations no longer in use.
Common Questions
What if I lose my API key?
API keys are shown only once and cannot be retrieved. If lost, create a new key, update your integrations to use it, and delete the old one. To avoid this, copy the key into a password manager or secrets manager immediately after creation.
Can I limit what an API key can access?
Keys are scoped to the workspace they were created in. They cannot access any other workspace. Within a workspace, a key has the same permissions as the user account that created it. For restricted access, create a workspace member with limited permissions and generate the key from that account.
How many API keys can I create?
There is no documented limit on the number of keys per workspace. Creating one key per integration or environment is the recommended practice.
Do API keys expire?
Keys do not expire automatically. They remain valid until you delete them. Rotate keys periodically as a security practice, and revoke any key that may have been exposed.
What is the difference between an API key and a Zapier connection?
A Zapier connection uses your API key under the hood - Zapier prompts you for the key when you first connect Instafill.ai to your Zapier account. The key you paste into Zapier is the same type of key used for direct REST API calls. You can use the same key for both, or create a dedicated "Zapier" key to track its usage separately.
Can I use multiple keys at the same time?
Yes. Each key operates independently. A common pattern is one key per integration channel - one for your backend, one for Zapier, one for n8n - so you can revoke any single channel without disrupting the others.