How to edit fillable fields on a converted form
This guide walks you through adjusting the fillable fields on a form that Instafill.ai converted from a flat PDF. The conversion places the fields for you. You then delete the ones that are not needed, move the ones that sit off their line, change the type of any field that should be something else, and add any field that was left out.
What you need before you start
| You need | What that means |
|---|---|
| A converted form | A flat or scanned PDF that Instafill.ai has made fillable and whose fields have had their first review. It is in your forms library. |
| The desktop version of the app | Open Instafill.ai on a computer. Editing fields means dragging them, resizing them by their edges and using keyboard shortcuts, and all of that is far more convenient with a mouse, a keyboard and a large screen than on a phone. |
| A paid plan | Updating a form's layout needs one. |
1. Open the form in the field editor
Open Forms in the top bar and find the form. Open the menu at the end of its row and choose Update PDF form layout.
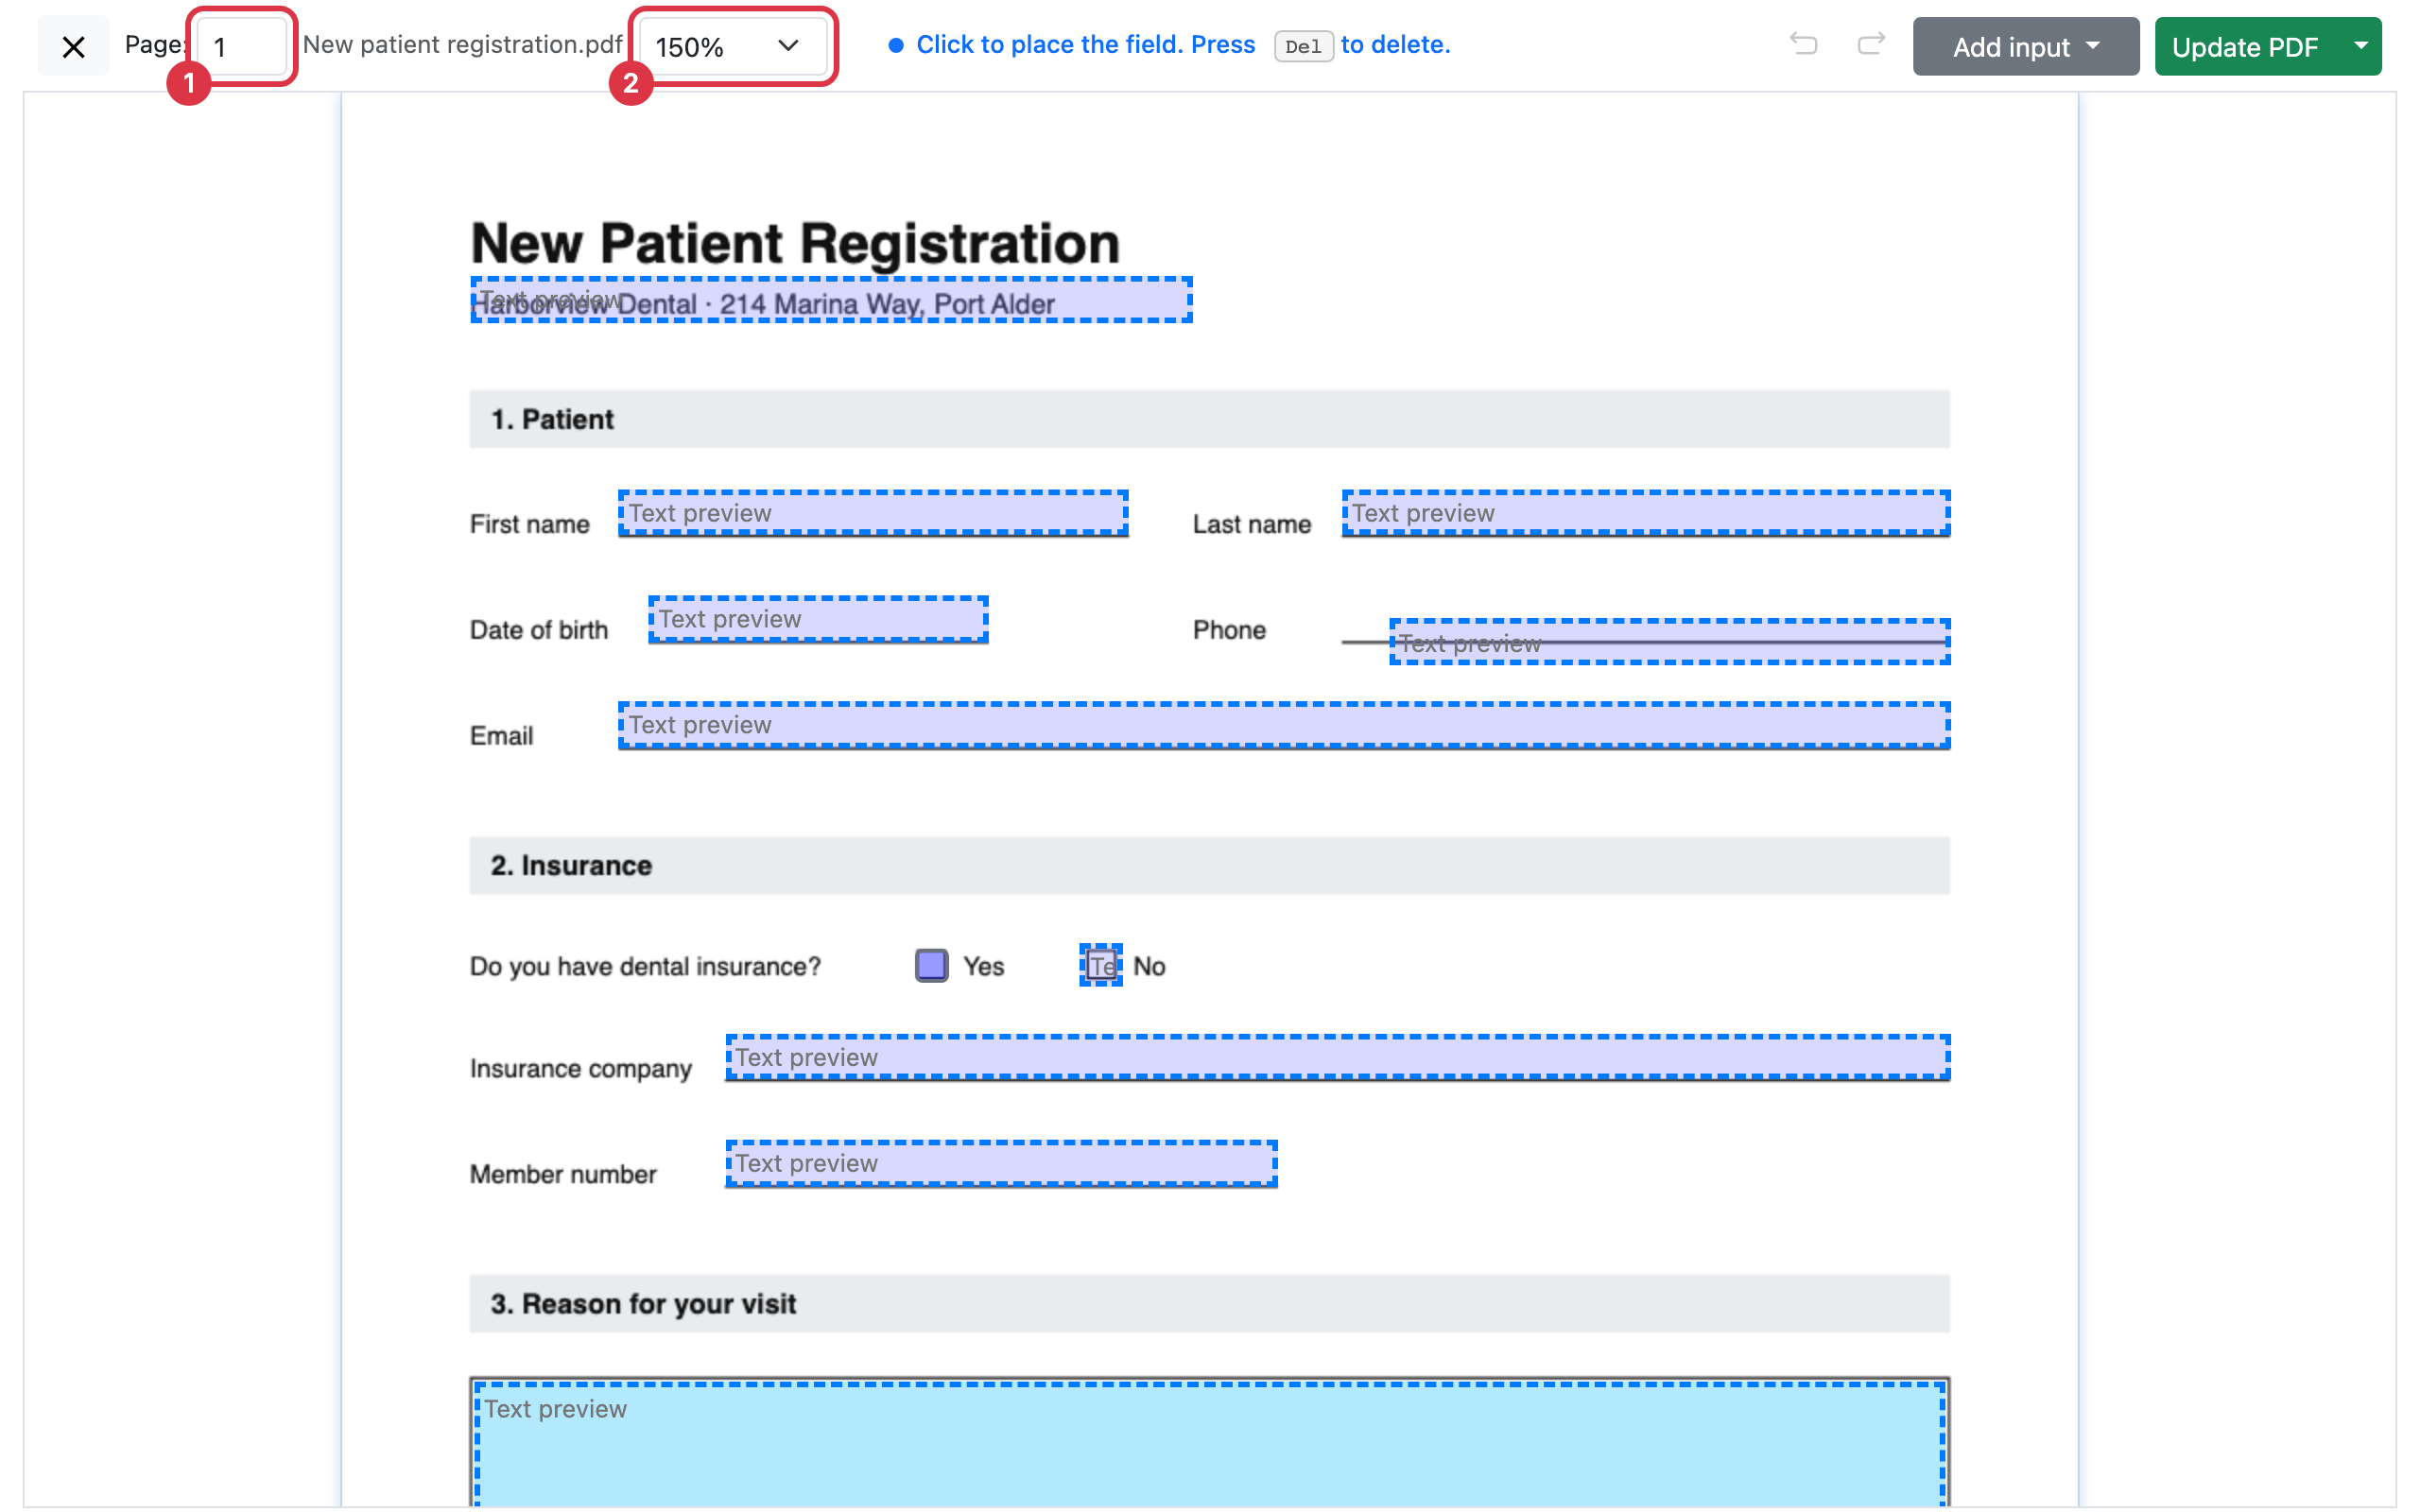
The form is drawn page by page, with every fillable field outlined on top of it. Use the Page box to jump to a page, and the zoom menu beside the form's name to make the fields easier to grab.
2. Delete a field that is not needed
Click the field to select it, then press Del. Backspace and D do the same.
- Changed your mind: Press the undo arrow in the toolbar, or Ctrl+Z. The redo arrow, or Ctrl+Y, puts the change back.
- Two fields in one place: Fields that sit on top of each other are outlined in red with stripes. Delete one of them, or move it away.
3. Move or resize a field
Drag a field to move it. Drag any of its edges to resize it. A field stays on its own page.
- Small steps: Select the field and press an arrow key to nudge it a little at a time.
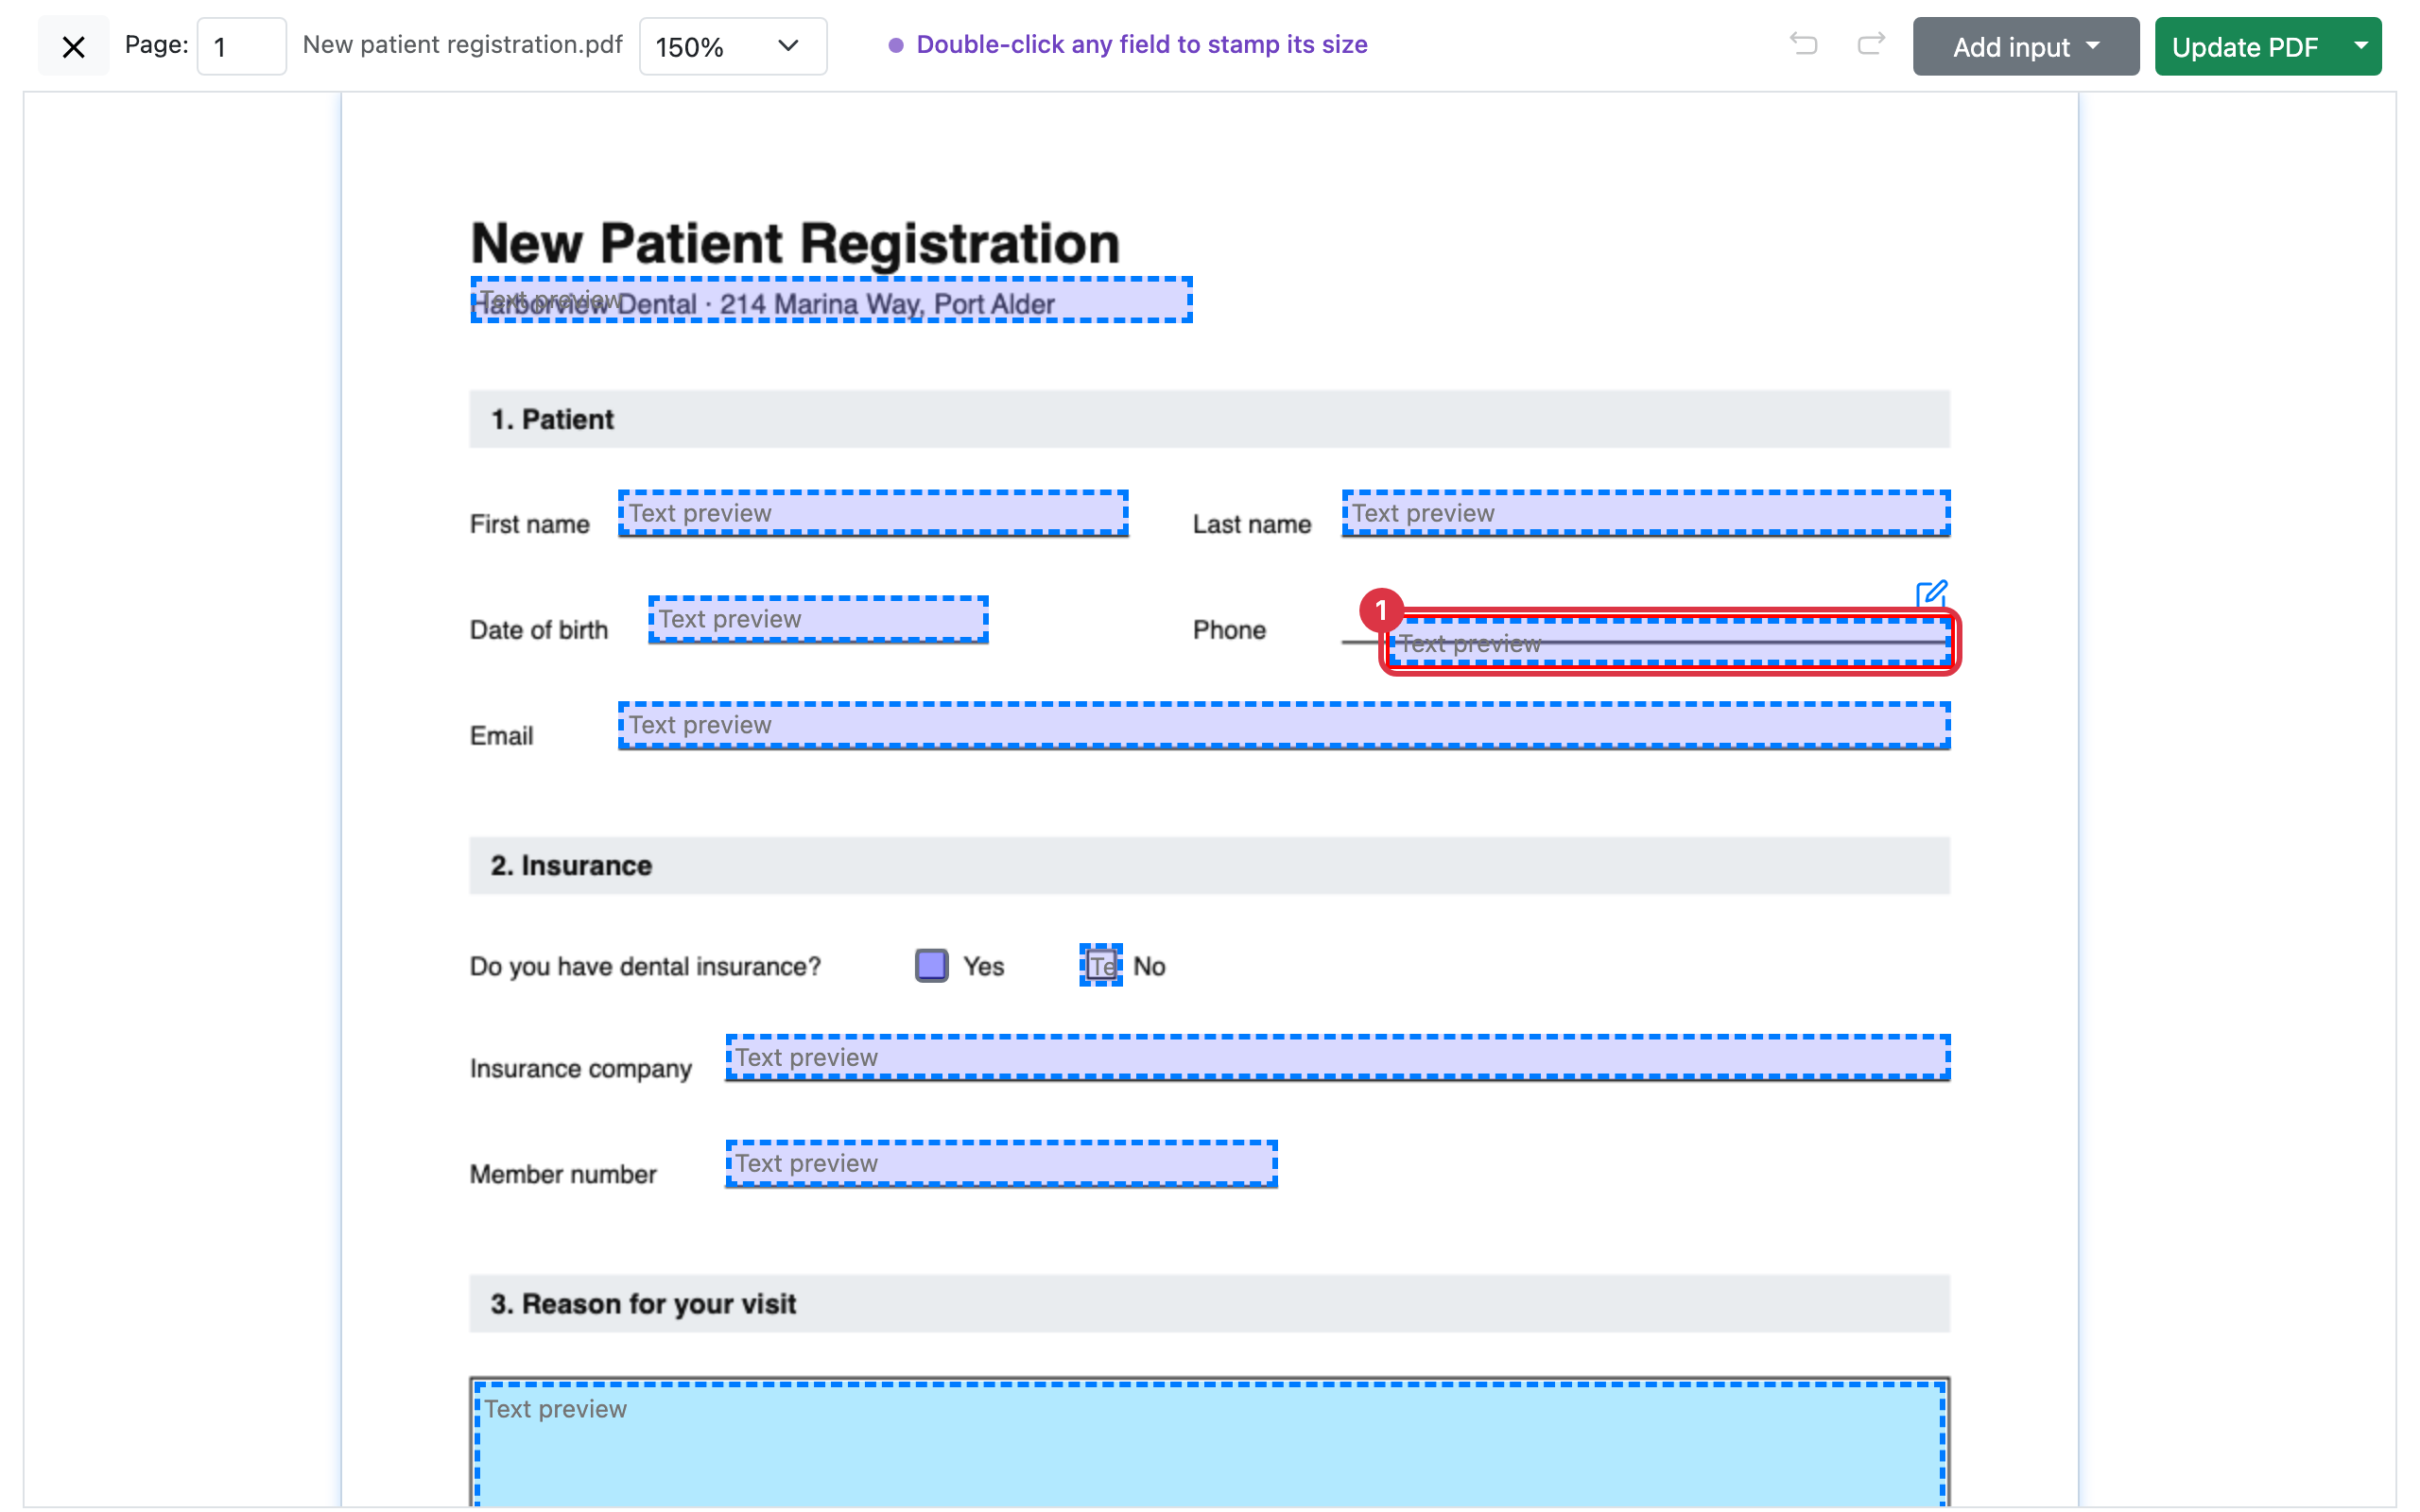
- Text that should line up: Resize the field so that it sits on its printed line or inside its printed box. Text is written inside the field's outline.
4. Change a field's type
A converted field is one of three types: a single line of text, several lines of text, or a checkbox.
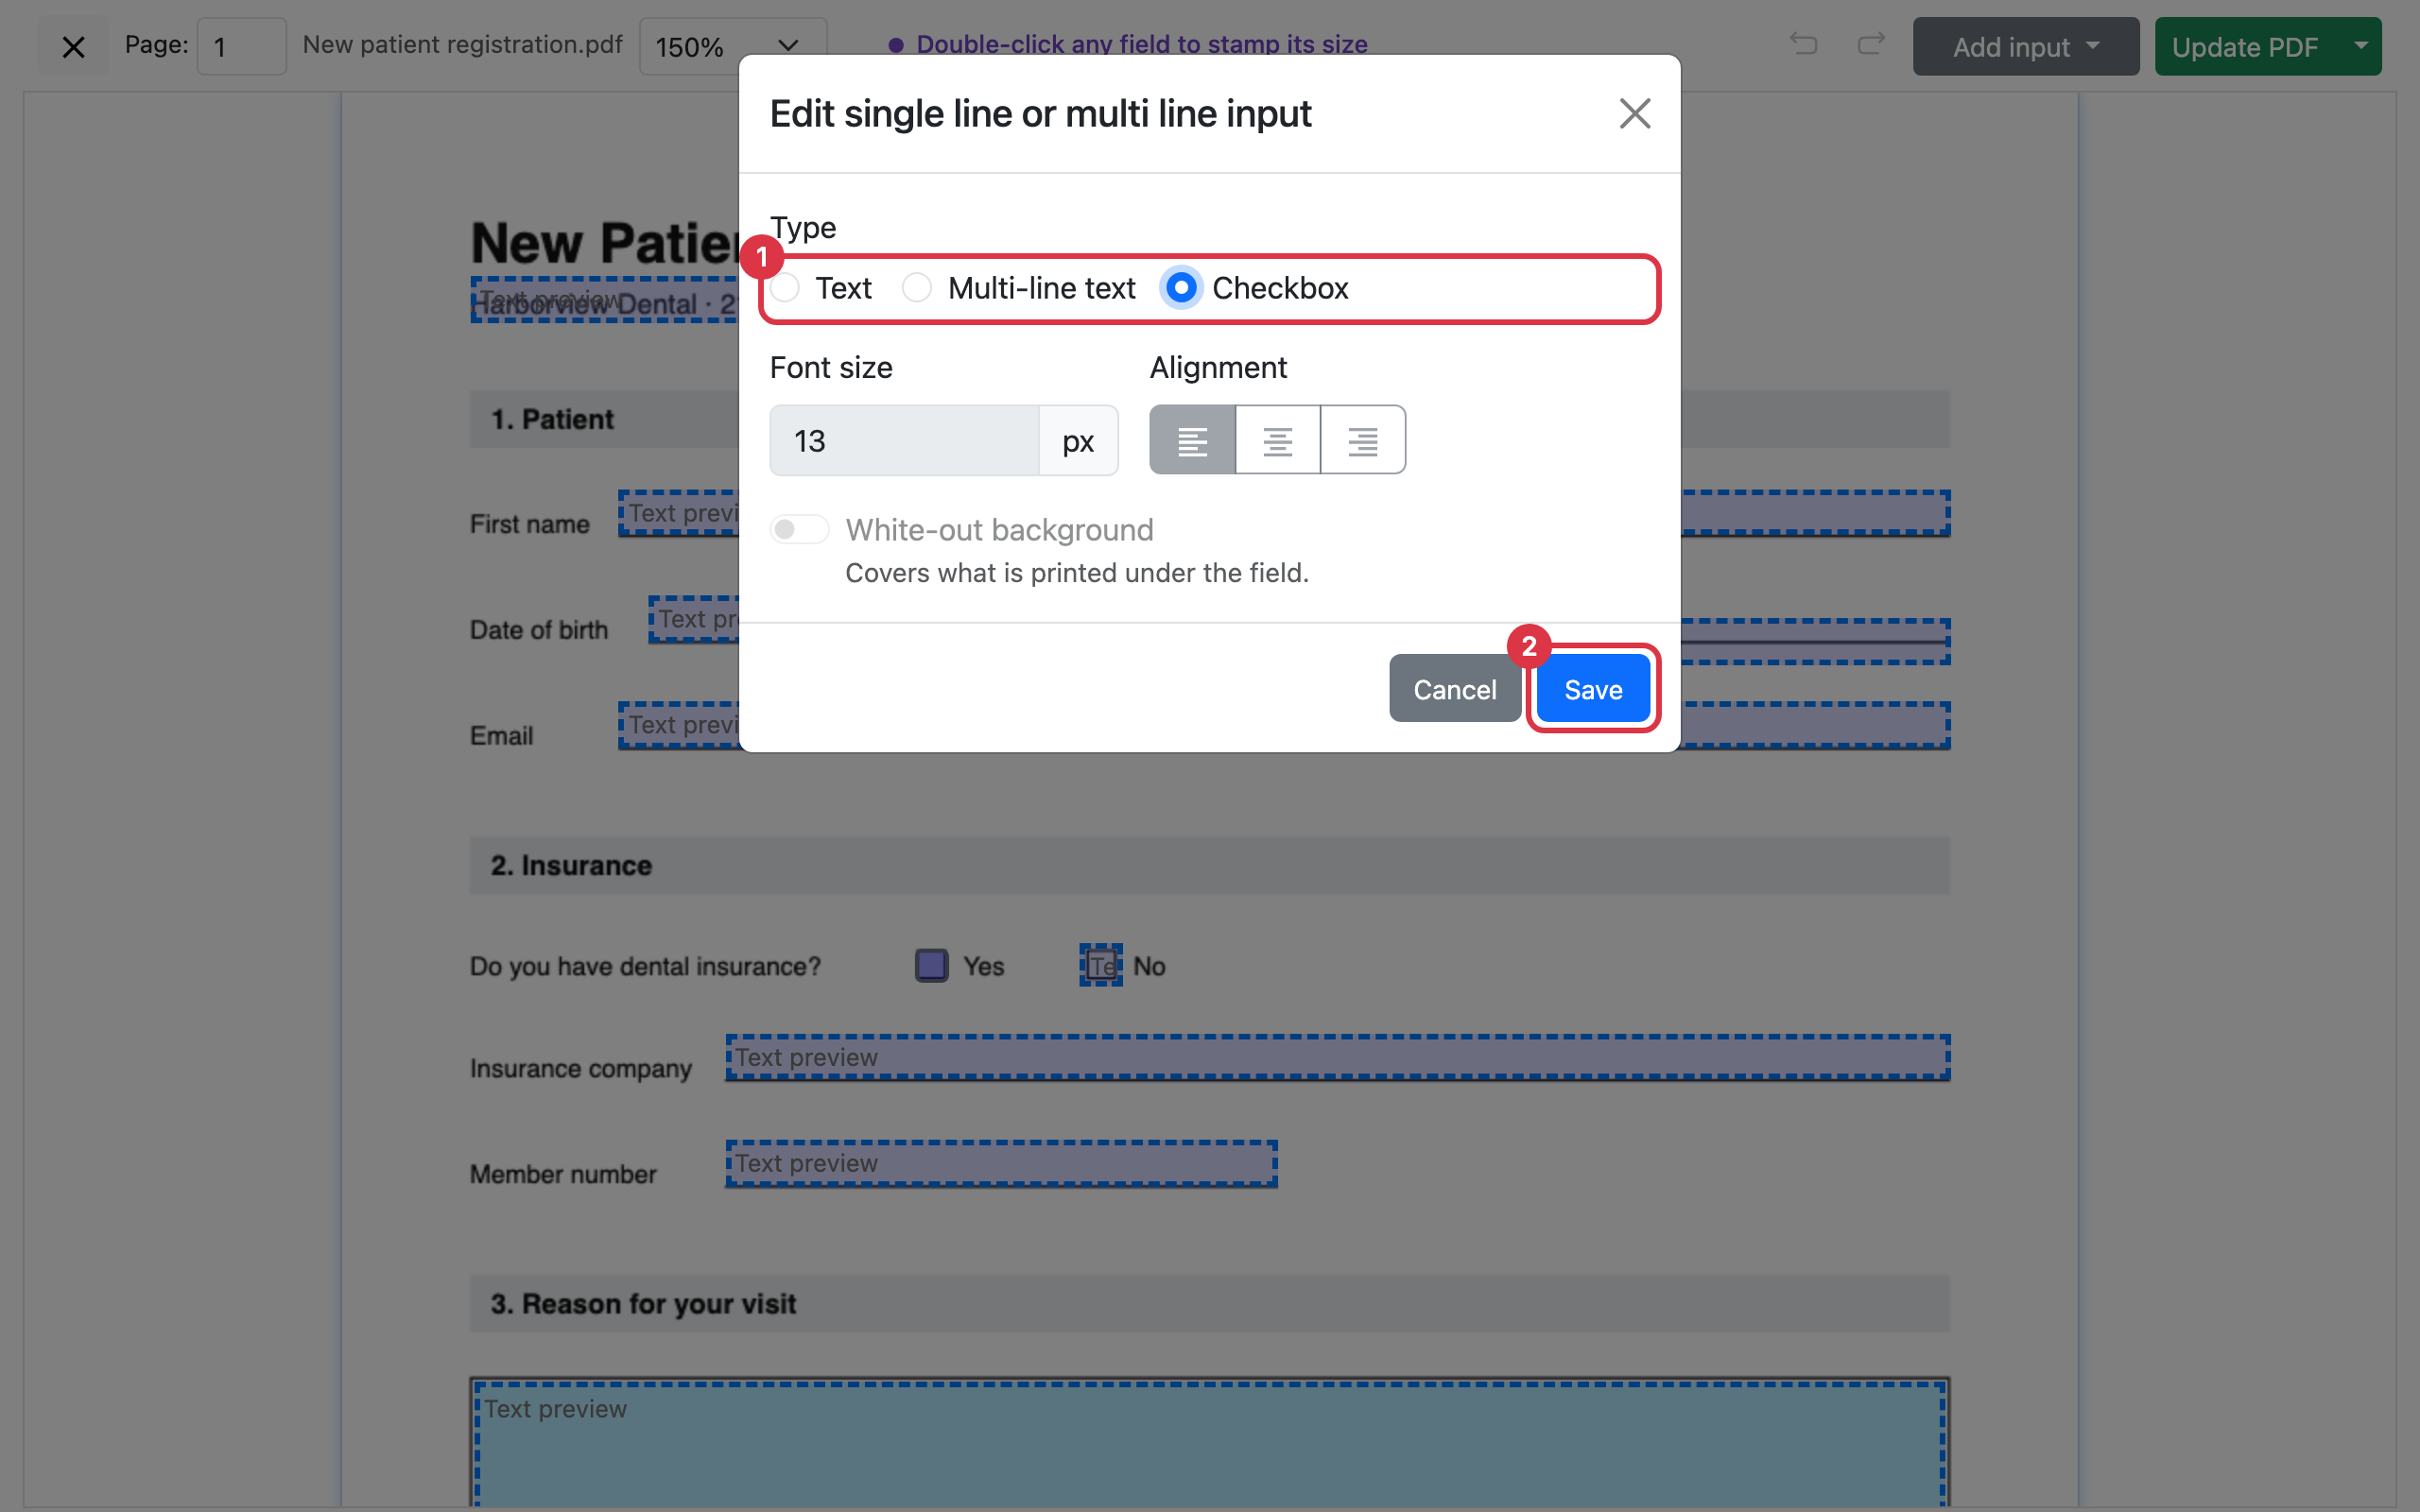
A text field. Select it and press the pencil button above its corner. Under Type, pick one of the options and press Save.
| Type | What it is for |
|---|---|
| Text | One line, such as a name or a date. |
| Multi-line text | Several lines, such as a description or an address block. |
| Checkbox | A box that is ticked or left empty. |
The same dialog sets the Font size and Alignment of a text field, and White-out background, which covers what is printed under the field.
A checkbox that should be text. Select the checkbox and delete it. Then add a text field in its place, as the next step shows.
5. Add a field the conversion left out
- Scroll to the page that is missing the field. A new field goes on the page you are looking at.
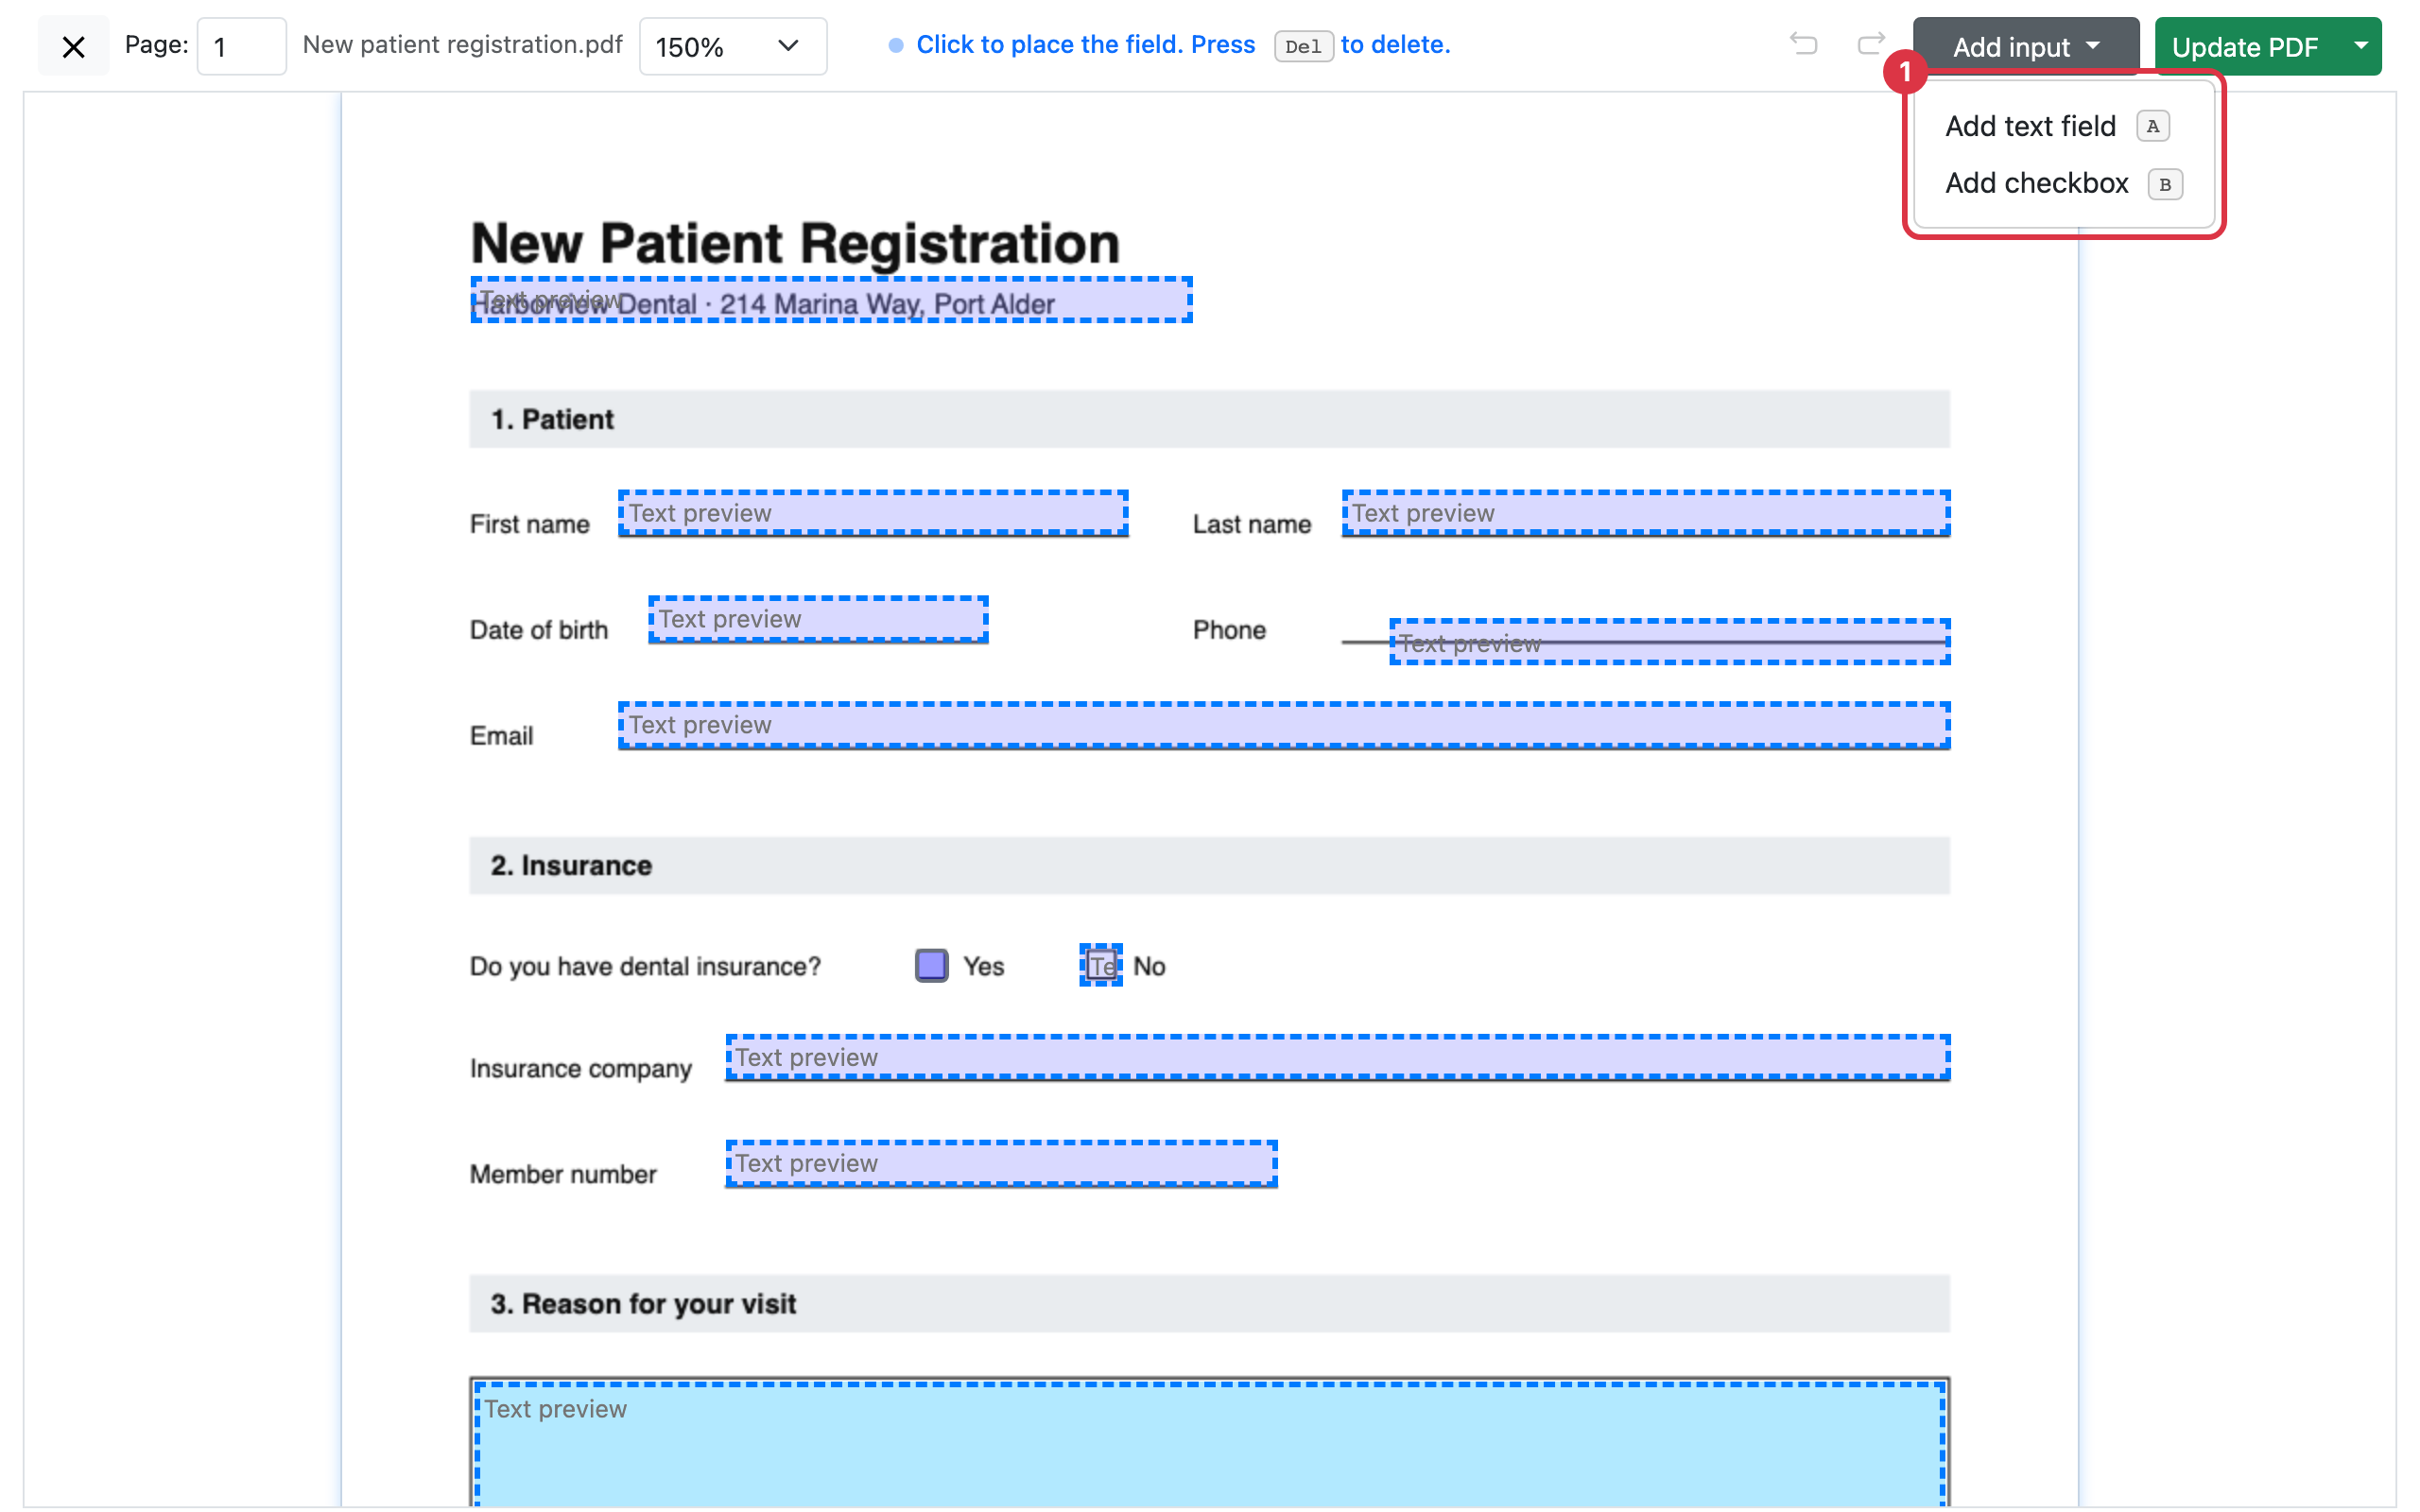
- Open Add input in the toolbar and choose Add text field or Add checkbox.
- Move the pointer over the form. The new field follows it.
- Click where the field belongs to place it.
- Drag the field or its edges until it sits on its printed line or inside its printed box.
For a text field that needs several lines, press its pencil button and pick Multi-line text, as in step 4.
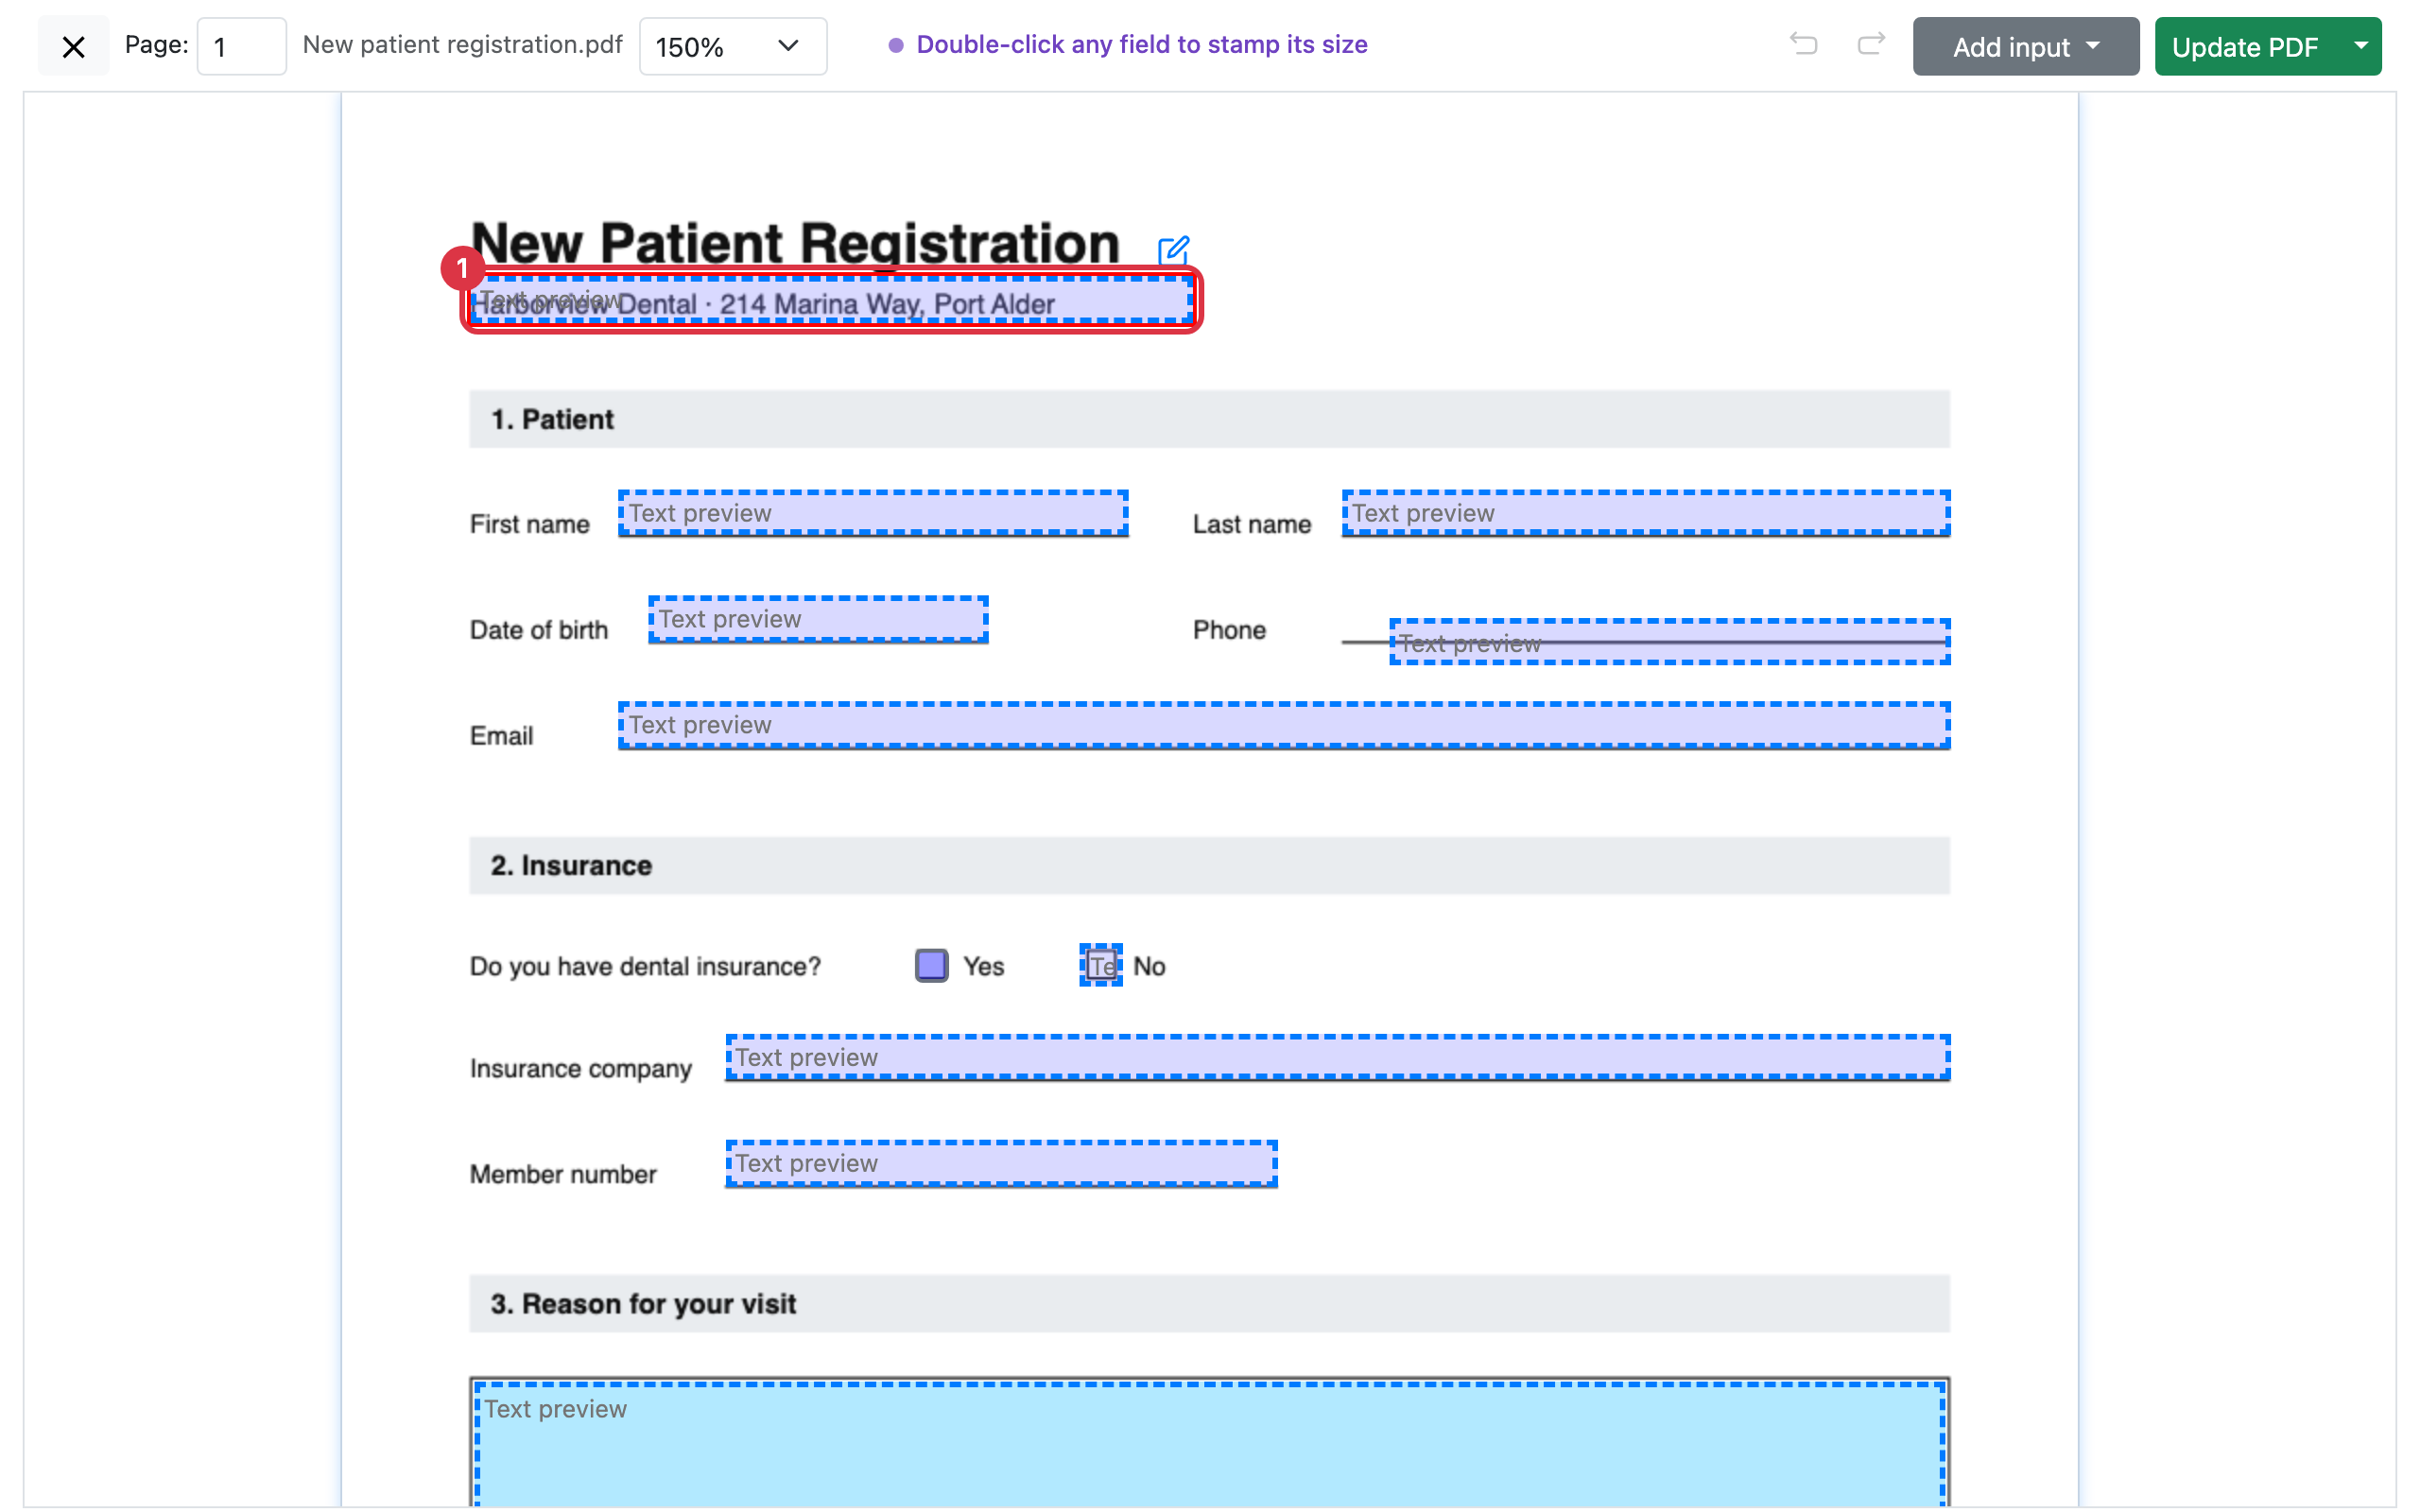
- Many fields of one size: Double-click a field. Each click on the page then places another field of the same size. Press Esc, or click any field, to stop.
- Ready for filling: A field you add is prepared for filling when you save in the next step.
6. Save your changes
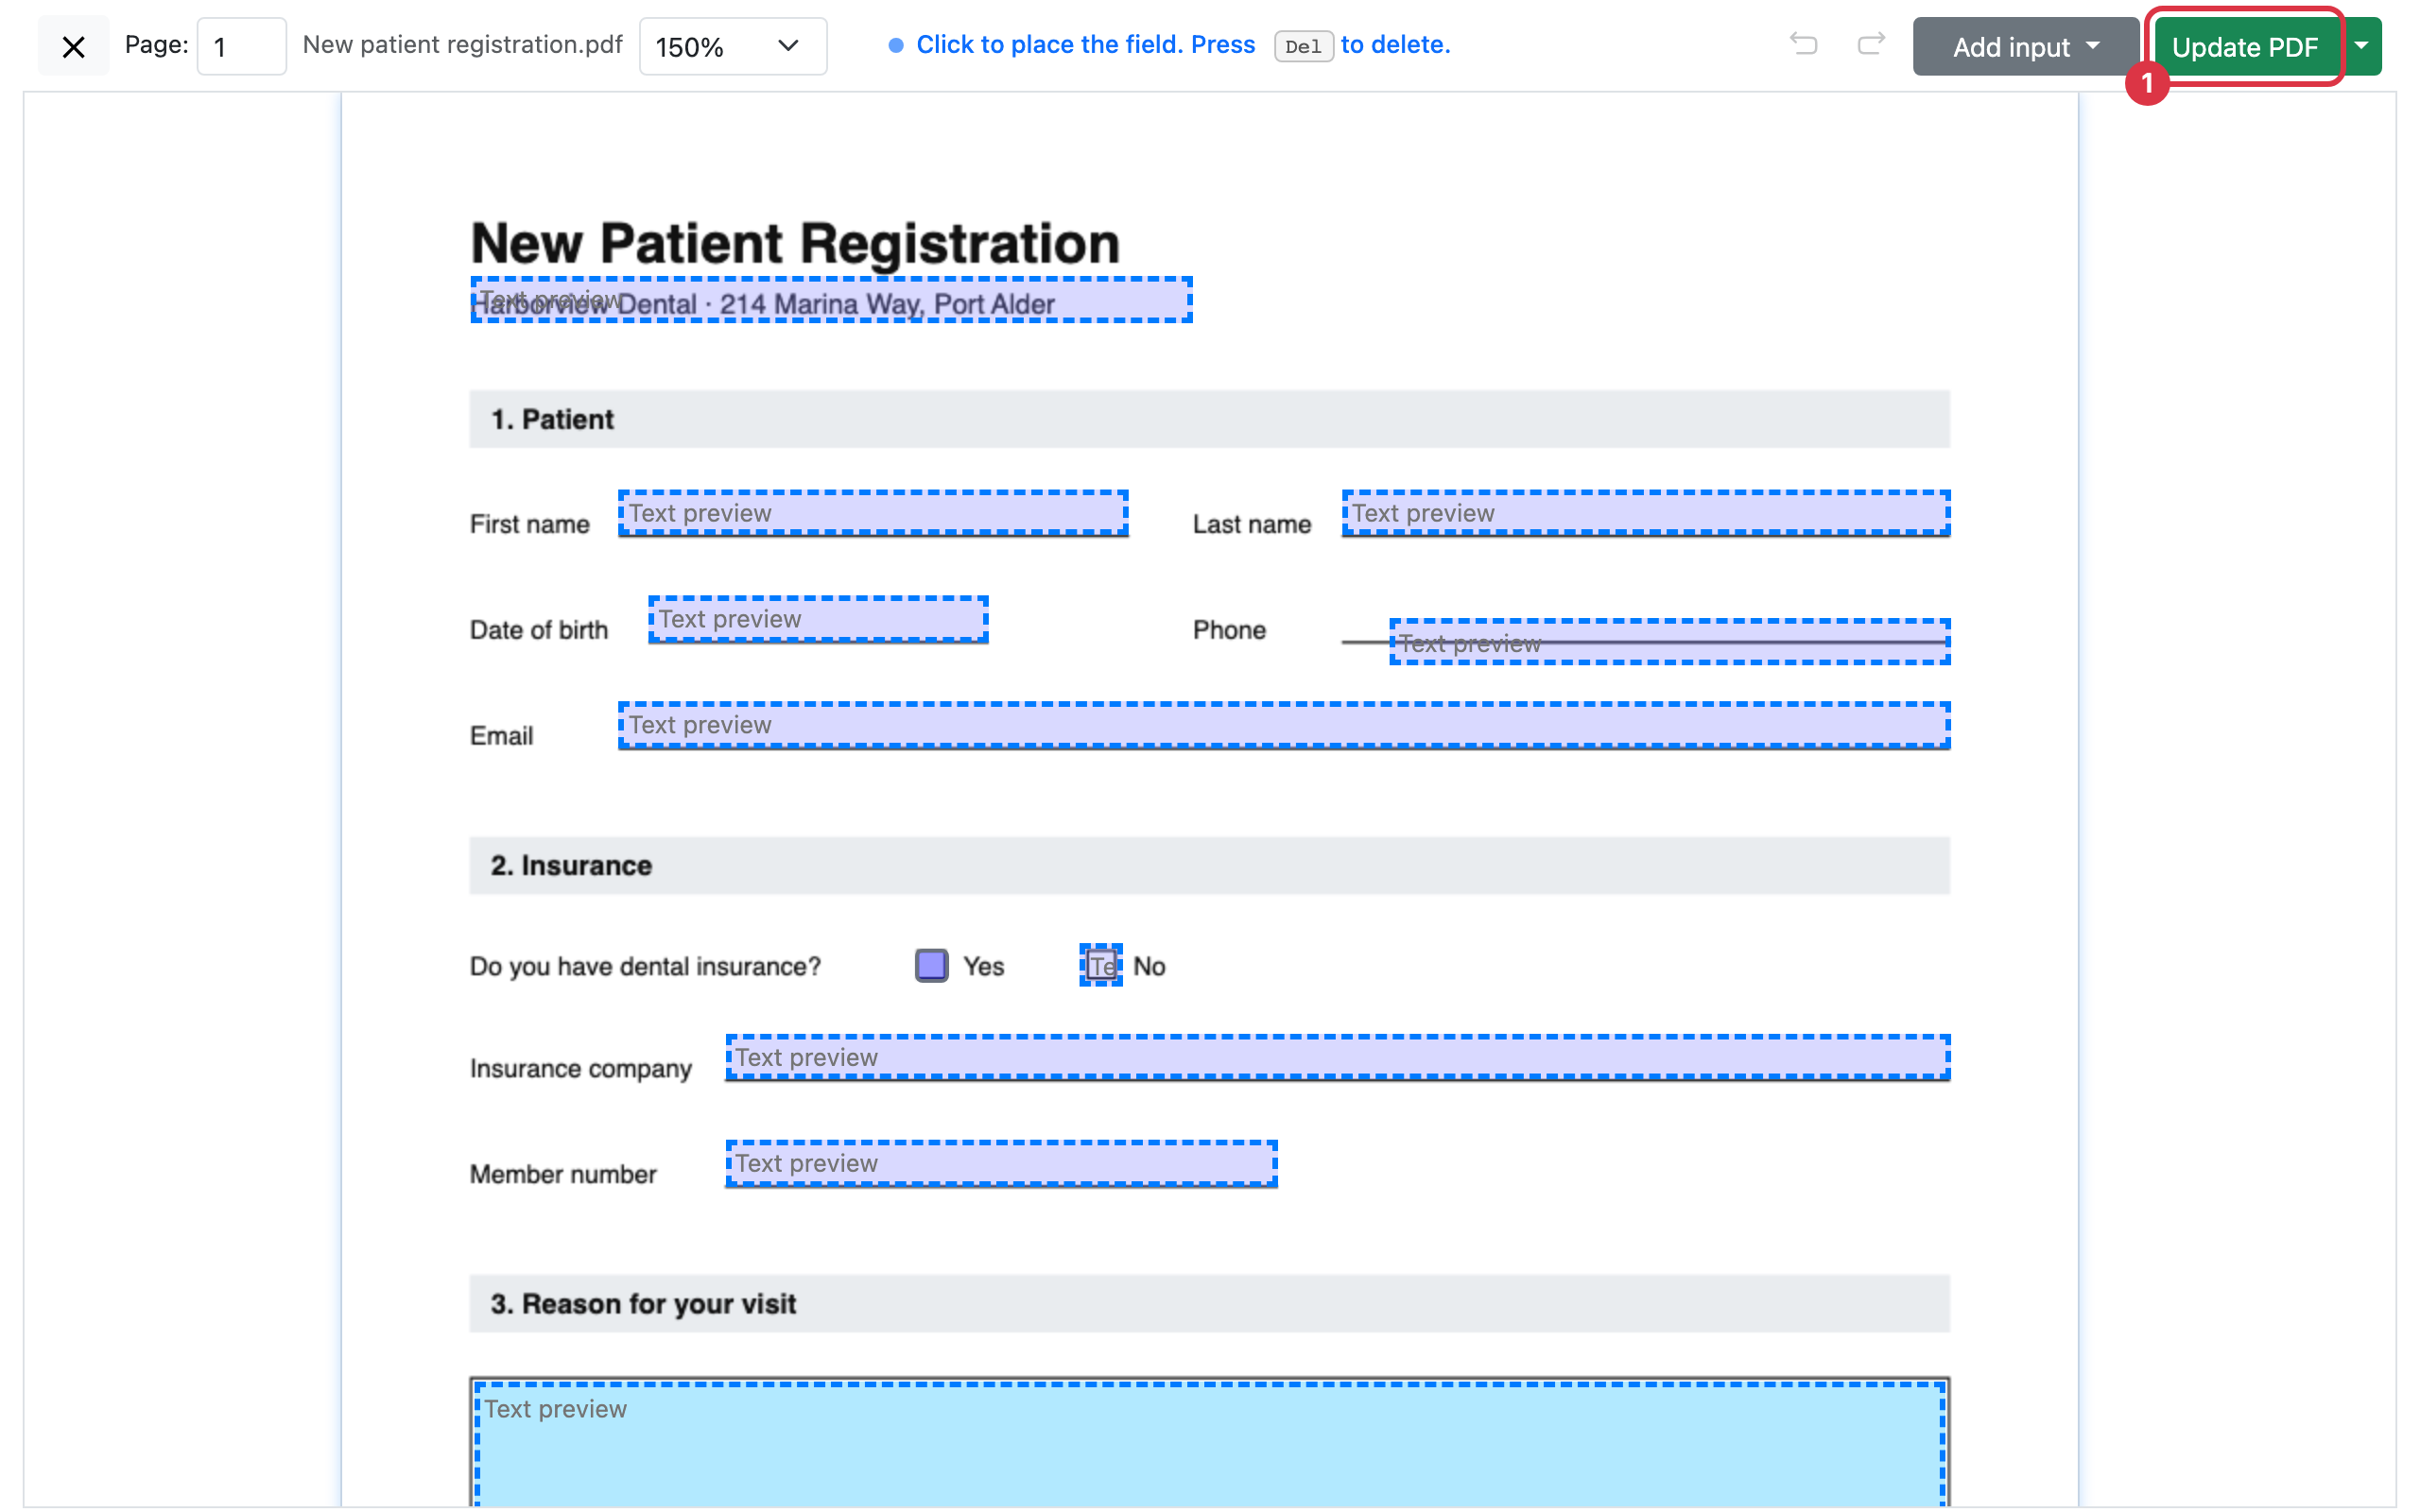
Press Update PDF at the right of the toolbar. It rebuilds the form with your changes, confirms with a message, and reloads the editor.
The arrow beside the button offers Download PDF, which gives you the fillable form as a file.
Work faster with the keyboard
| Key | What it does |
|---|---|
| Del, Backspace or D | Deletes the selected field. |
| Arrow keys | Nudge the selected field. |
| A | Adds a text field. |
| B | Adds a checkbox. |
| Ctrl+C | Adds another field the size of the selected one. |
| Ctrl+Z and Ctrl+Y | Undo and redo. |
| Esc | Stops adding fields. |