How to invite a new member into their own workspace and assign their signature
This guide takes an Owner or an Admin through adding one new person to the organization. You create a workspace for them, invite them as a User who opens only that workspace, and, once they have accepted, give them the signature block their letters are signed with.
What you need before you start
| You need | What that means |
|---|---|
| The Owner or Admin role | Only these two roles create workspaces and invite members. They maintain every signature block. A User maintains only their own. |
| The new member's email address | The invitation goes to this address, and only this address can accept it. |
| Their sign-off block details | The name they sign as. Their occupation and license number, if the letters should show them. |
| A picture of their signature | An image file, or a signature drawn on the screen. A signature block can also be added without one, and be given its picture later. |
| A paid plan | Creating a workspace needs one. |
1. Create a workspace for the new member
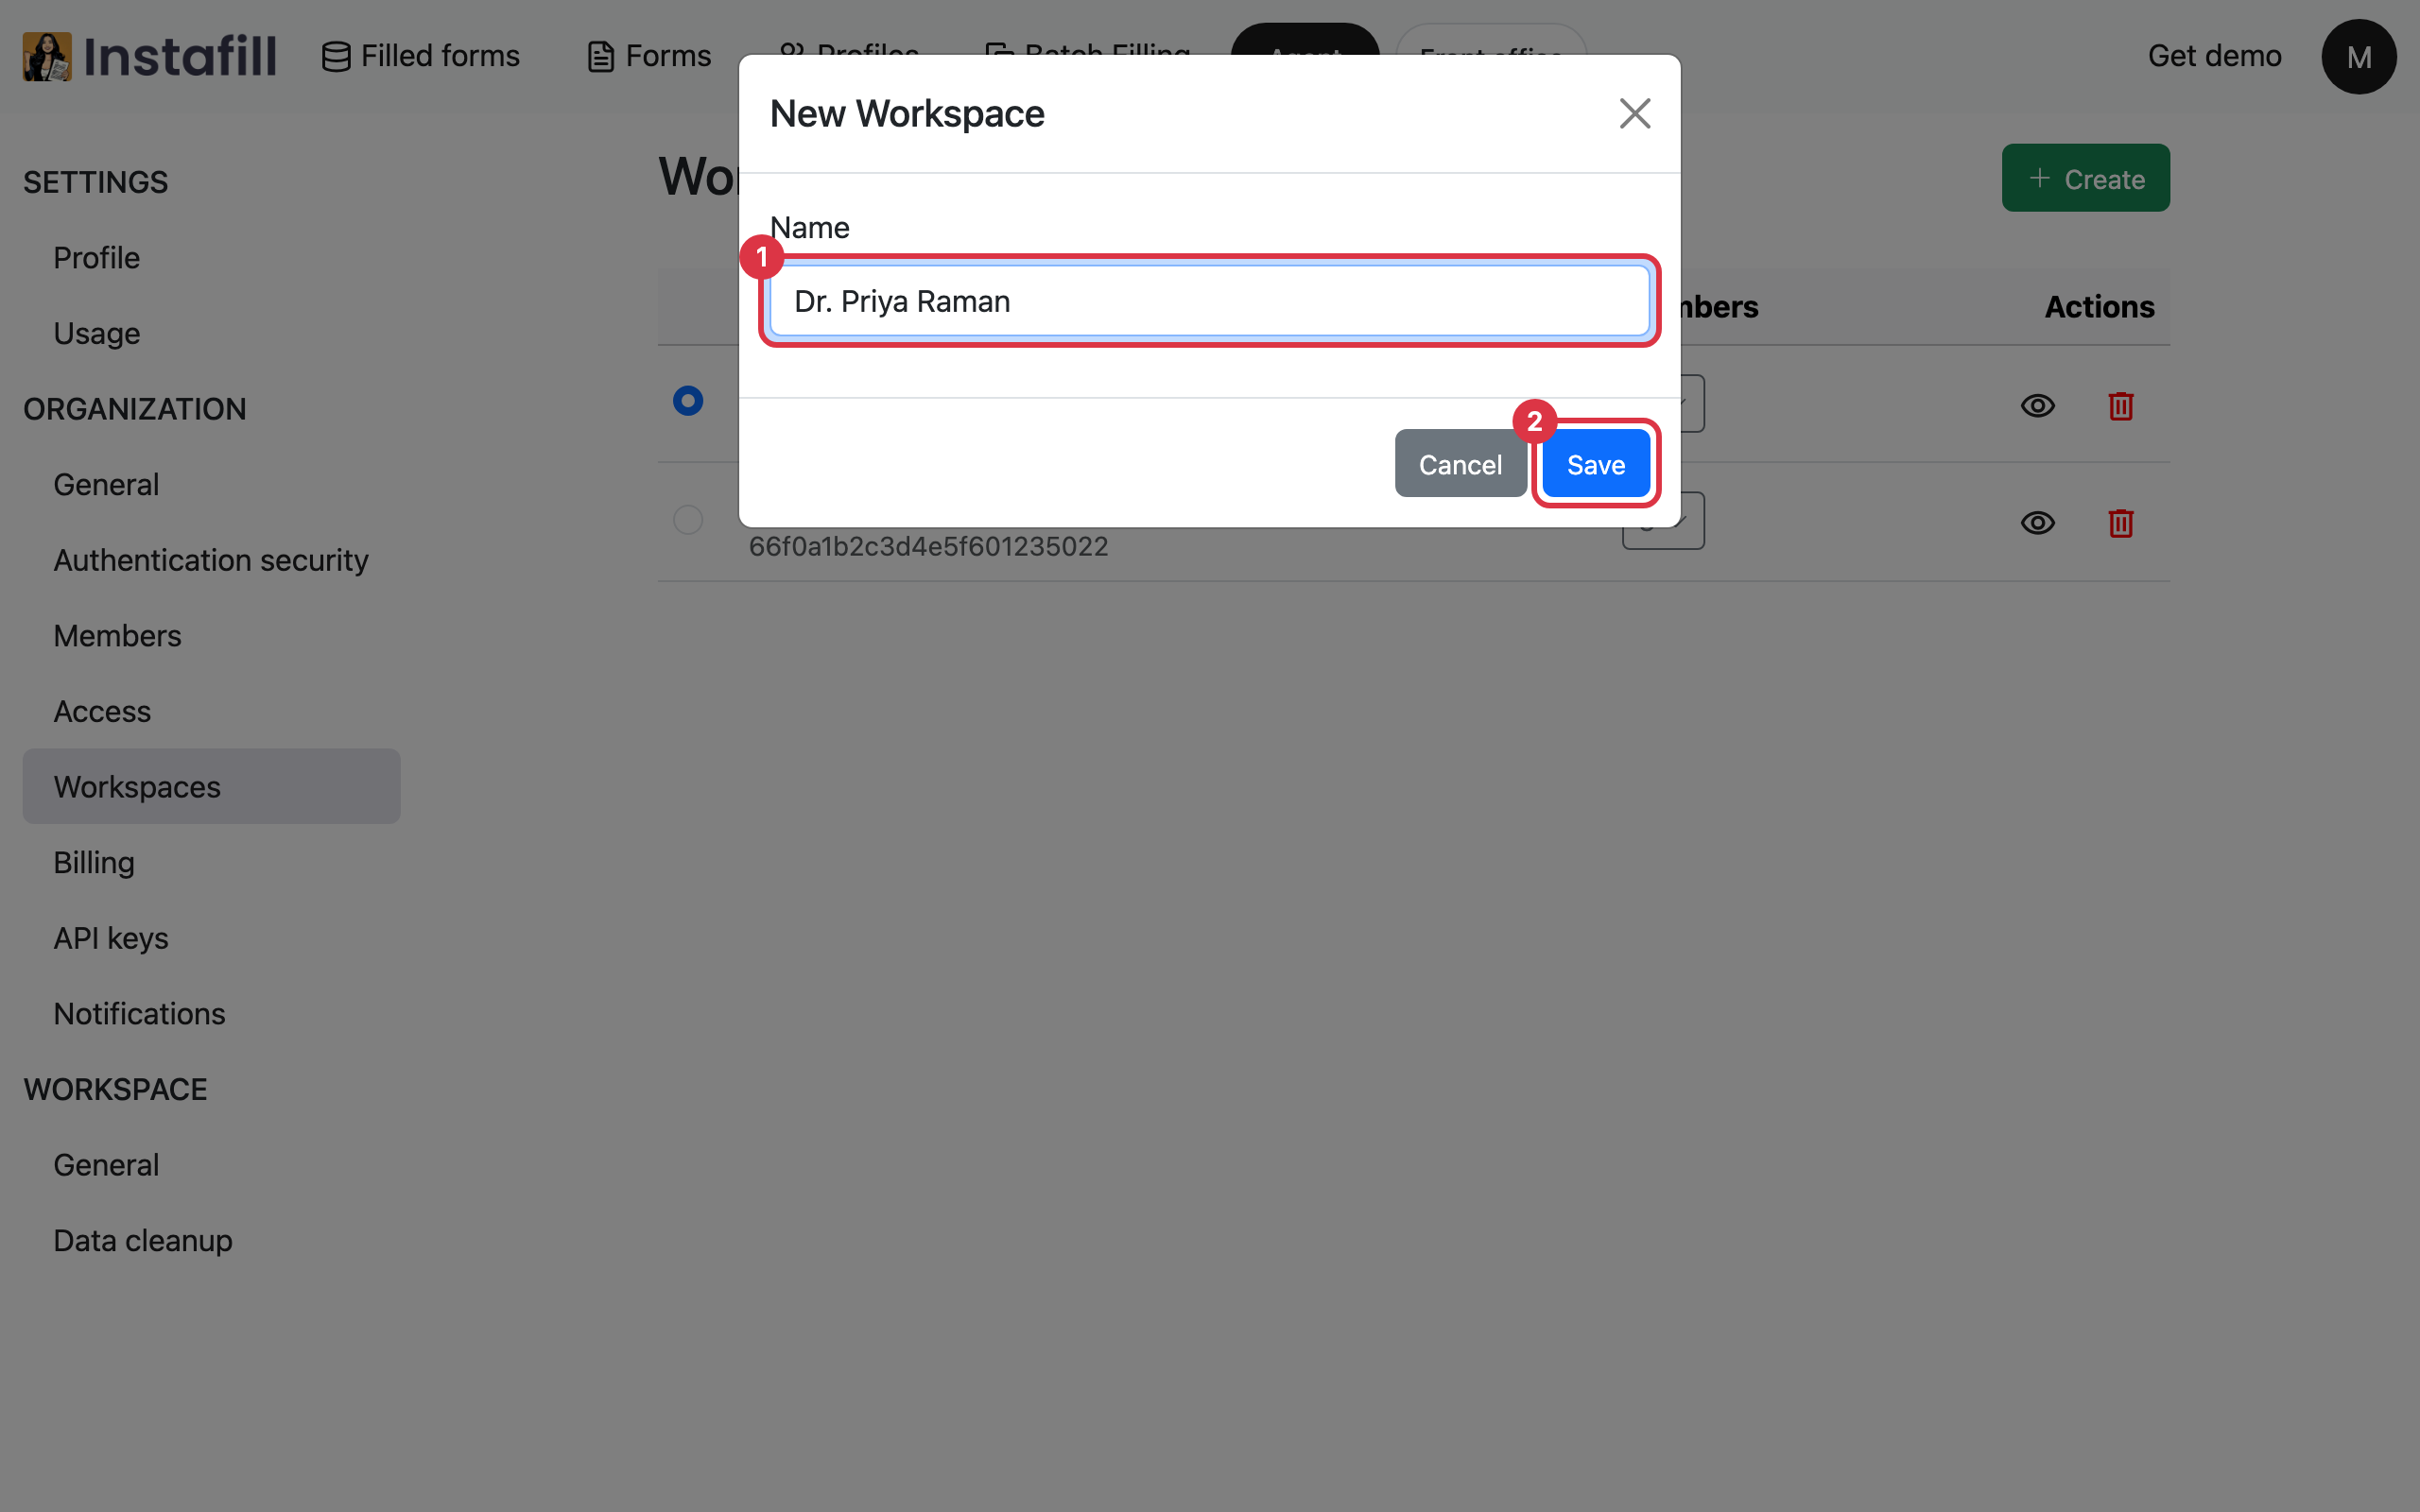
Open the account settings. Choose Workspaces. Select Create > type a name for the workspace, such as the member's name, and select Save.
The new workspace appears in the list and becomes the Active one.
2. Invite the member as a User
Open Members. Click the +Invite button. Fill in the three parts of the invitation:
- Email: The address of the new member.
- Role: Leave it on User. A User works in the workspaces you choose and manages nothing about the organization.
- Workspaces: The workspace you just created is already checked, because it is the active one. Leave every other workspace unchecked. The member will open only the workspaces you check.
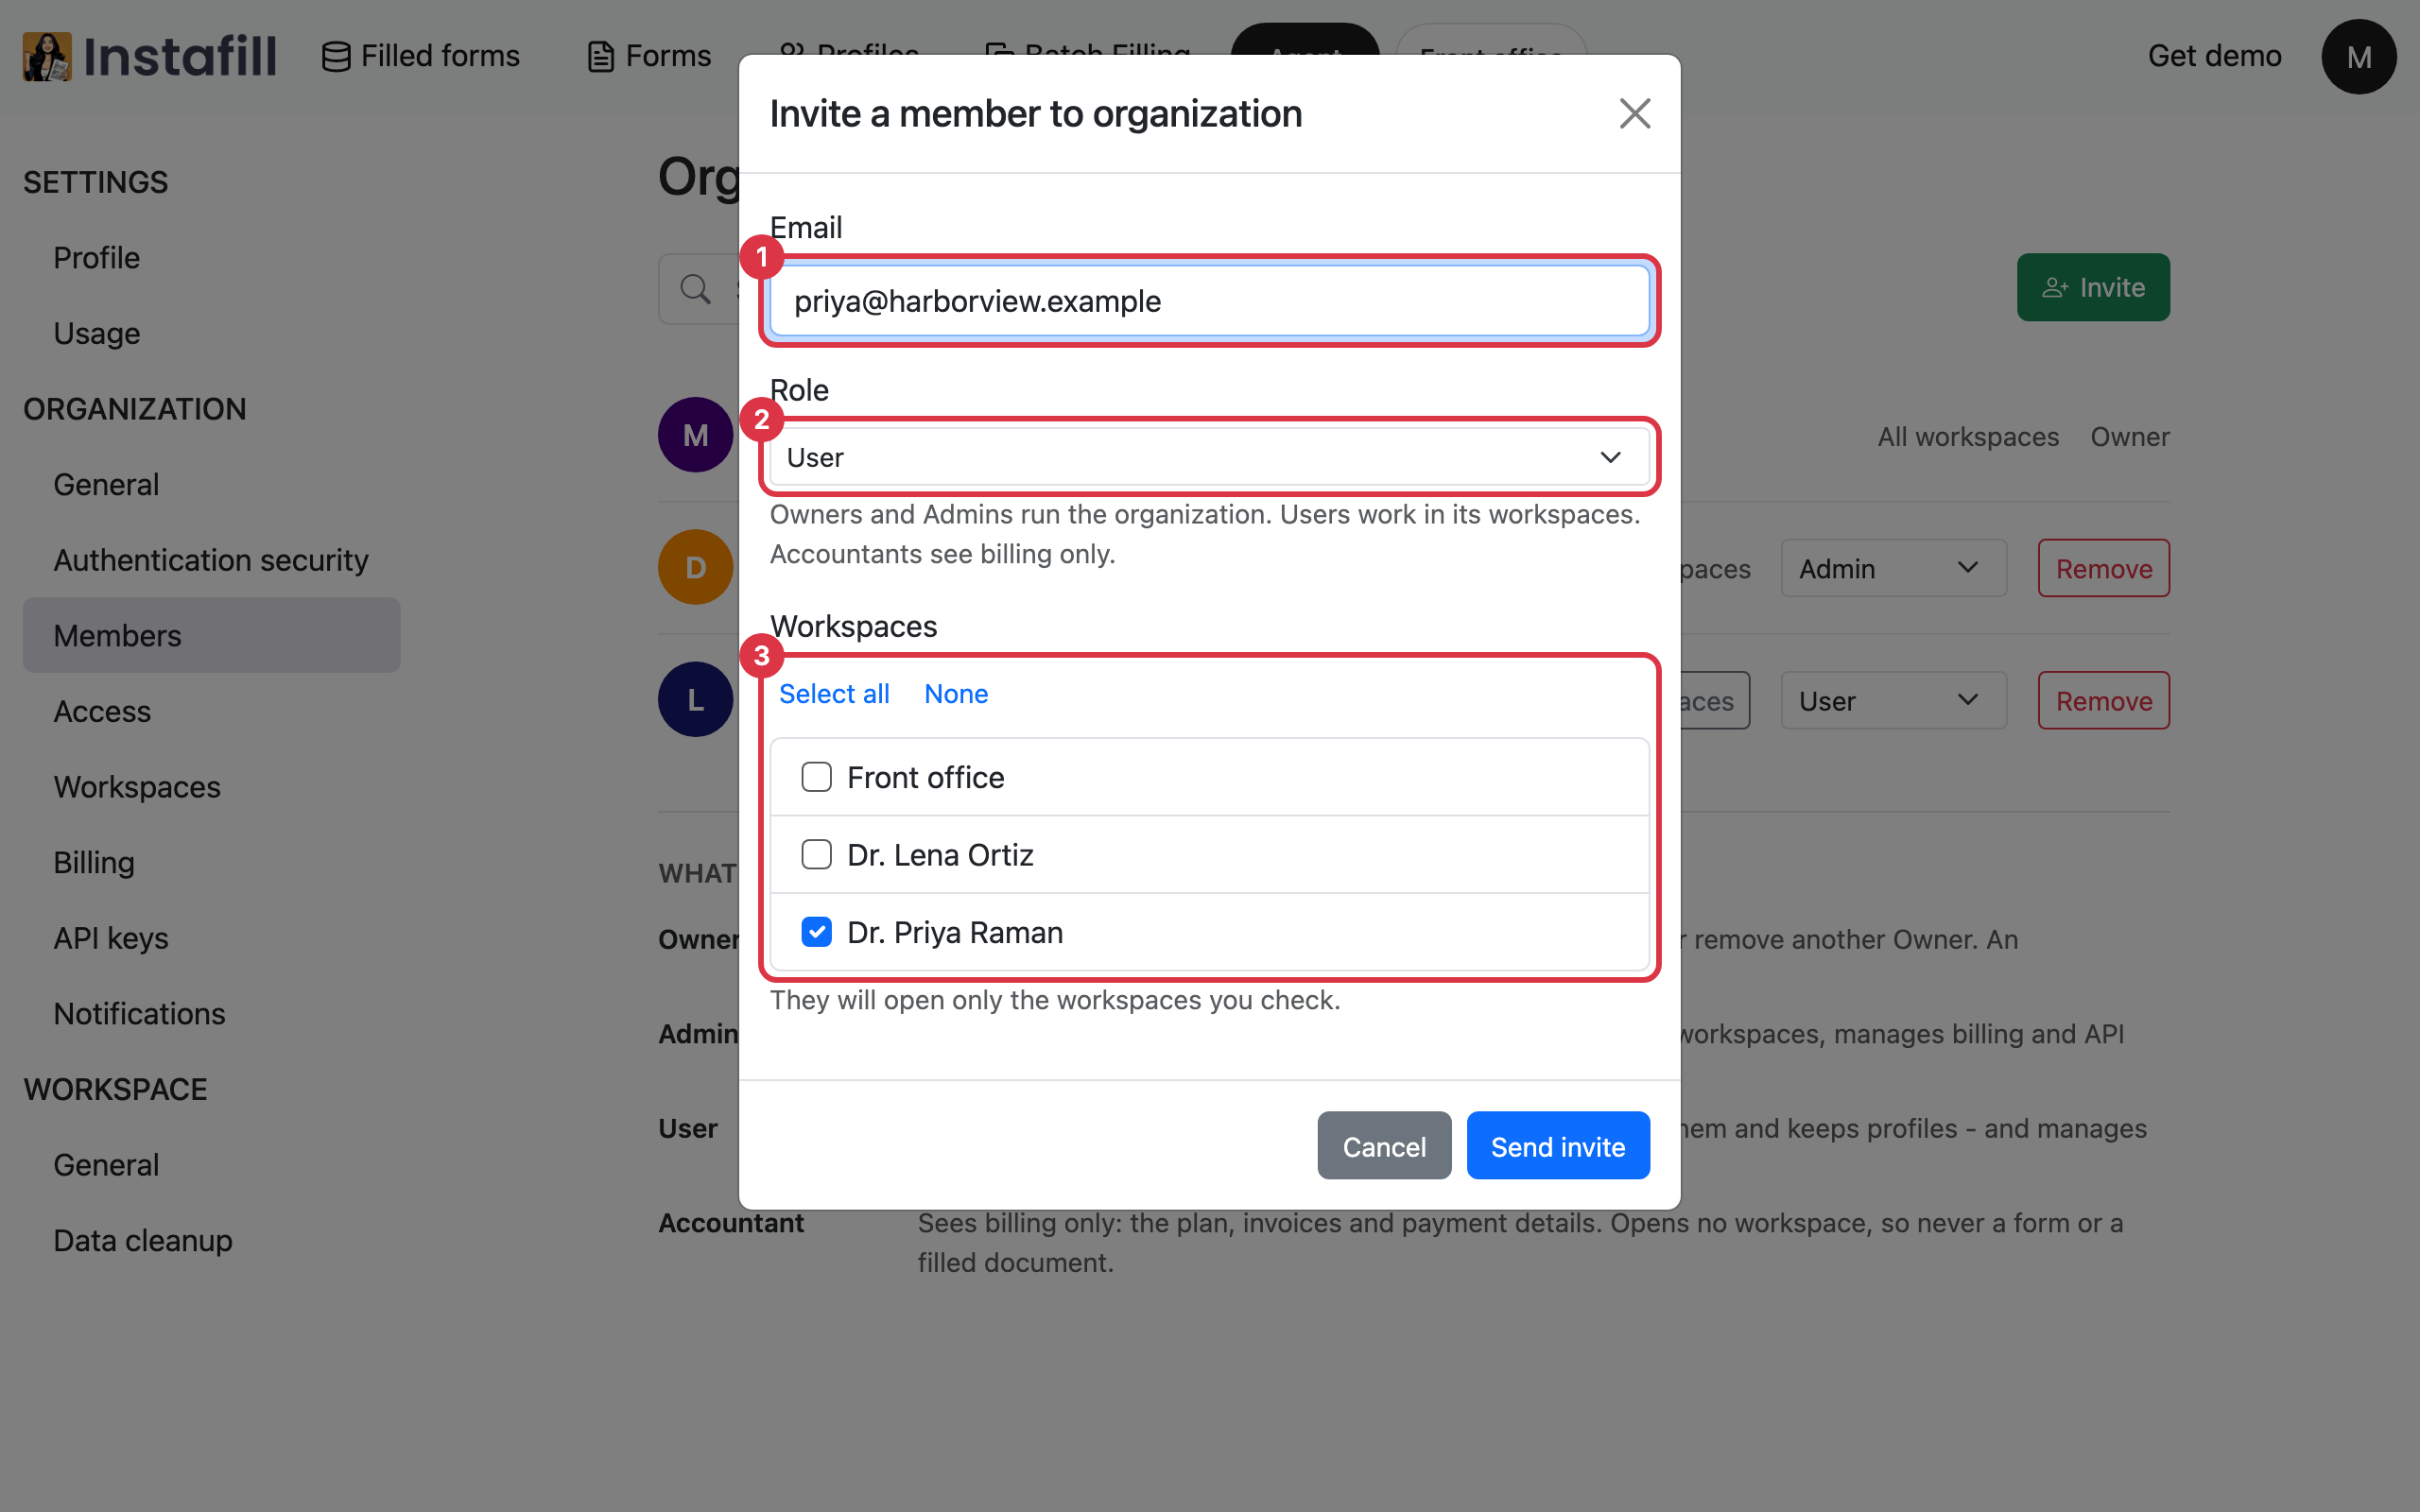
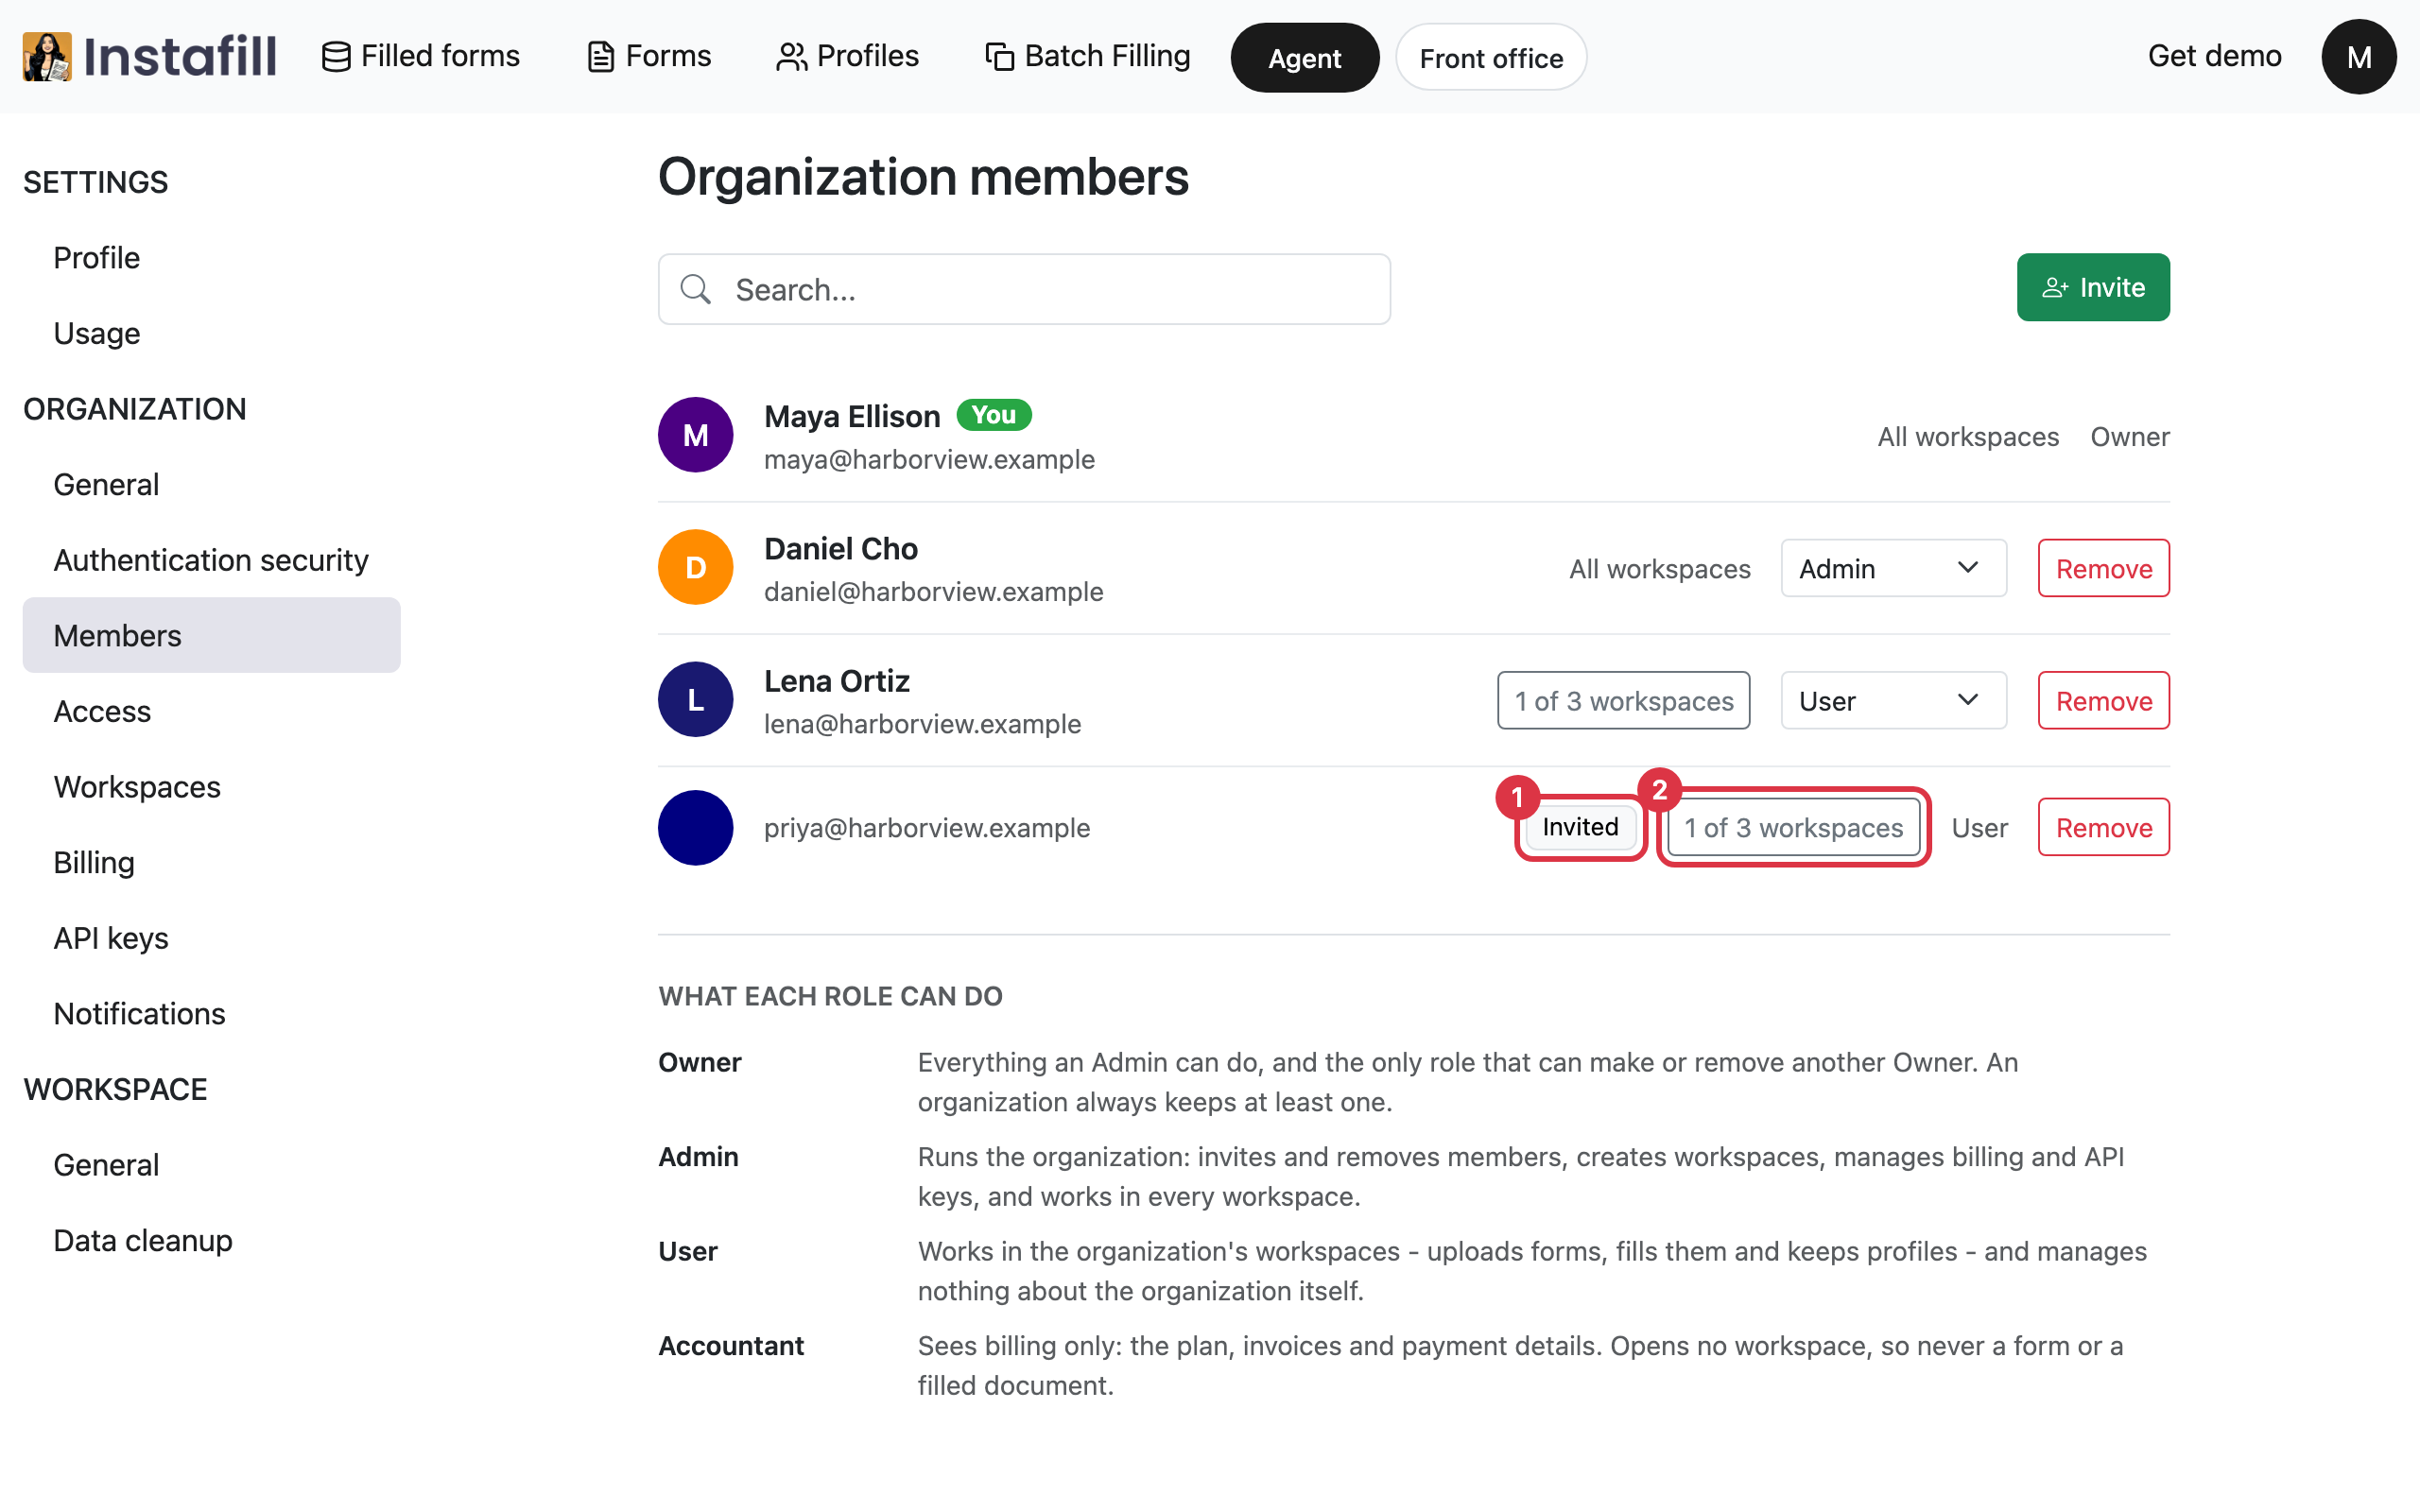
Select Send invite. The new User member now appears in the list with the label Invited. Check the number of workspaces they have access to - Admin and Owner can always update this.
3. Wait for the member to accept
The member receives an email with an Accept Invite button. They accept > Sign up to Instafill.ai > Have access to the workspace you have assigned to them.
In Members, the label Invited is gone once they have accepted. A signature block can be given only to a member who has accepted, so do the next step after that.
4. Bind the signature block to the member by their email
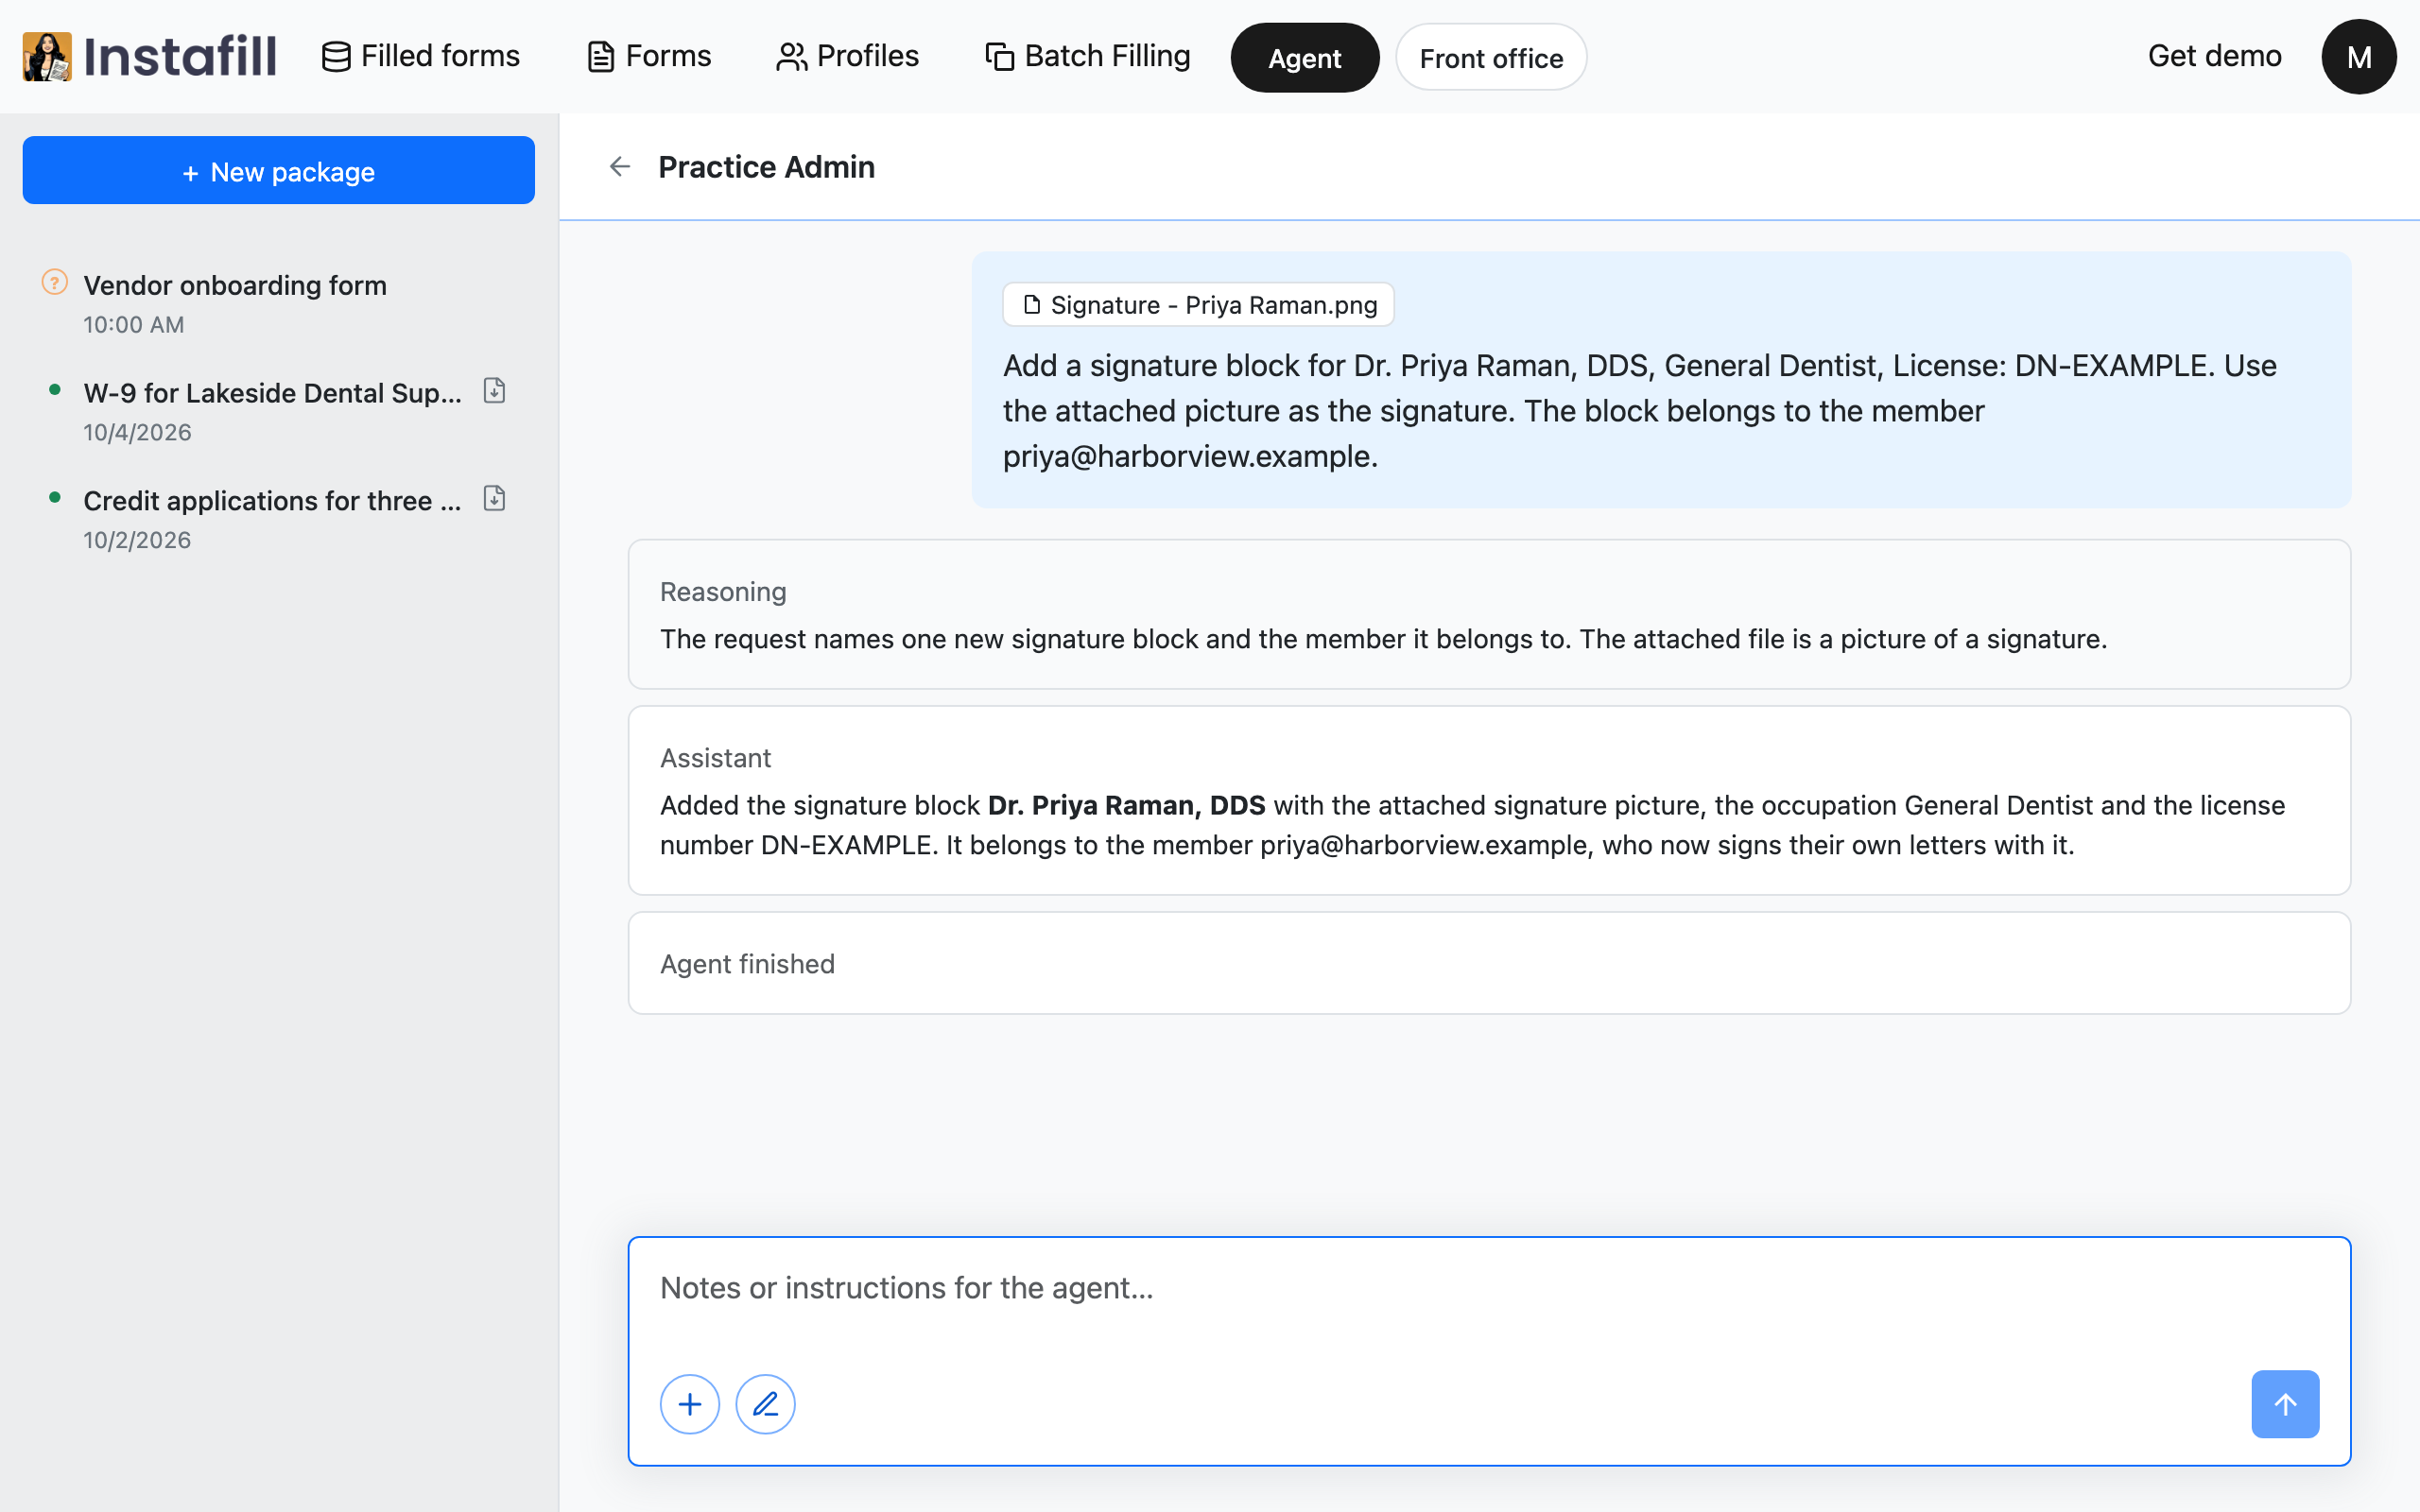
Open Agent in the top bar and choose the admin agent of your organization. Attach the picture of the signature, and write what the signature block says and who it belongs to. For example:
Add a signature block for Dr. Priya Raman, DDS, General Dentist, License: DN-EXAMPLE. Use the attached picture as the signature. The block belongs to the member [email protected].
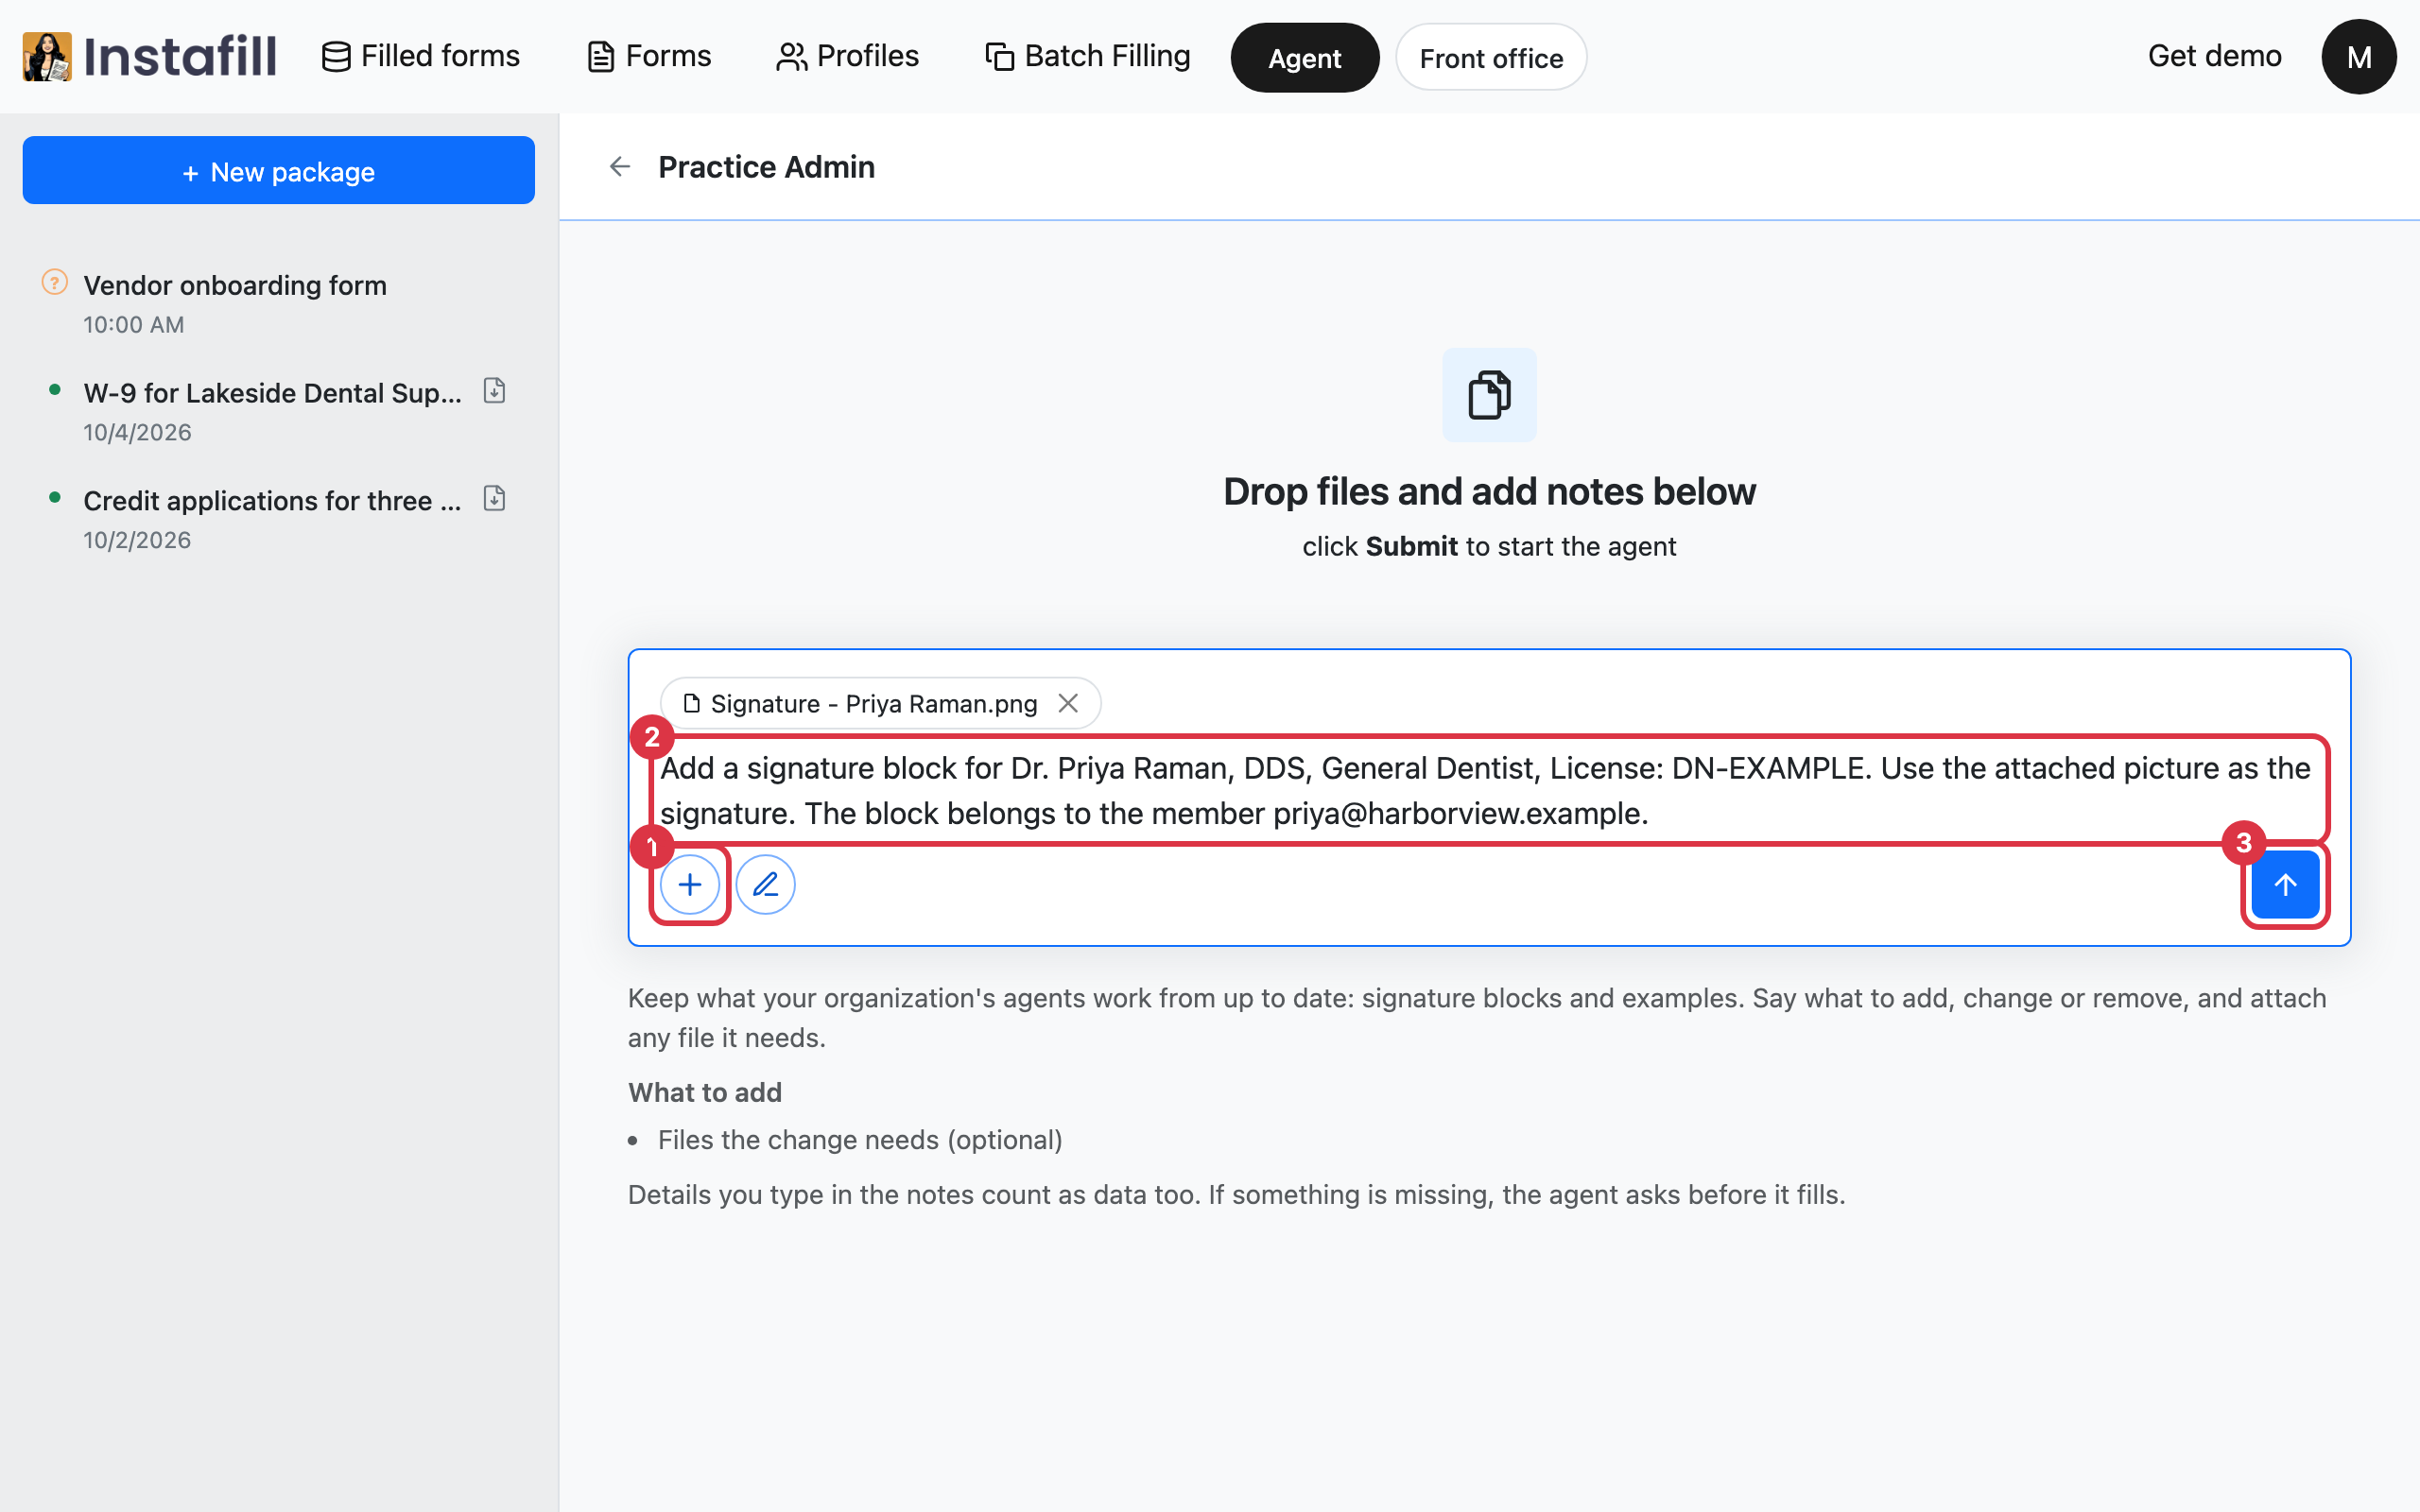
With no picture at hand, press the pen button beside the plus button and draw the signature on the screen. Press Add signature, and the drawing is attached as a picture.
The admin agent adds the signature block and answers with a short summary of what it did. These are the parts of a signature block:
| Part | What to write |
|---|---|
| Name | The name the member signs as. It is also how you refer to the block later. |
| Occupation | The line written under the name. You can leave it out. |
| License number | The line written under the occupation. You can leave it out. |
| Signature picture | The image you attached. Without one, the block is text only. |
| Member | The email address of the member the block belongs to. |
A member adds their own signature block
A User does not have to wait for an Owner or an Admin. They open Agent in the top bar, choose the admin agent of the organization, and ask for their own signature block. For example:
Add my signature block: Dr. Priya Raman, DDS, General Dentist, License: DN-EXAMPLE. Use the attached picture as the signature.
- The signature: Attach a picture, or press the pen button beside the plus button and draw it on the screen.
- No email needed: A signature block a User adds belongs to that User.
- Only their own: A User sees, updates and removes the signature blocks that belong to them, and no other member's.
- Their own conversations: In the admin agent, a User sees only the conversations they started.
Who signs with which signature block
- A User: Signs only with the signature block that belongs to them. Until a signature block is bound, a User's letter goes out with no signature.
- An Owner or an Admin: Signs with any signature block. Make a note at the agent run.
Update a sign-off block when something changes for a member
An Owner or an Admin can update the signature picture, or any other part of a sign-off block, at any time. A User can do the same for a sign-off block that belongs to them. Ask the admin agent, name the block, and say what changes. To replace the signature, attach the new picture. For example:
Update the signature block Dr. Priya Raman, DDS. Use the attached picture as the new signature, and change the occupation to Lead Dentist.
Update which workspaces a member has access to
In Account settings > Members, select the button that shows how many workspaces the member has access to. Select more workspaces if needed, and save.