How to send a form to someone else to fill
This guide shows how to send a form to a client or a colleague who is not in your workspace. They get an email with a secure link, fill the form with AI from the files that hold their data, and send it back. You get an email when they are done, with a link to the filled form.
What you need before you start
| You need | What that means |
|---|---|
| A form in your forms library | The form you want filled. |
| A paid plan | Sending a request needs one. |
| The recipient's email address | Someone who cannot already open your workspace. A member of the workspace fills the form themselves, so no request is needed. |
| Credits left | The recipient can start filling only while your organization has credits. |
1. Open Request to fill
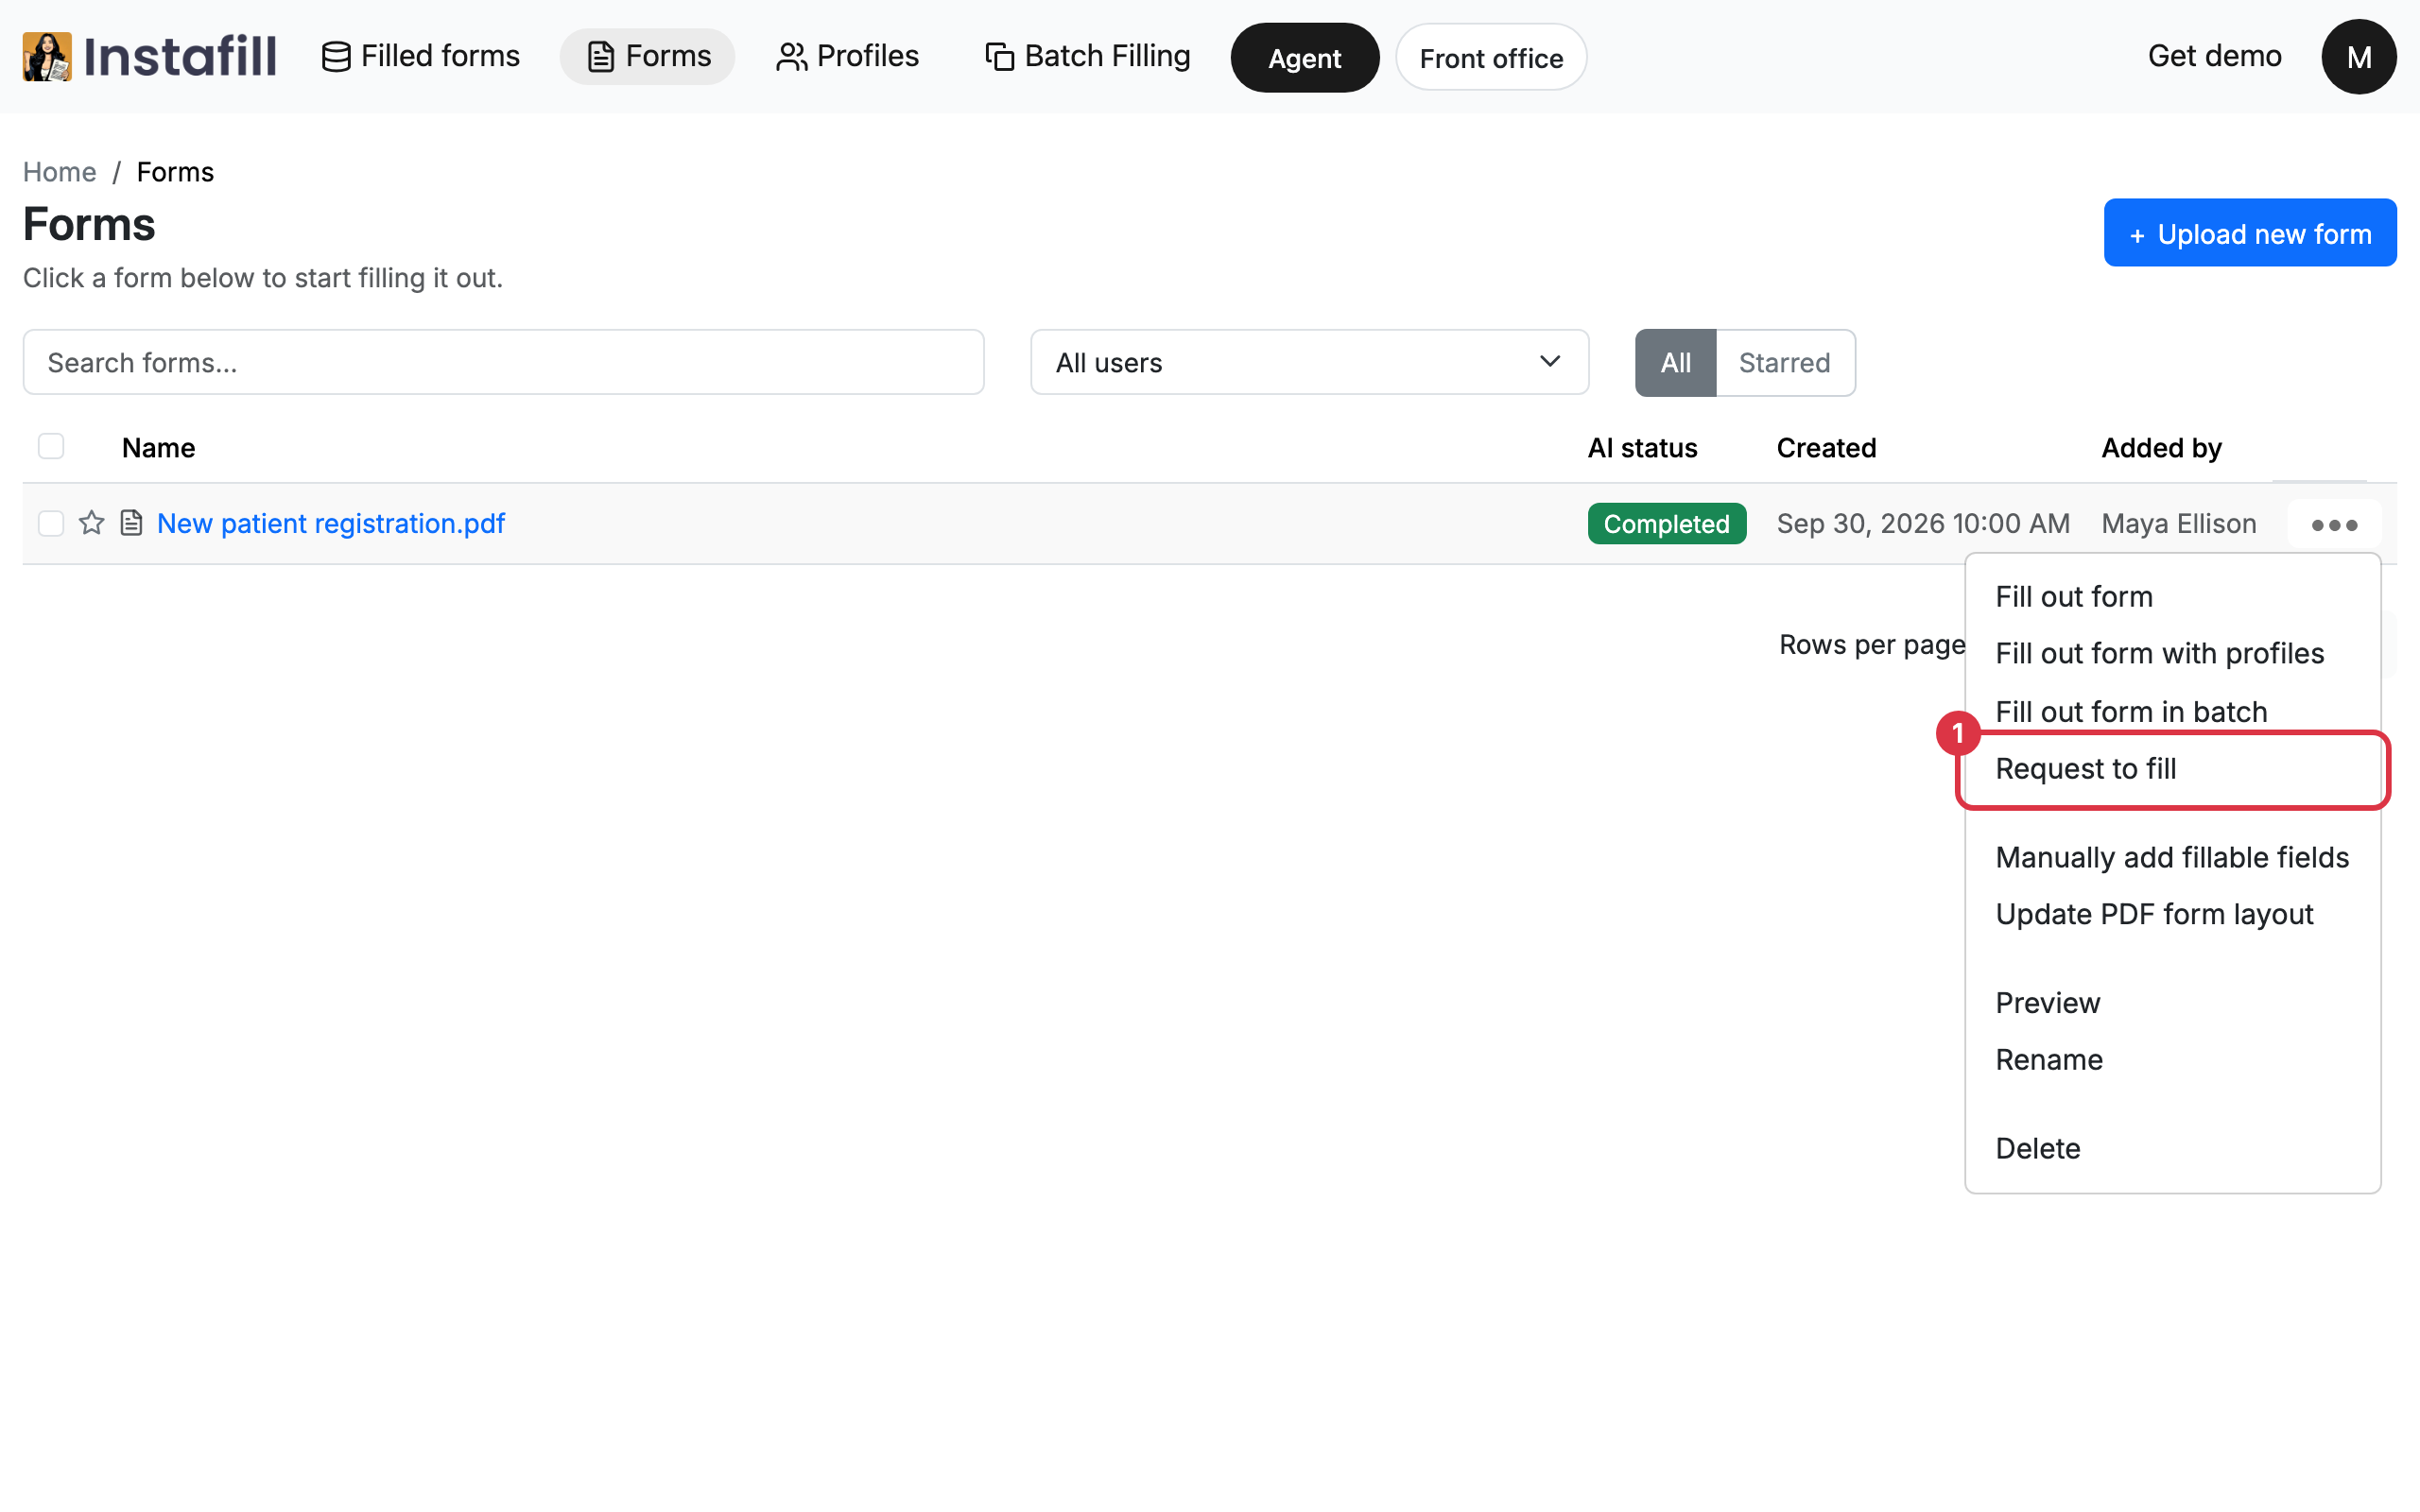
Open Forms in the top bar and find the form. Open the menu at the end of its row and choose Request to fill.
2. Say who fills it and which pages
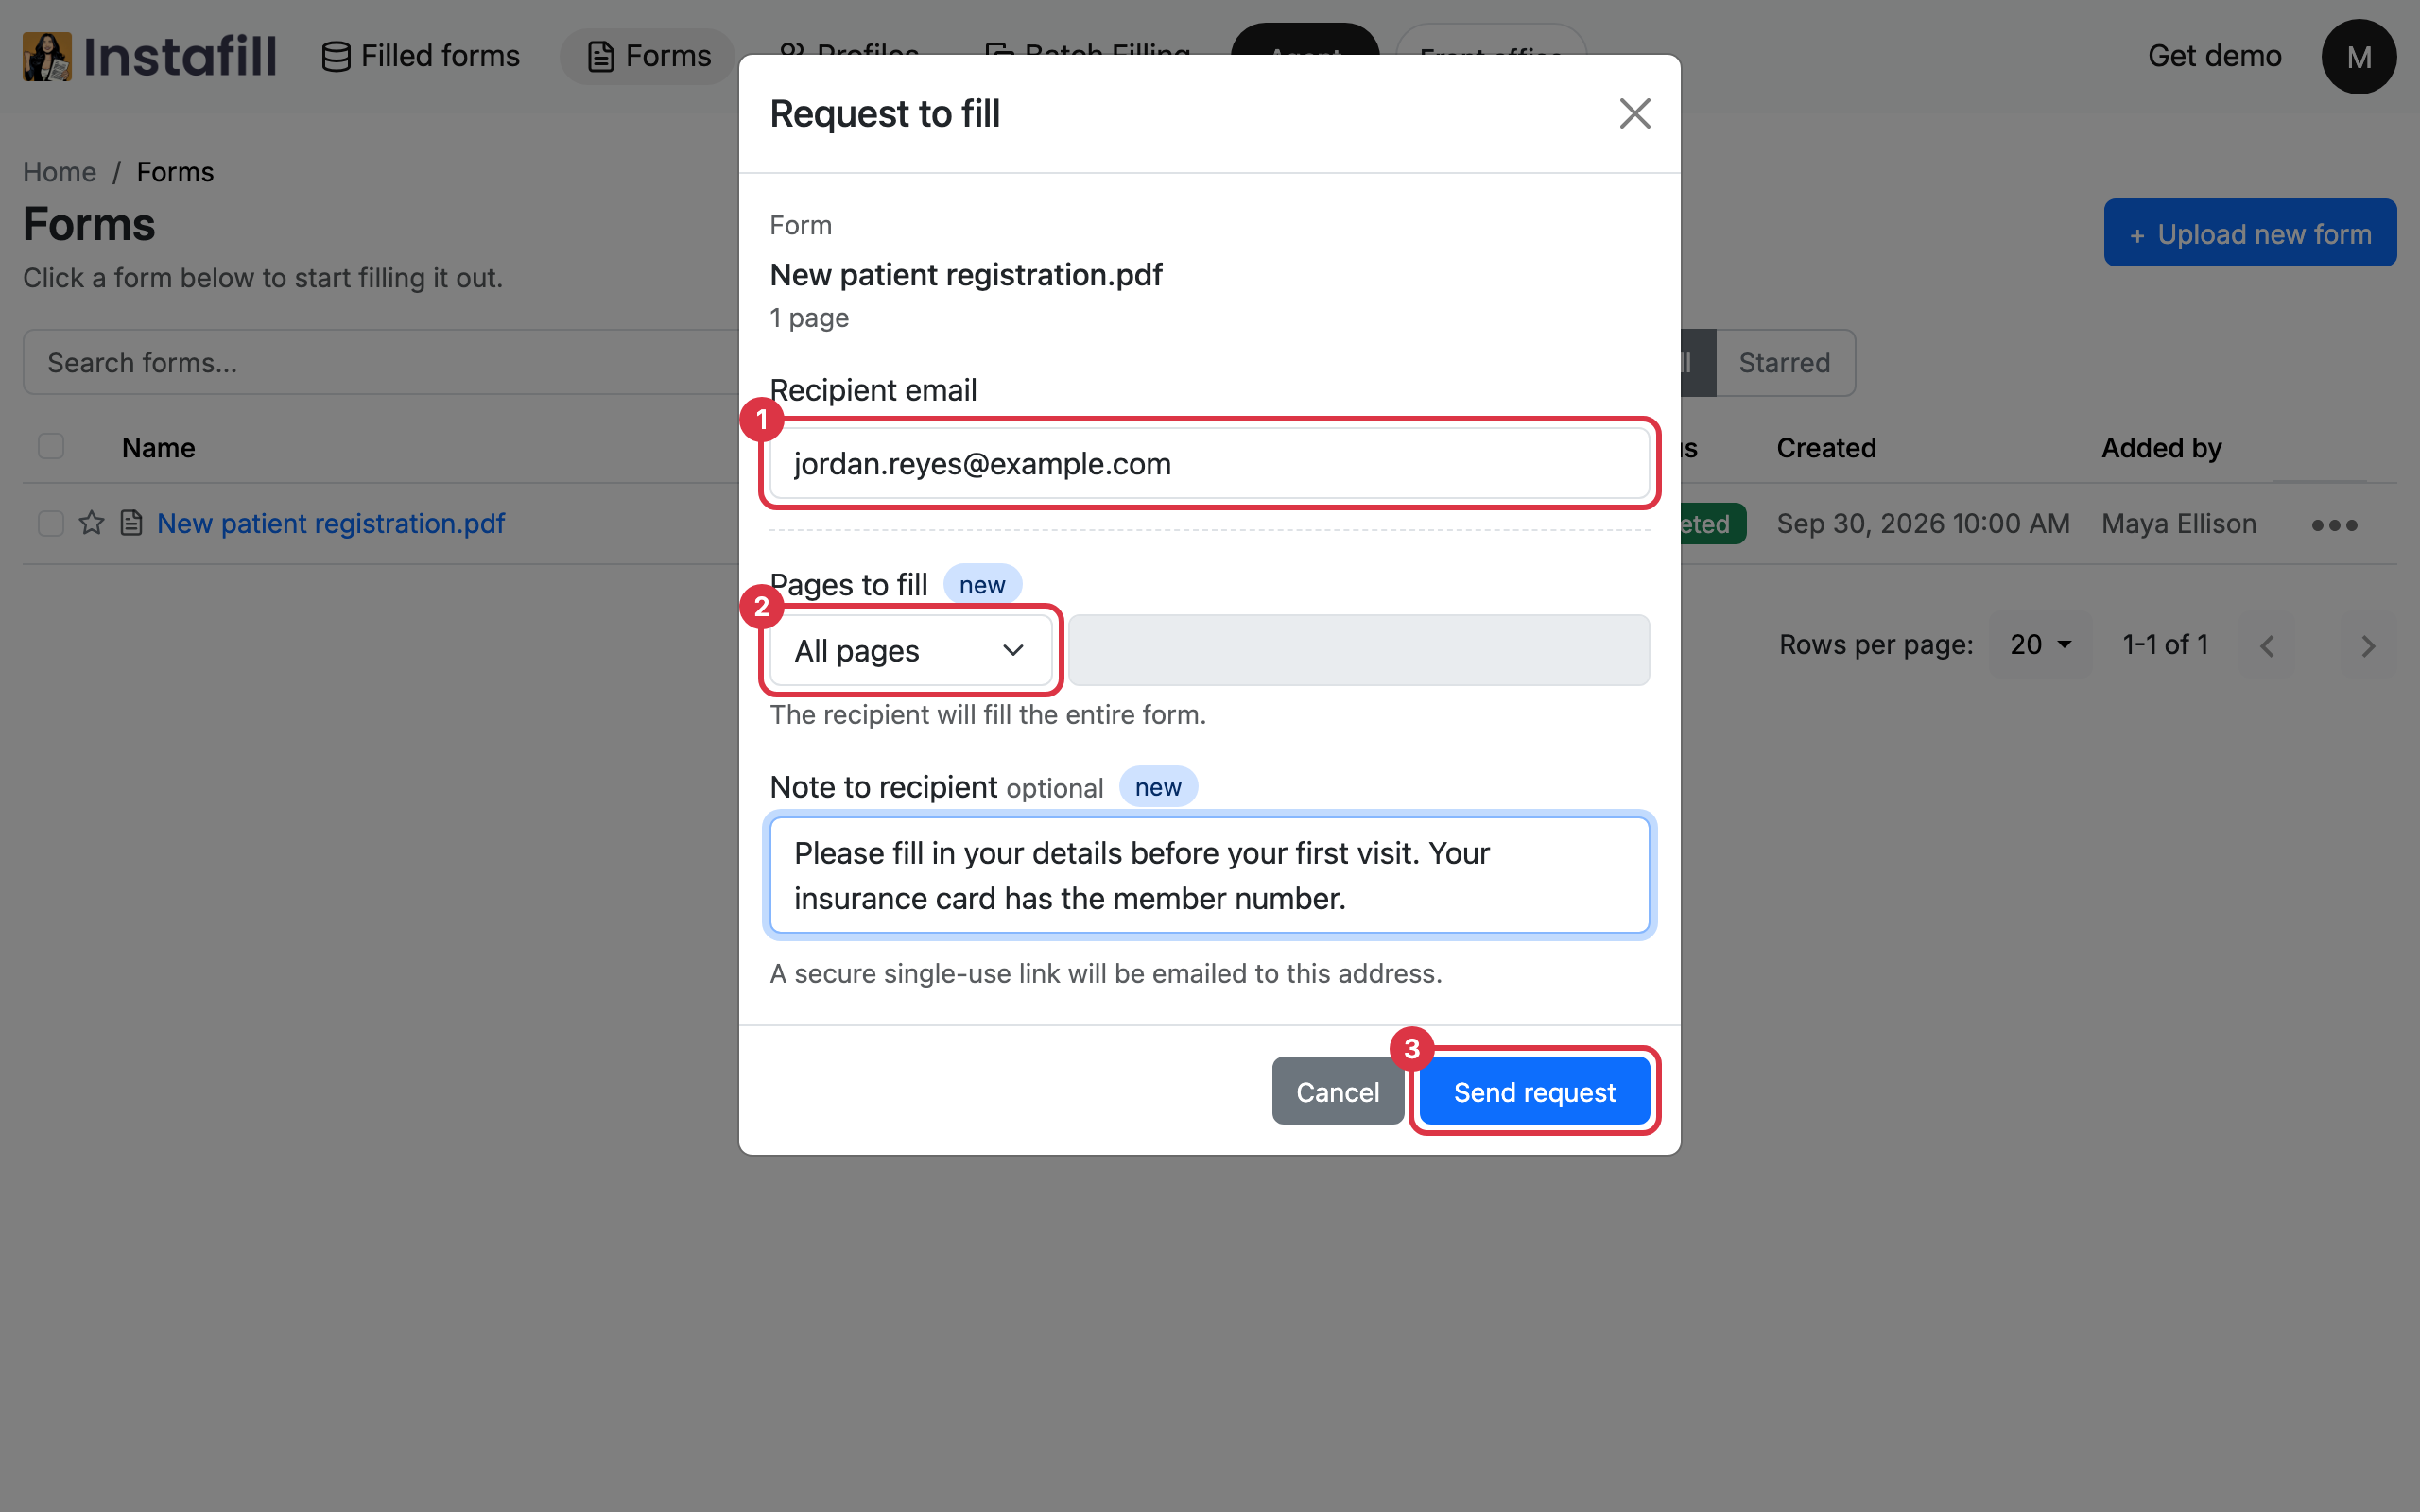
The Request to fill dialog shows the form's name and how many pages it has.
- Recipient email: Type the address the request goes to.
- Pages to fill: Leave it on All pages, or pick Custom and type the page numbers and ranges the recipient fills.
- Note to recipient: Add a few words if they help, such as which details you need. It is optional.
| Pages to fill | What the recipient fills |
|---|---|
| All pages | The entire form. |
| Custom | Only the pages you list. All other pages stay locked. |
3. Send the request
Press Send request. A message confirms that the request was sent to that address.
- The link: The email carries a single-use link, tied to that email address. It stays open for 7 days.
- Your note and pages: Both are in the email, and again on the recipient's screen.
4. What the recipient does
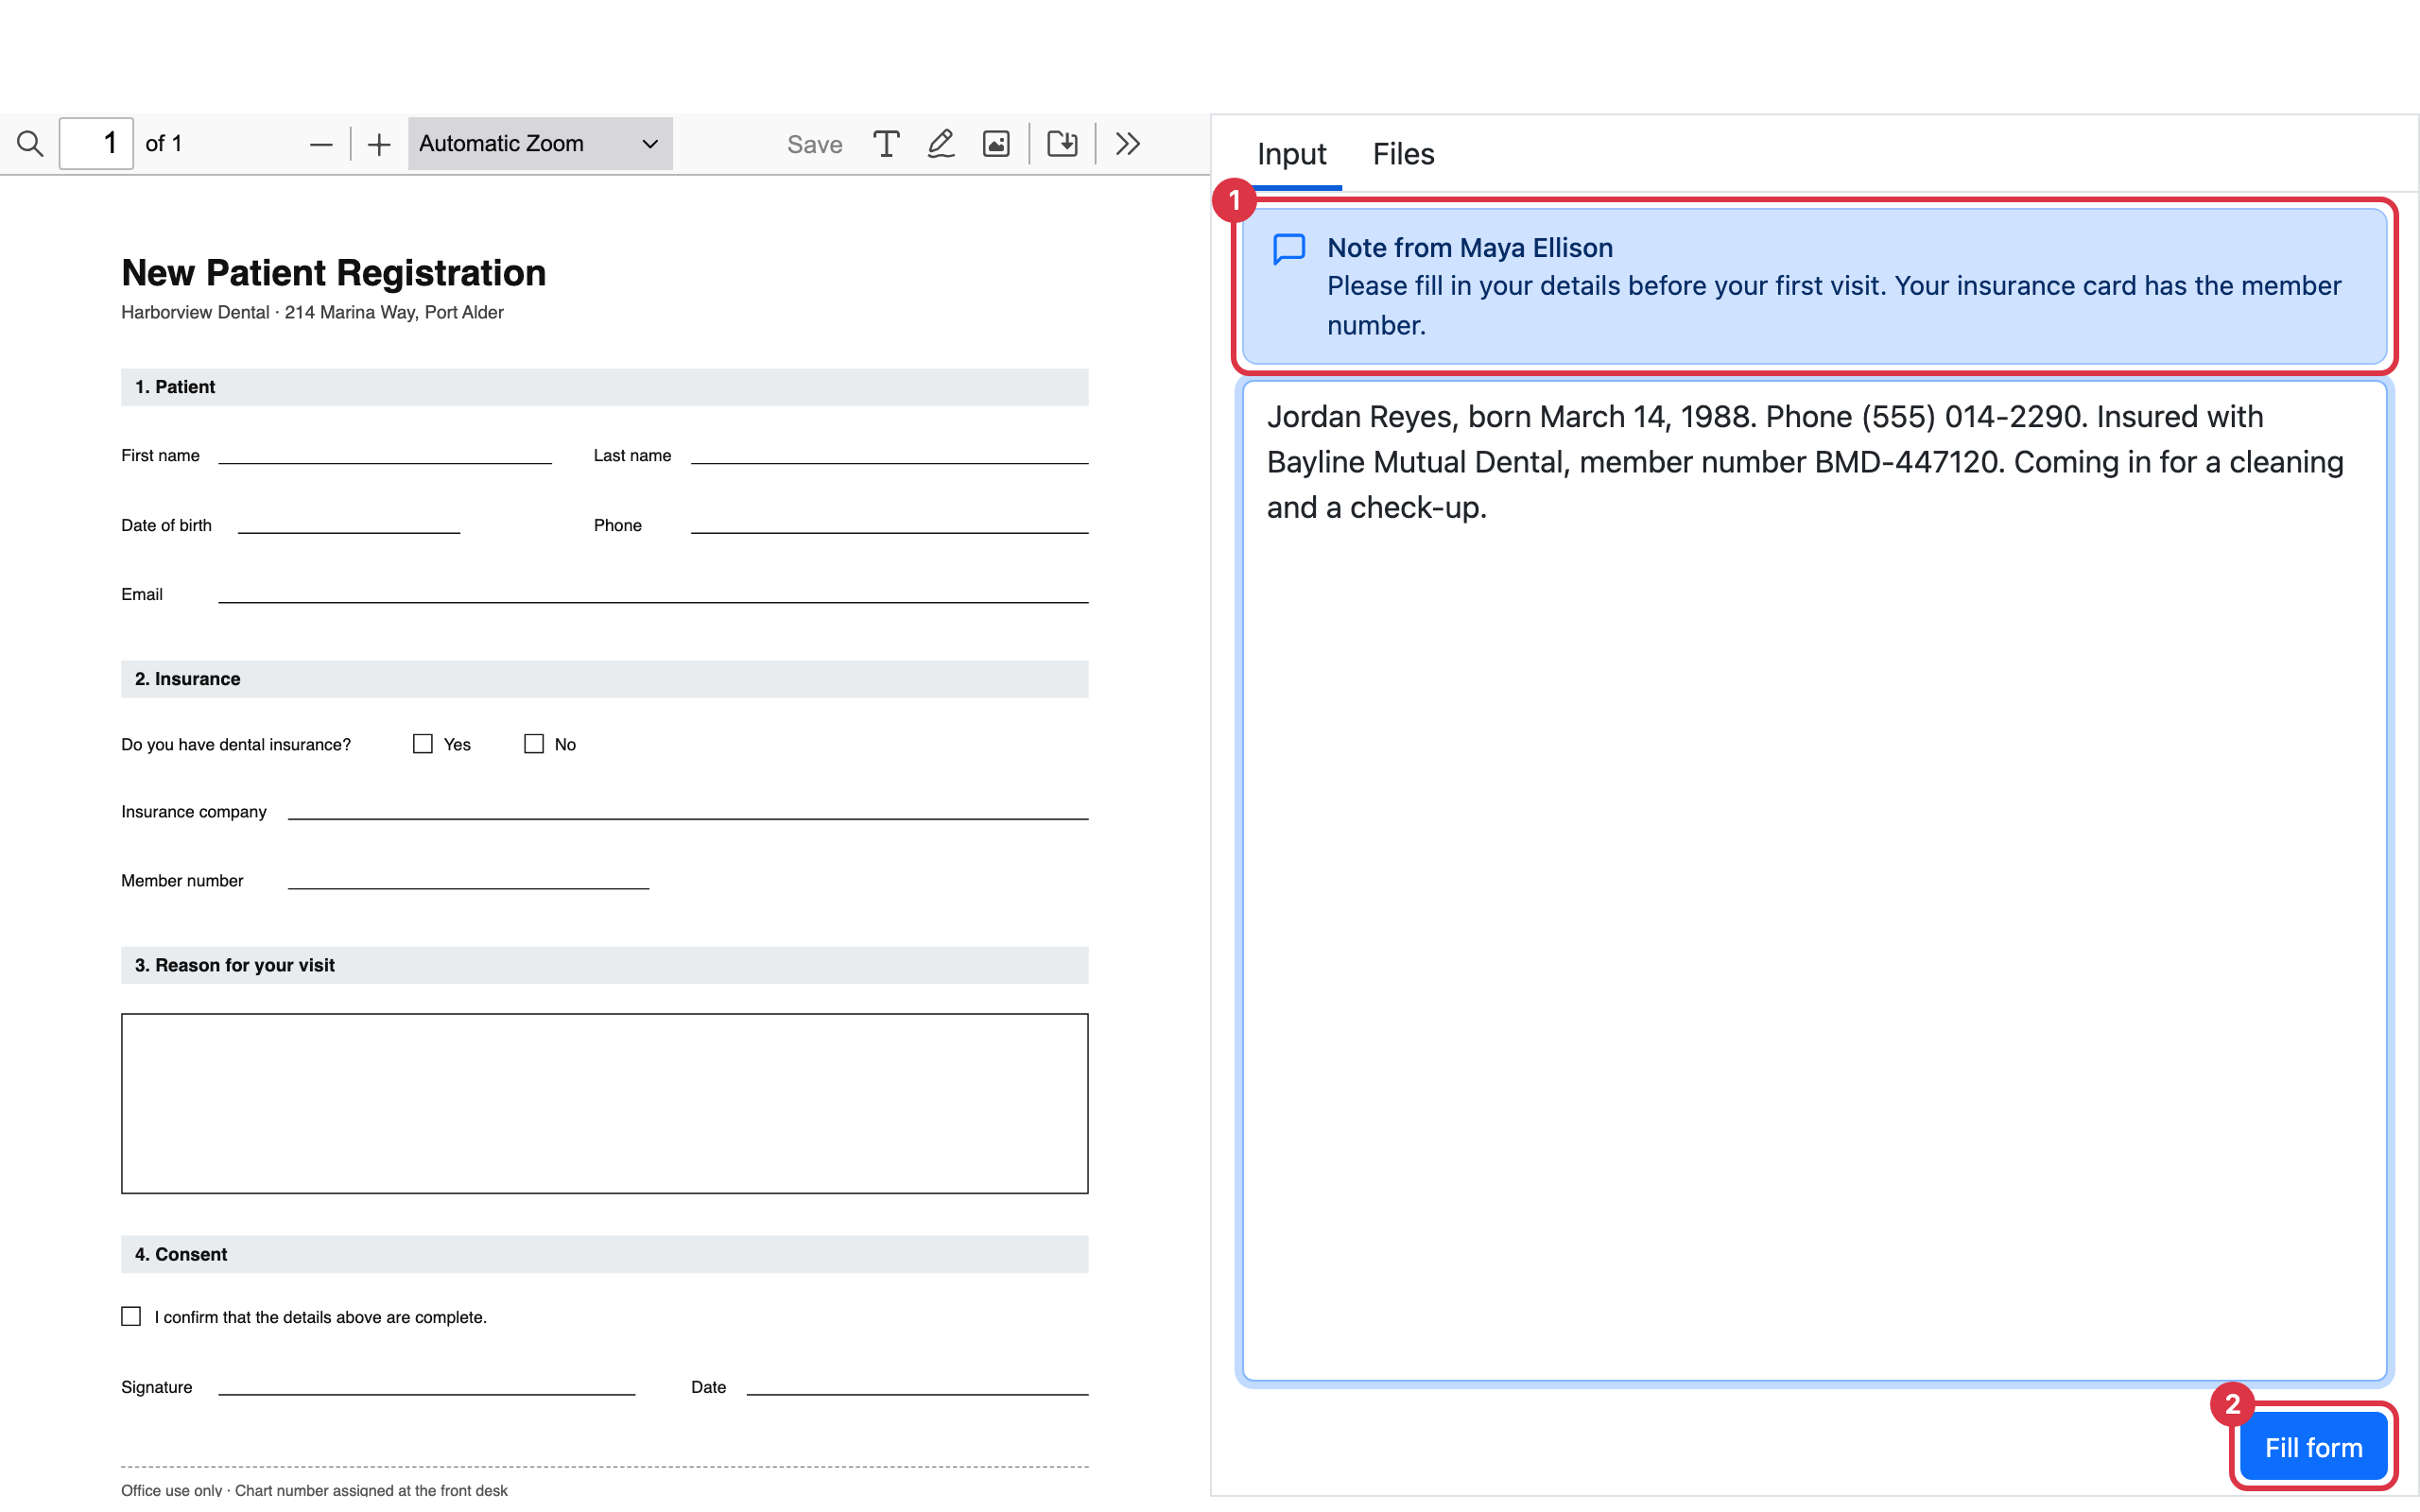
The recipient opens the email and presses Fill Form. They sign in to Instafill.ai with the email address the request was sent to. The link does not open for anyone else.
- Read the note: Your note and the pages they are asked to fill are shown above their input.
- Give the data: They type the details, upload the files that hold their data, or both.
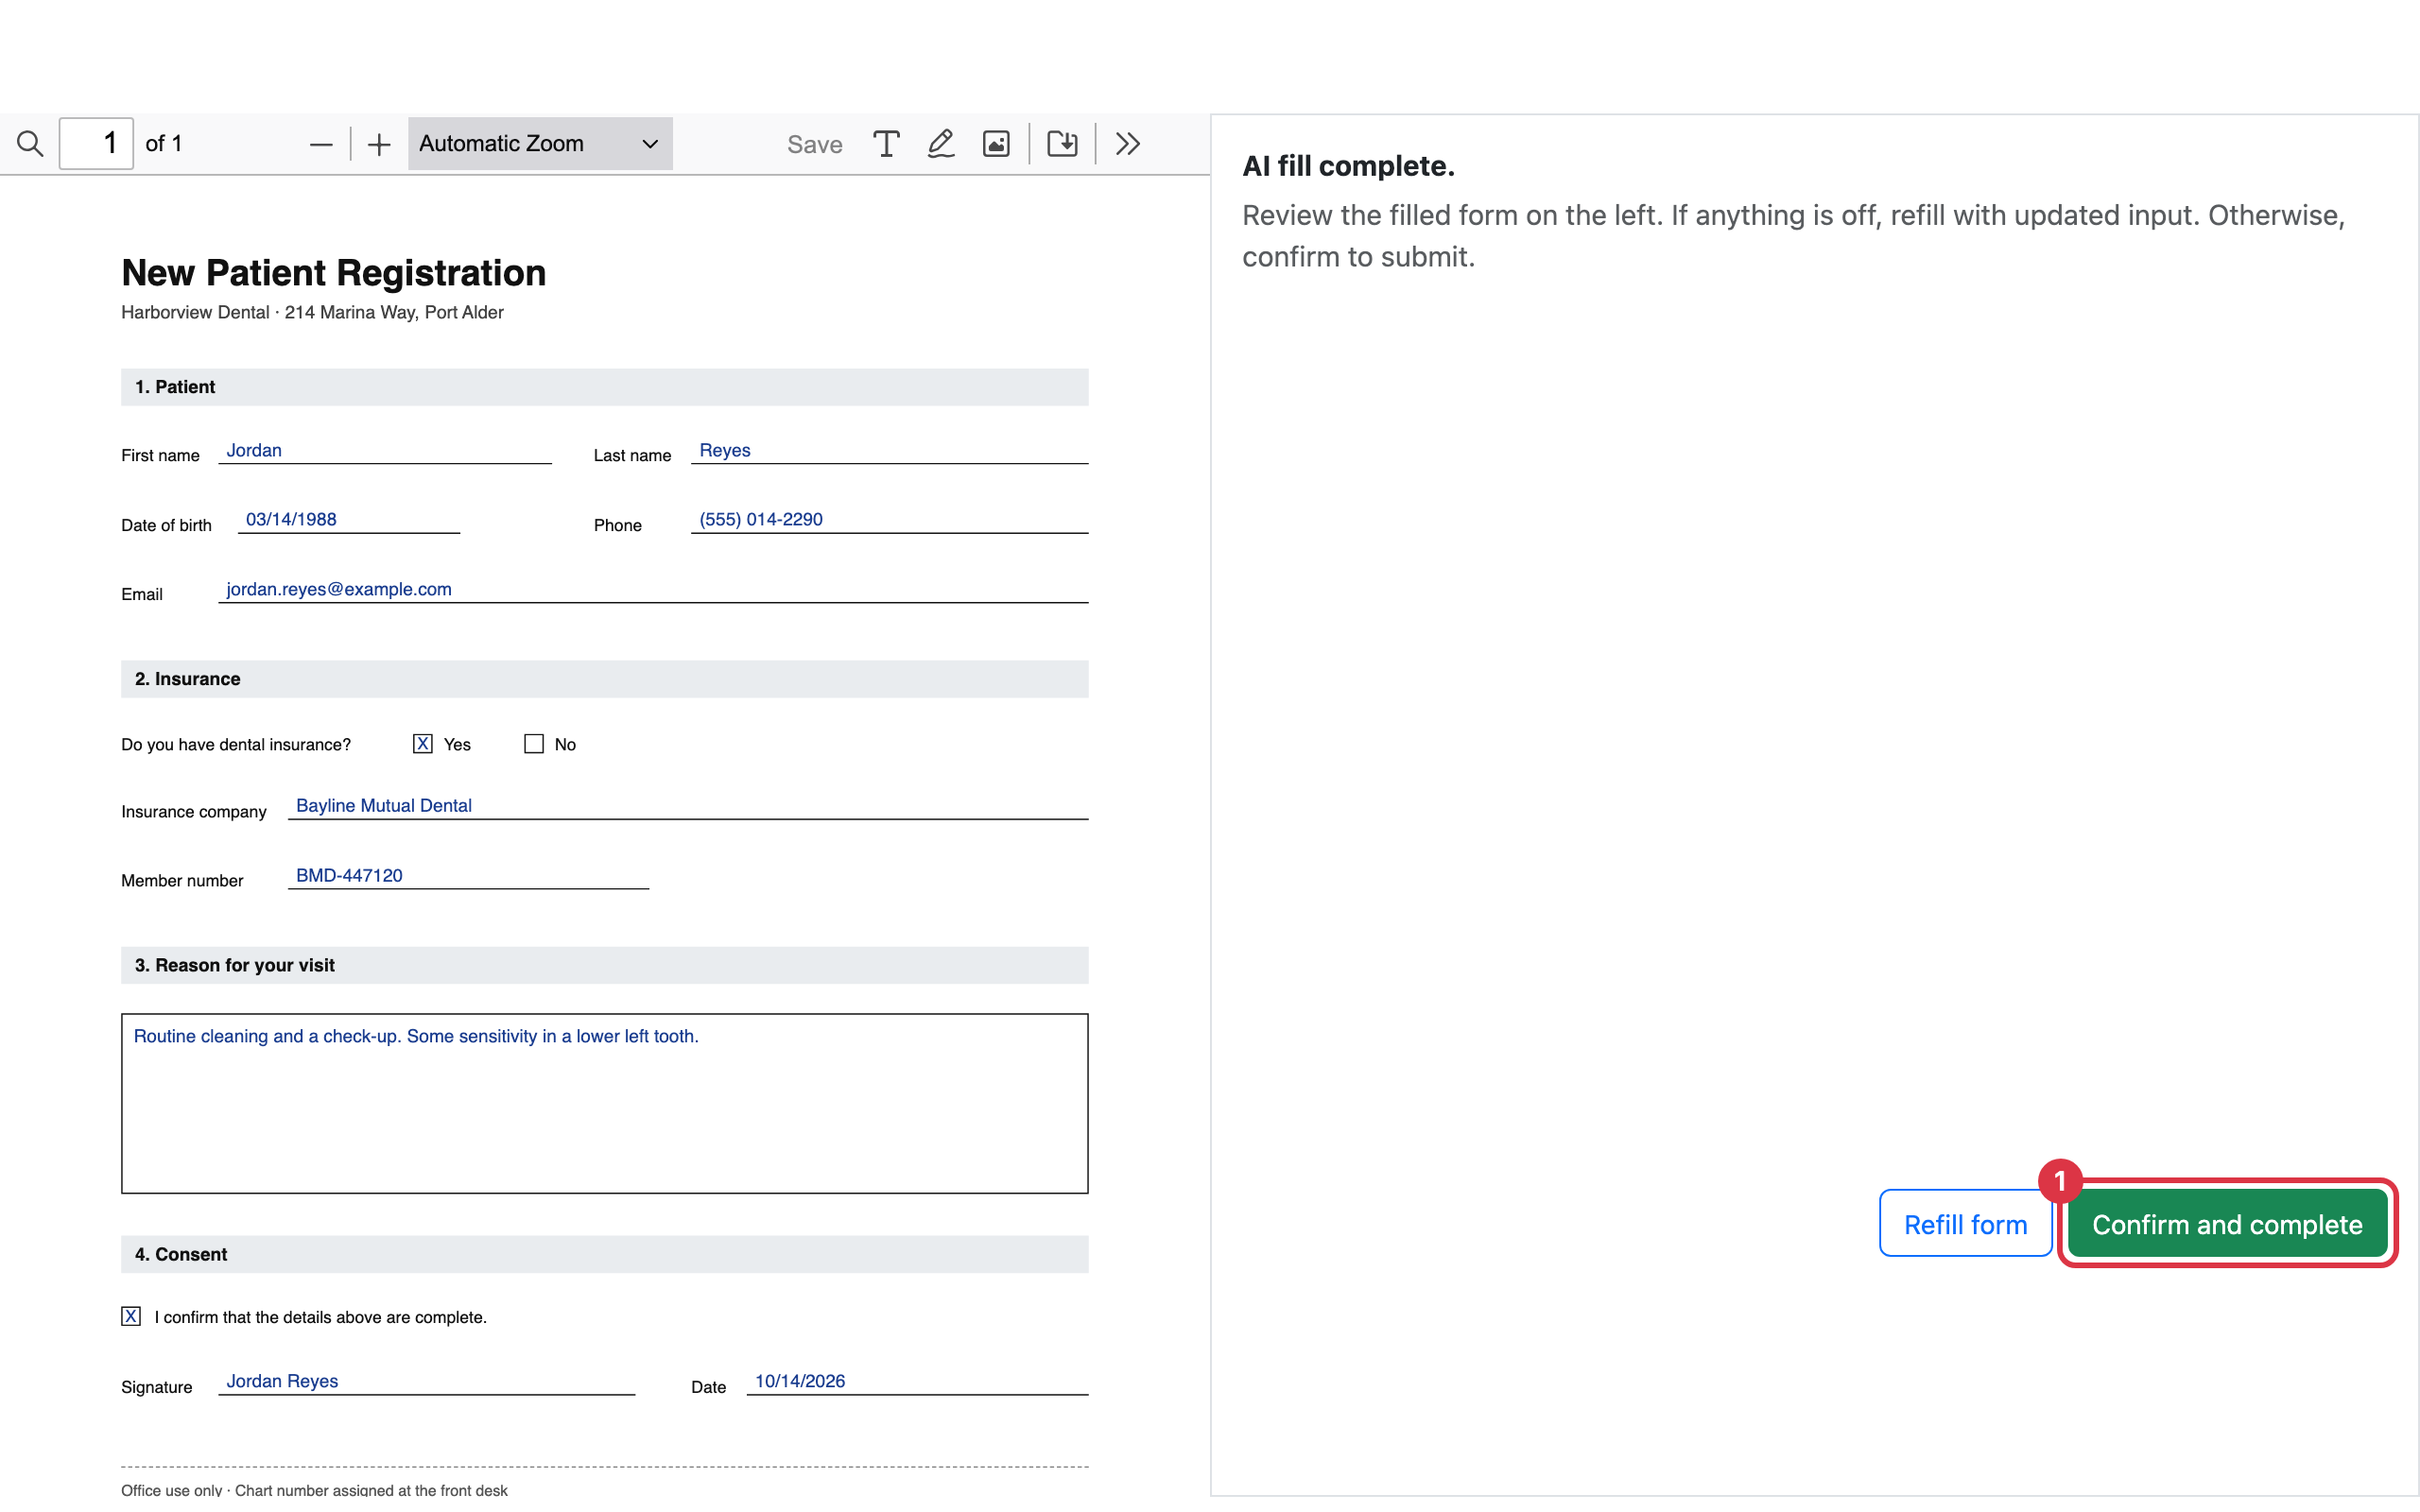
- Fill the form: They press Fill form. The filled form appears on the left for them to check.
- Update or confirm: If any value is not as expected, they press Refill form with updated input. When it is right, they press Confirm and complete.
5. Open the filled form
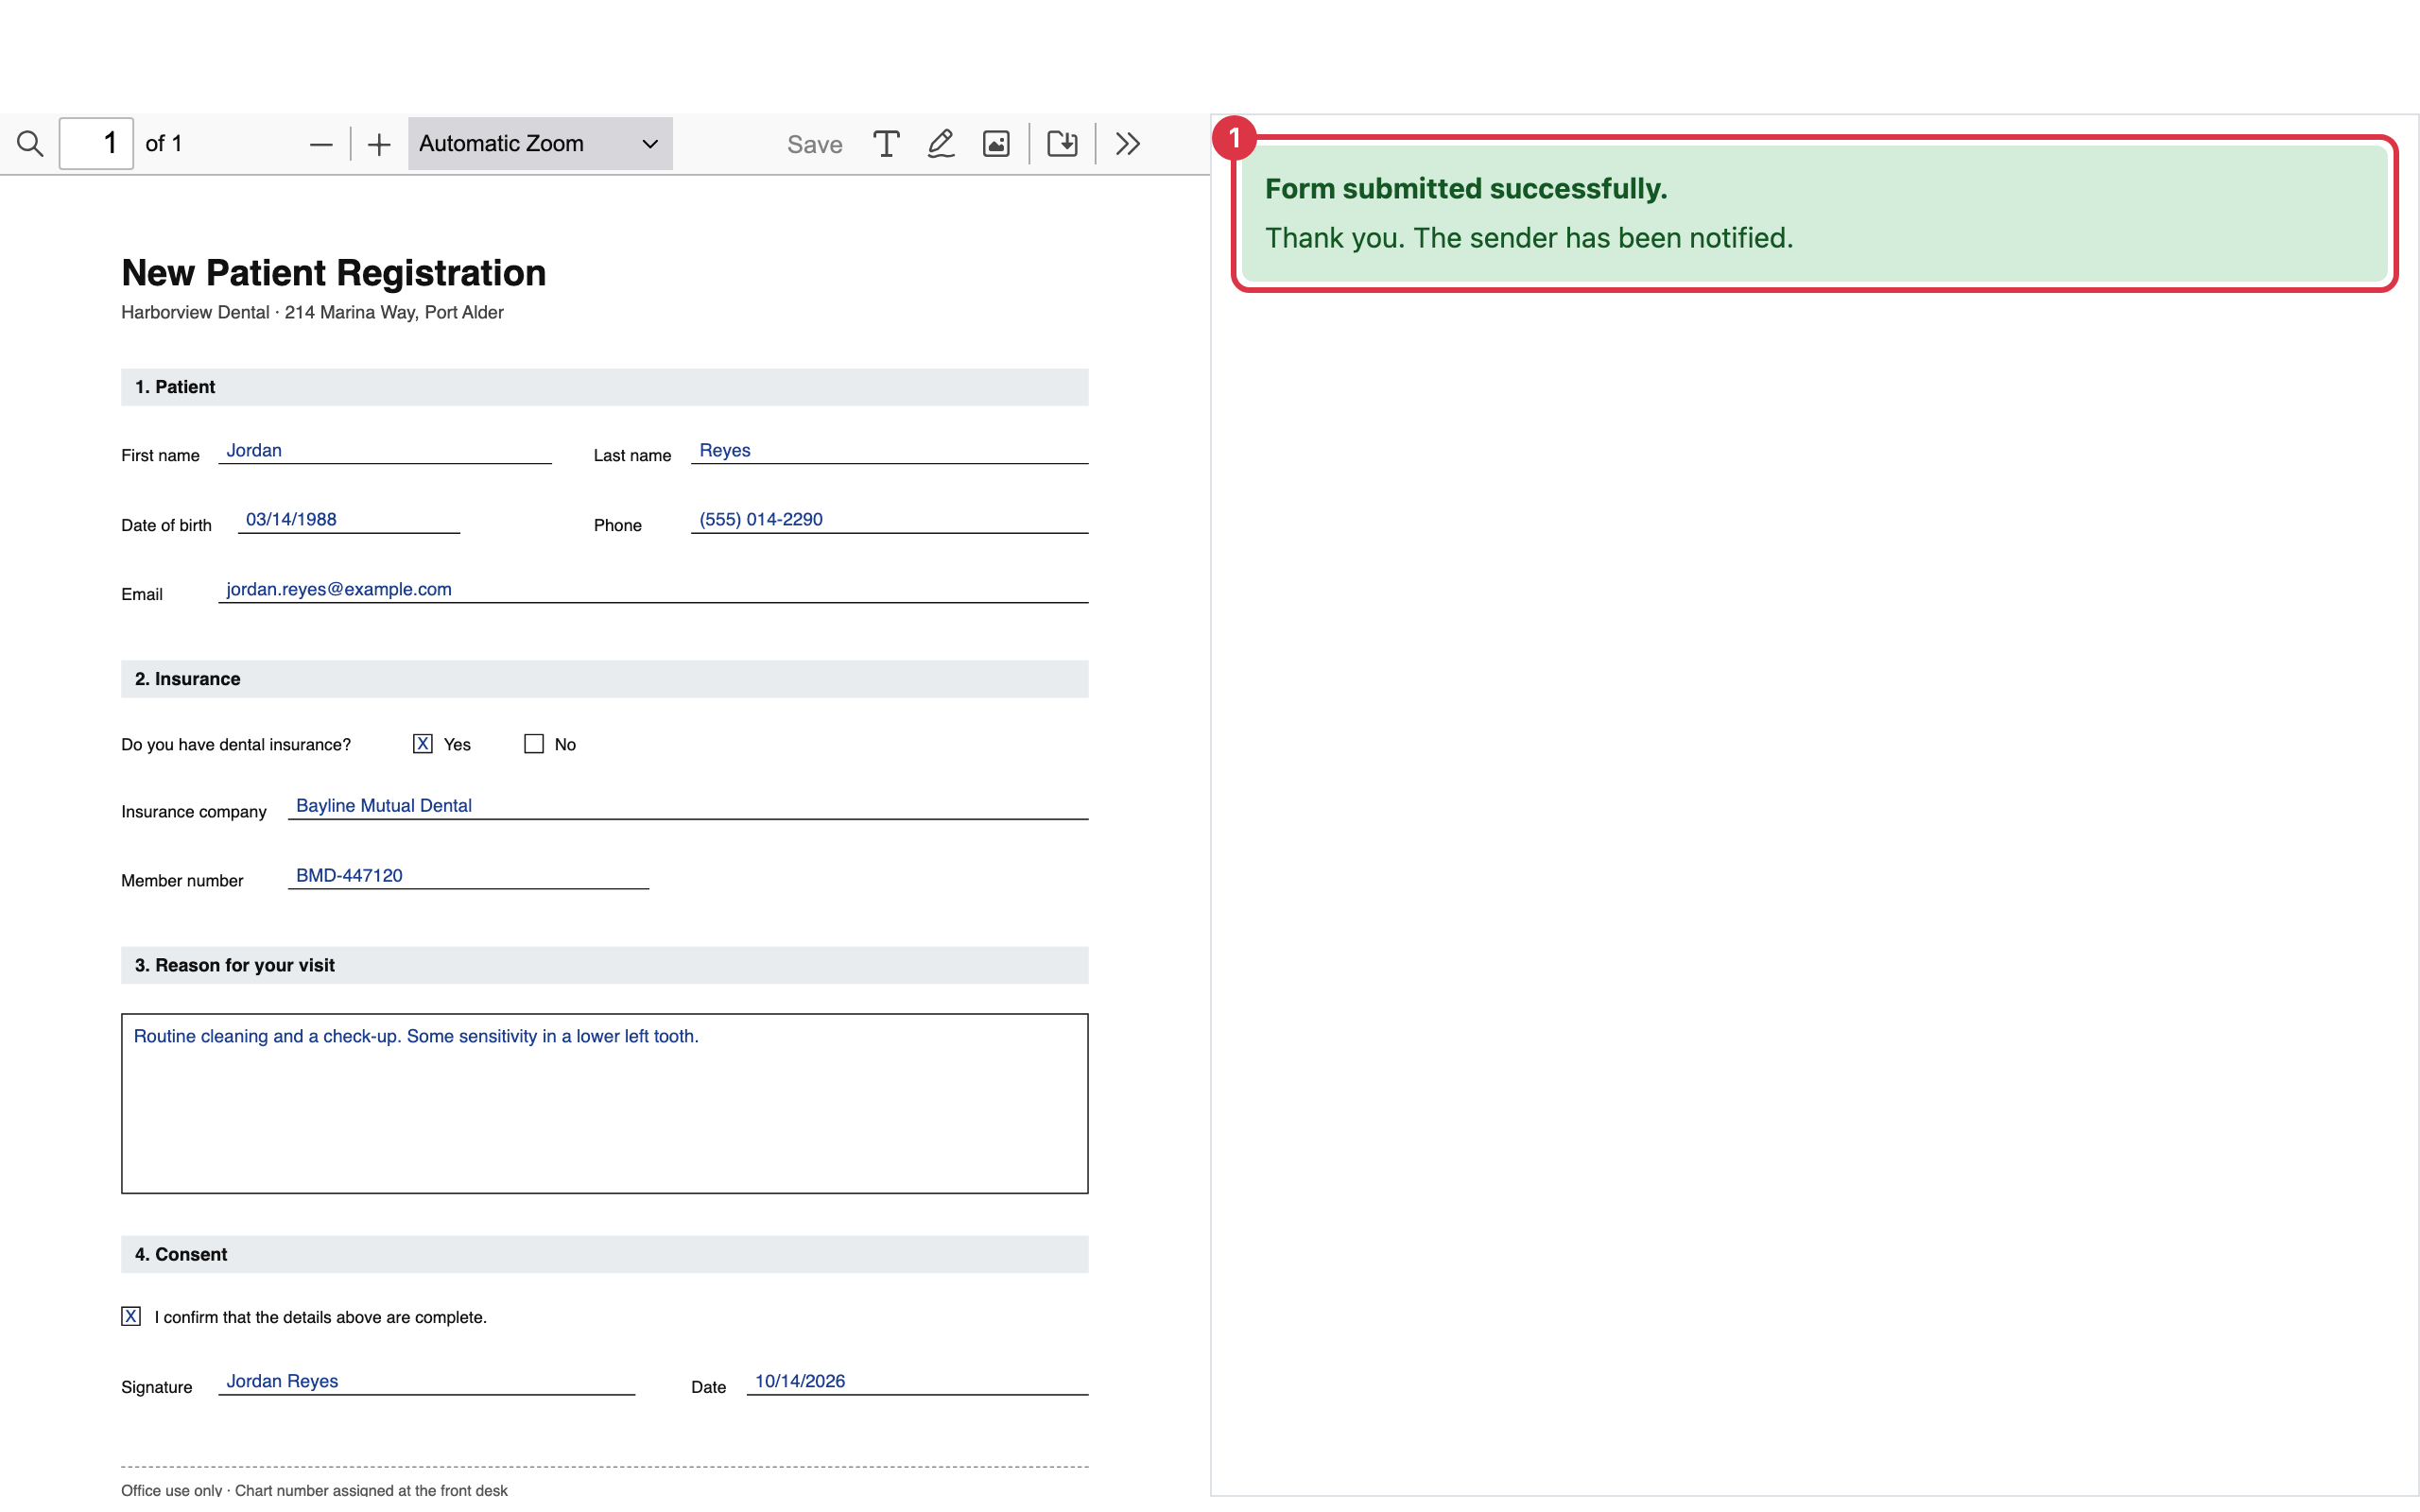
When the recipient confirms, they see that the form was submitted and that you have been notified. You get an email saying they completed the form. Press View Filled Form in it to open the filled form.
Share a public link instead
Some forms also have a public web form. For those, the dialog has two tabs: Email a person and Public link.
- Public link: Anyone with the link can fill and submit the form. Press Copy to copy it, or Open to see it.
- Embed on your website: The tab also gives a piece of code that puts the form on your own site.