How to fill any form with the Agent
This guide walks you through filling a form with the Agent, from a blank form to a finished file. You hand over a form and the files that hold your data. The Agent fills the form, asks you when a fact is missing, and gives it back for you to check, adjust and download.
What you need before you start
| You need | What that means |
|---|---|
| A form to fill | A blank PDF, fillable or scanned. You can also use a form that is already in your forms library. |
| Source files | Documents with data, notes you type, or both. |
| Credits | A run holds 1 credit when it starts. A free account starts with 10 credits, which last 1 year. |
| A paid plan, for three things | Attaching Word files, filling from a spreadsheet, and downloading the filled form. |
The Agent reads these file types: PDF, PNG, JPG, JPEG, GIF, WEBP, HEIC, TIF, TIFF, CSV, XLS, XLSX, DOC, DOCX and TXT.
1. Attach a form and your source files
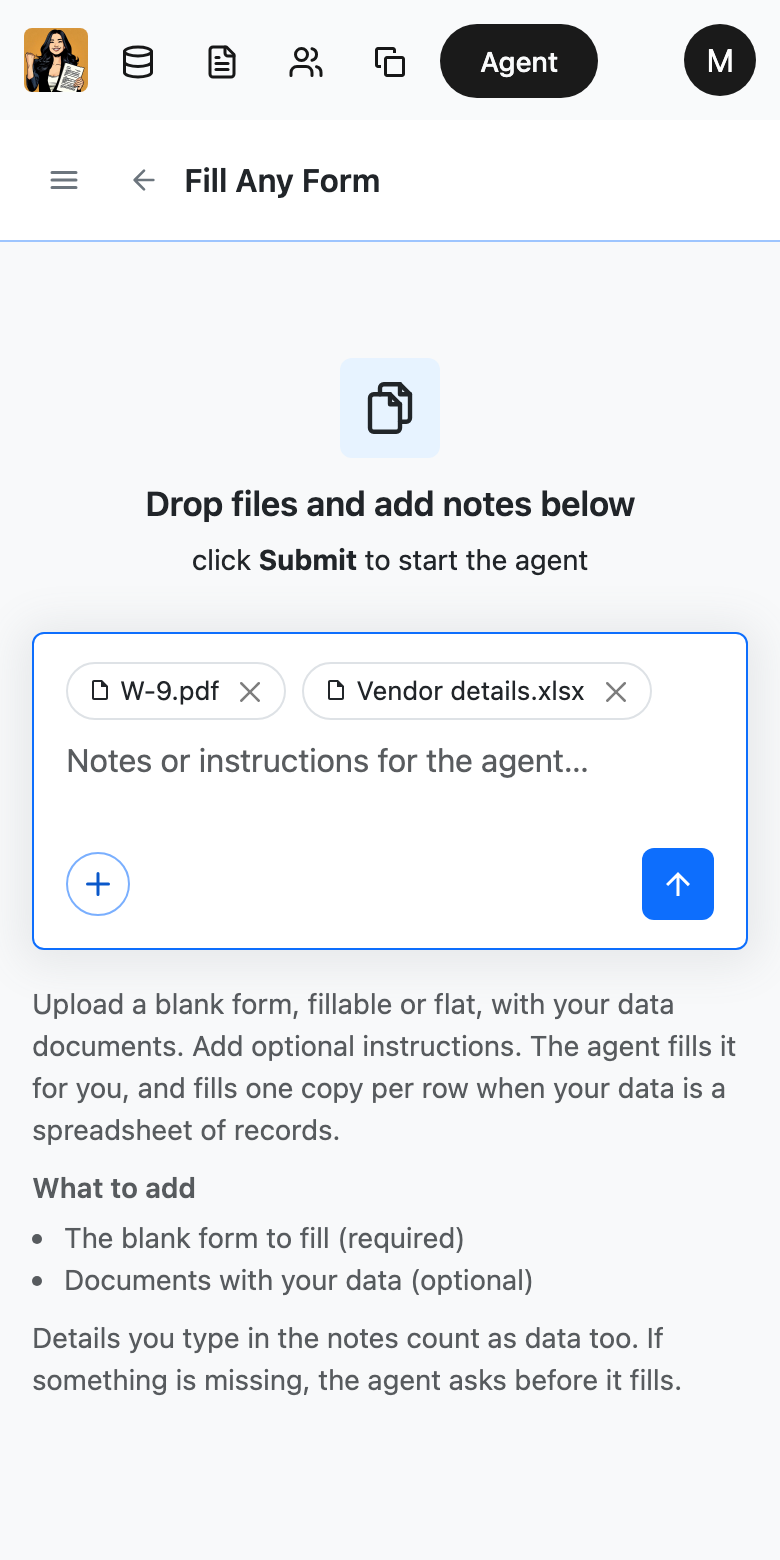
Open Agent in the top bar. Drop the blank form and your source files into the message box, or add them with the plus button. Type a note if there is something the Agent should know that is not in your files.
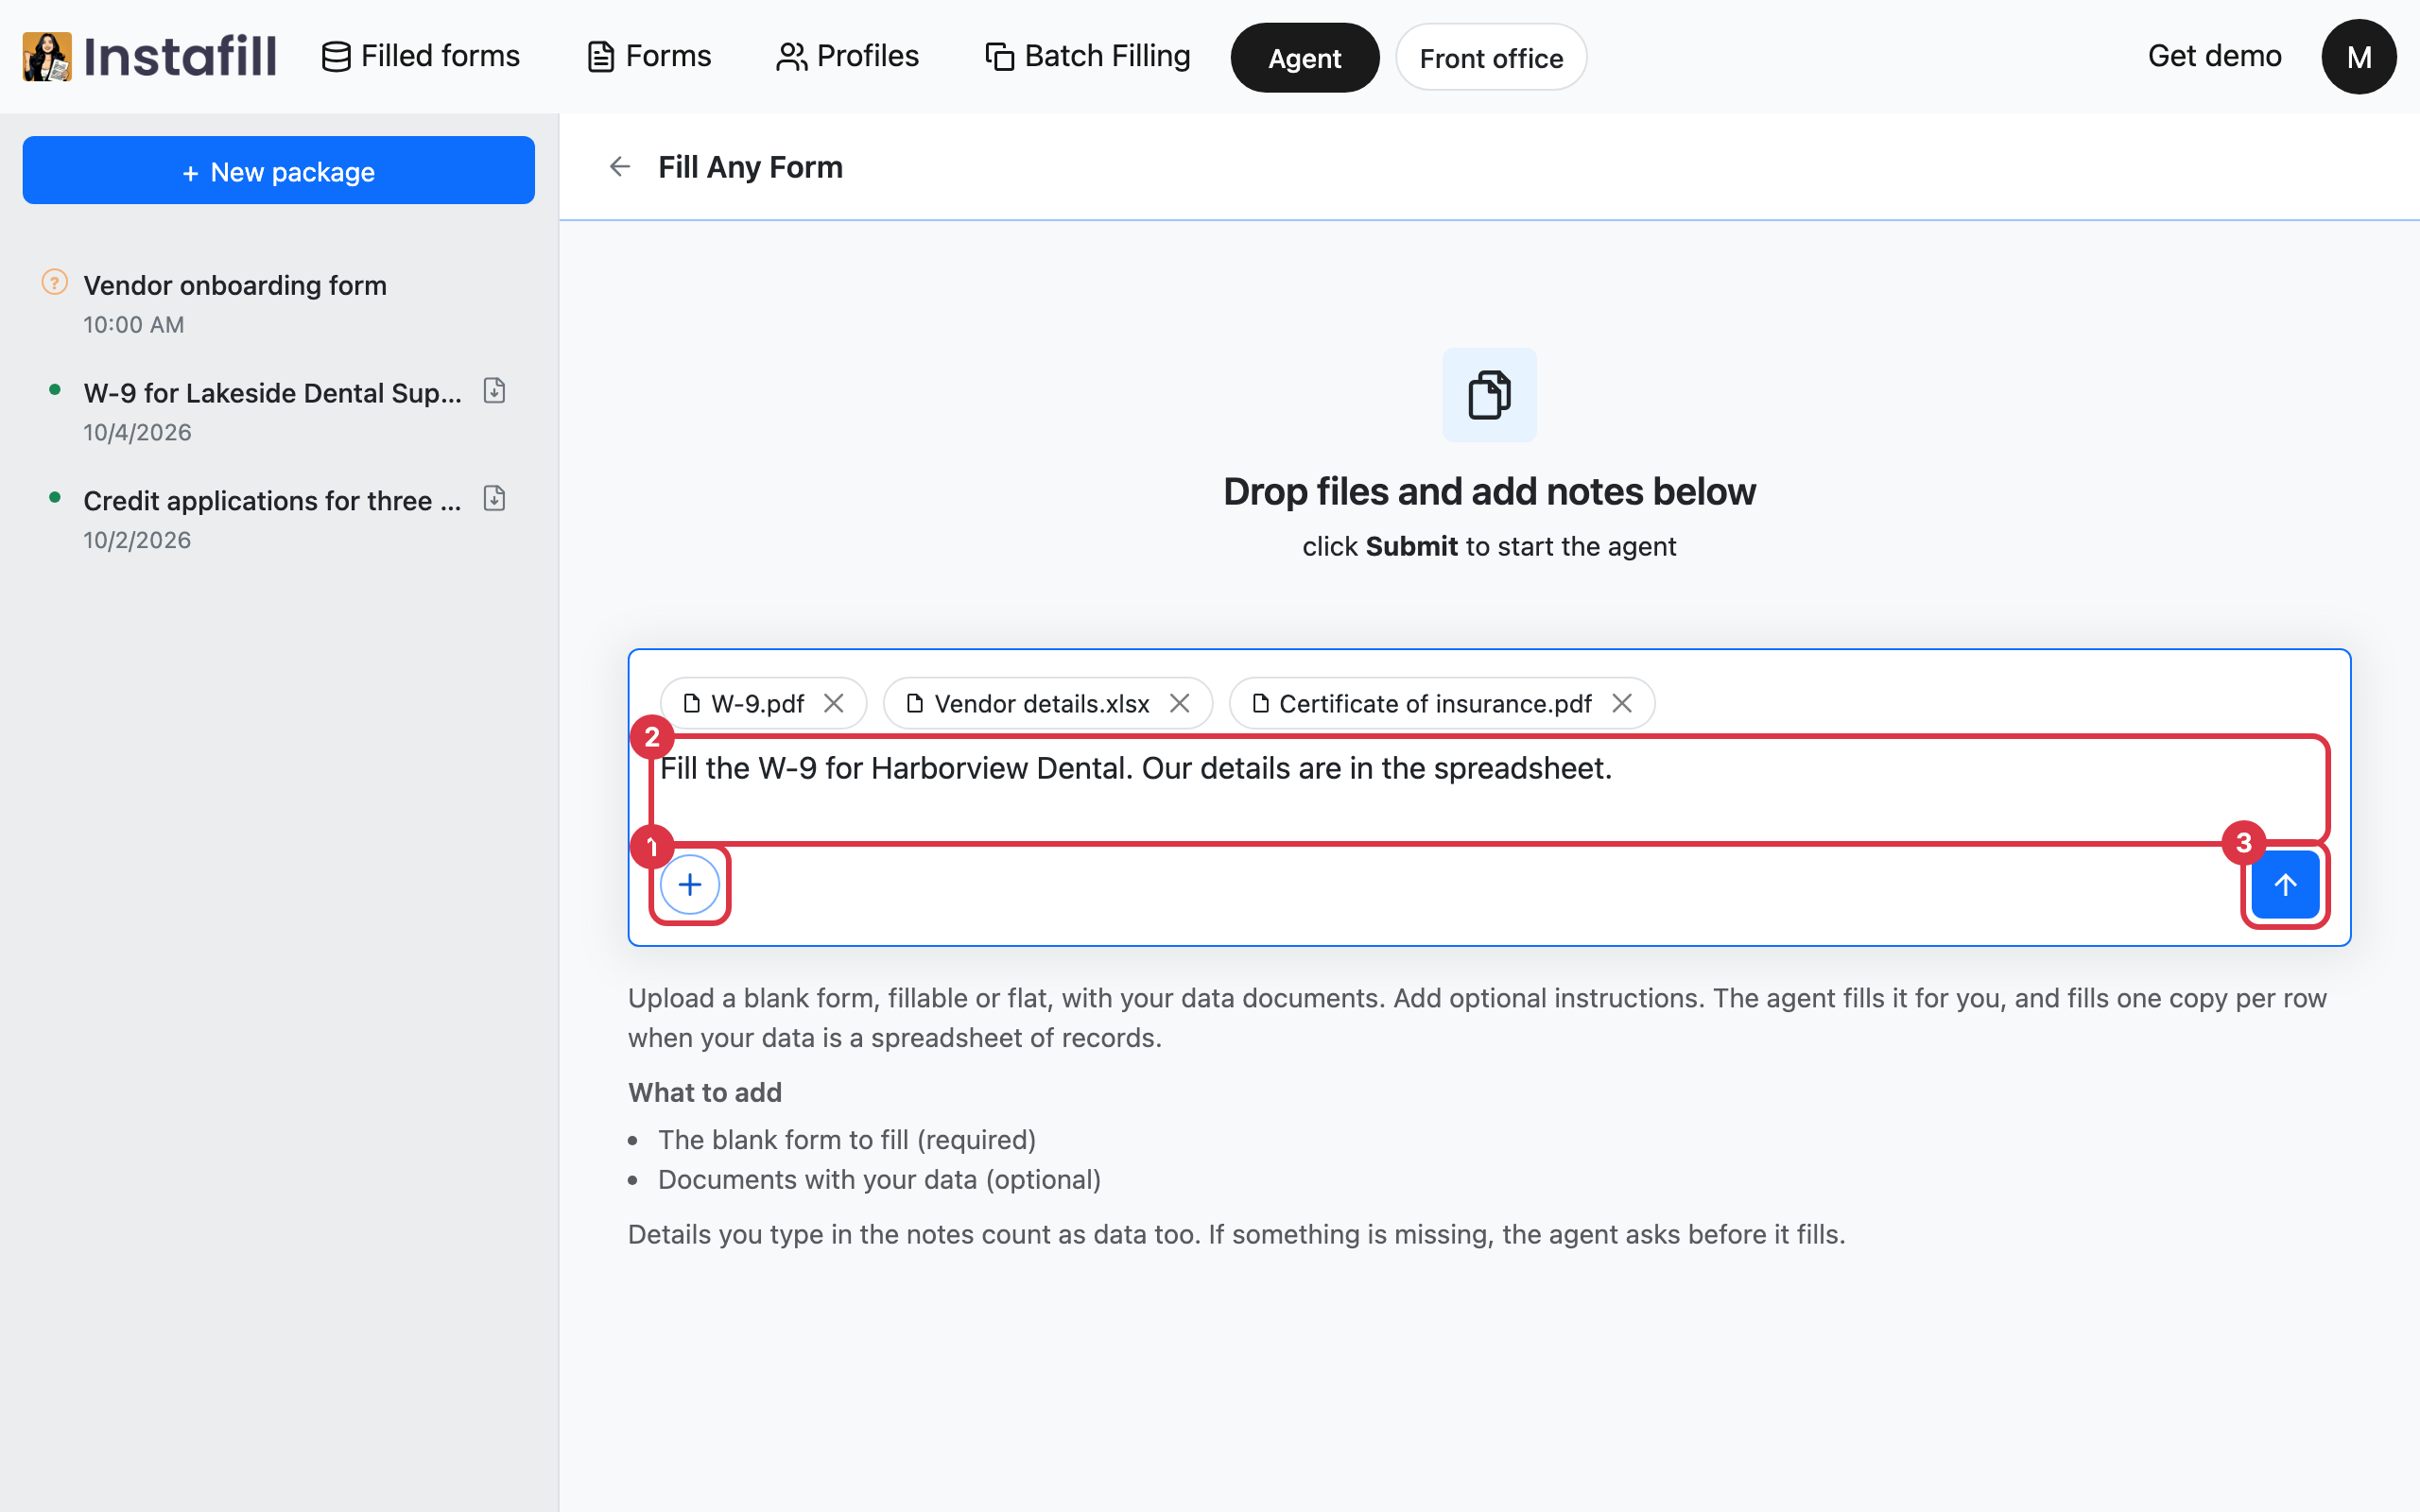
- No labeling needed: The Agent works out which file is the form and which files hold your data. It asks if it cannot tell.
- A form you used before: Name it in your note. A form in your forms library does not need attaching again.
- A scanned or flat PDF: Attach it as it is. The Agent makes it fillable first, and it stays in your forms library for next time.
2. Choose a model
The message box has a model menu beside the send button. You can leave it as it is, or open it and pick the other model before you send.
| Model | When to pick it |
|---|---|
| GPT-6 Sol | Smartest, for demanding forms. It is the one selected when you start. |
| GPT-6 Luna | Fastest and most efficient. |
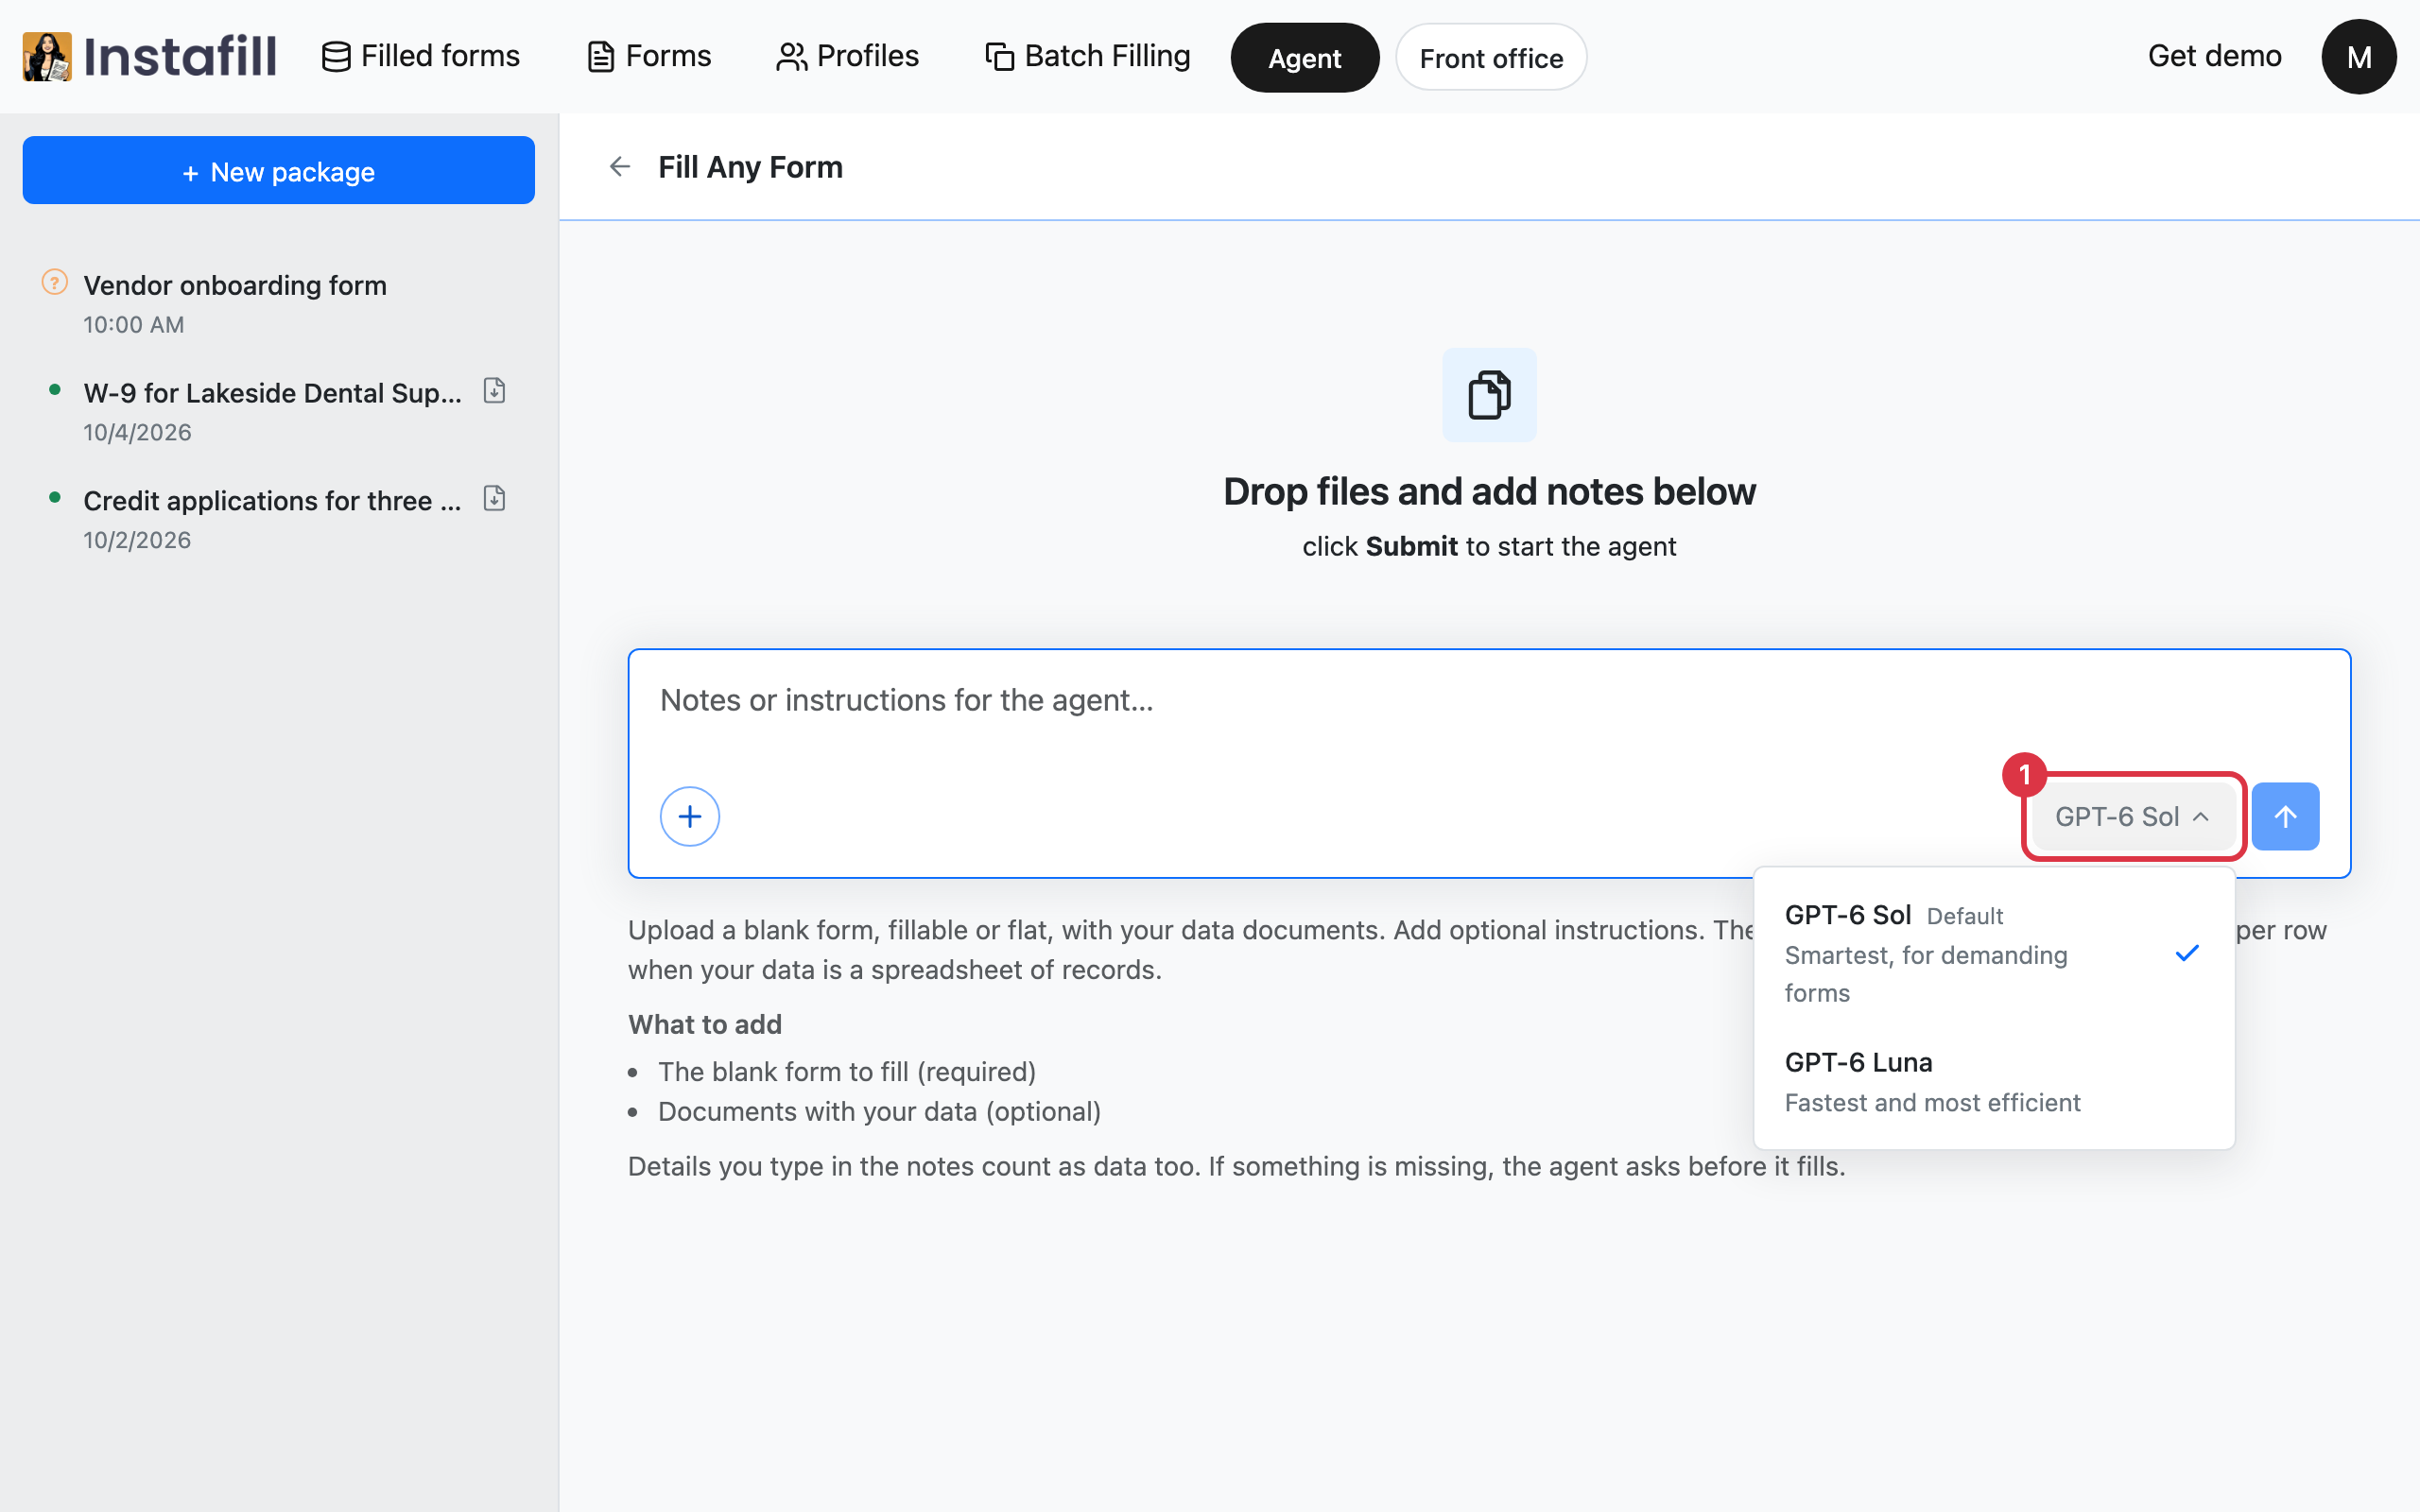

Your pick is remembered for new conversations. In a conversation that has already run, a new pick applies to its next run.
3. Send it, and answer what the Agent asks
Press the blue arrow to send. The Agent reads your files and starts filling the form.
When a fact is missing, it stops and asks you instead of guessing. Each question comes with a few answers to pick from. You can also answer in your own words, or attach a file when the question asks for one. Press Send answer, and the Agent carries on from there.
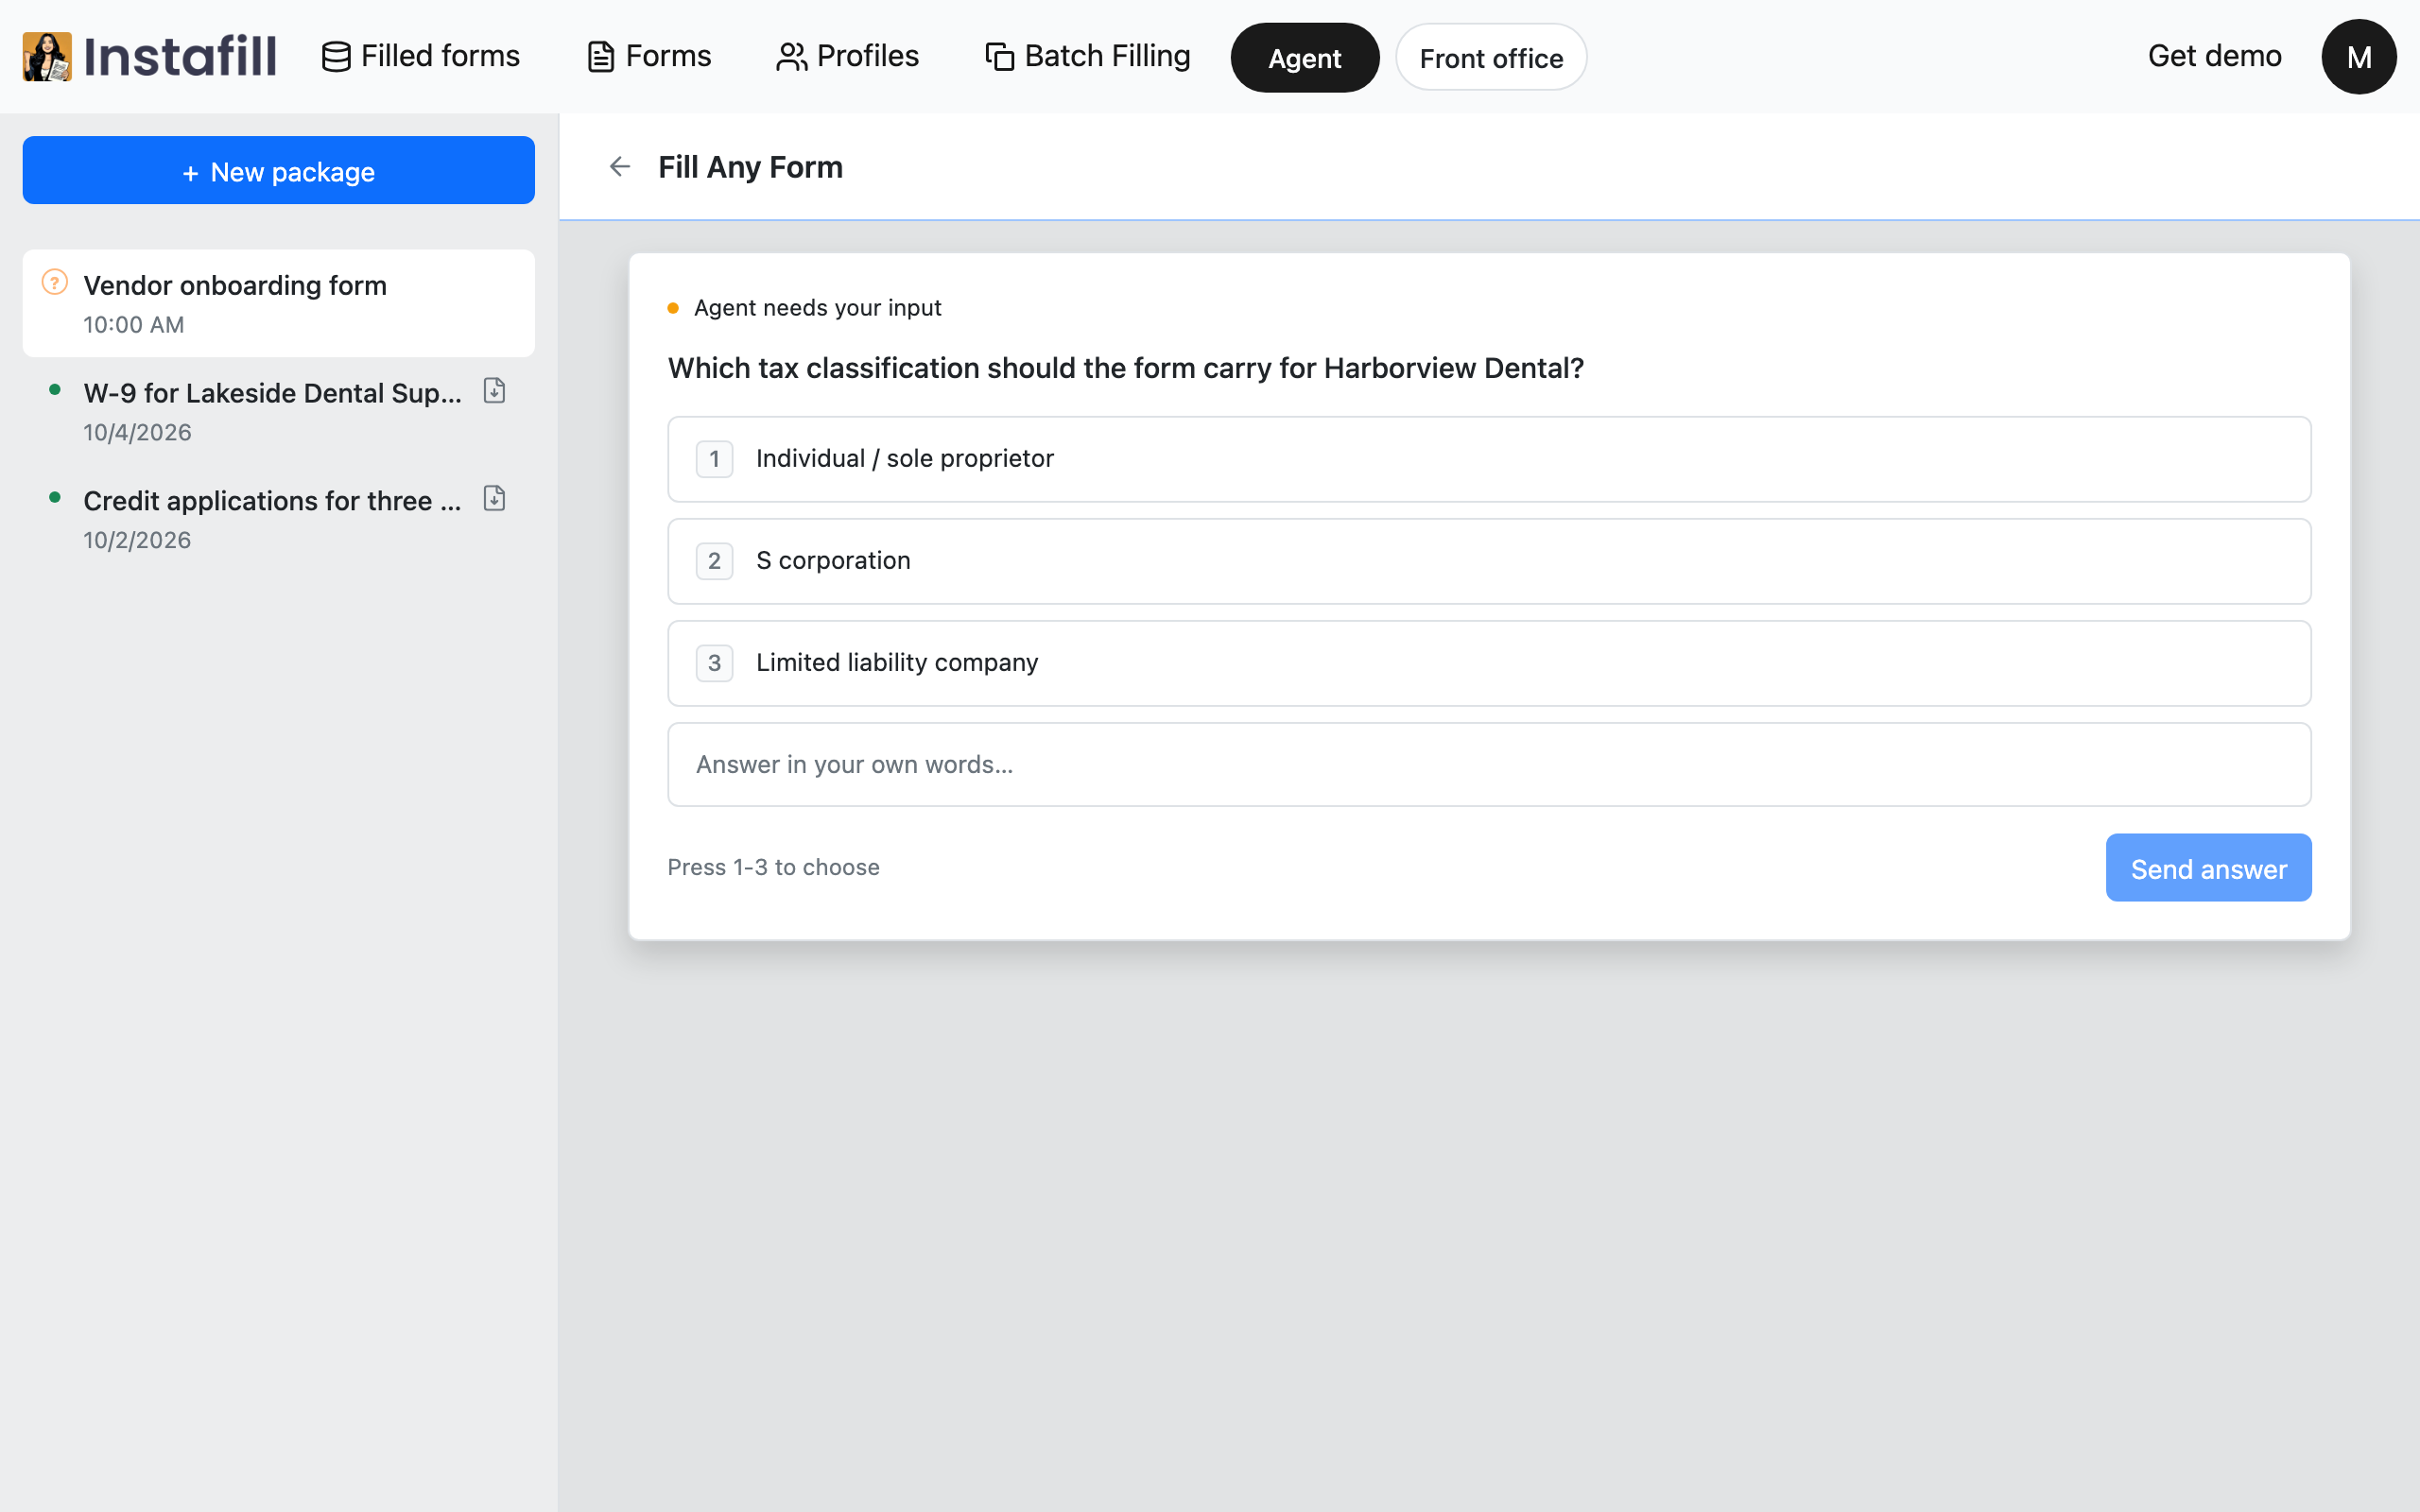
You can stop a run at any time. Its credit comes back.
4. Check the filled form
When the Agent finishes, it tells you what it filled and gives you the form. Press Open PDF to read it.
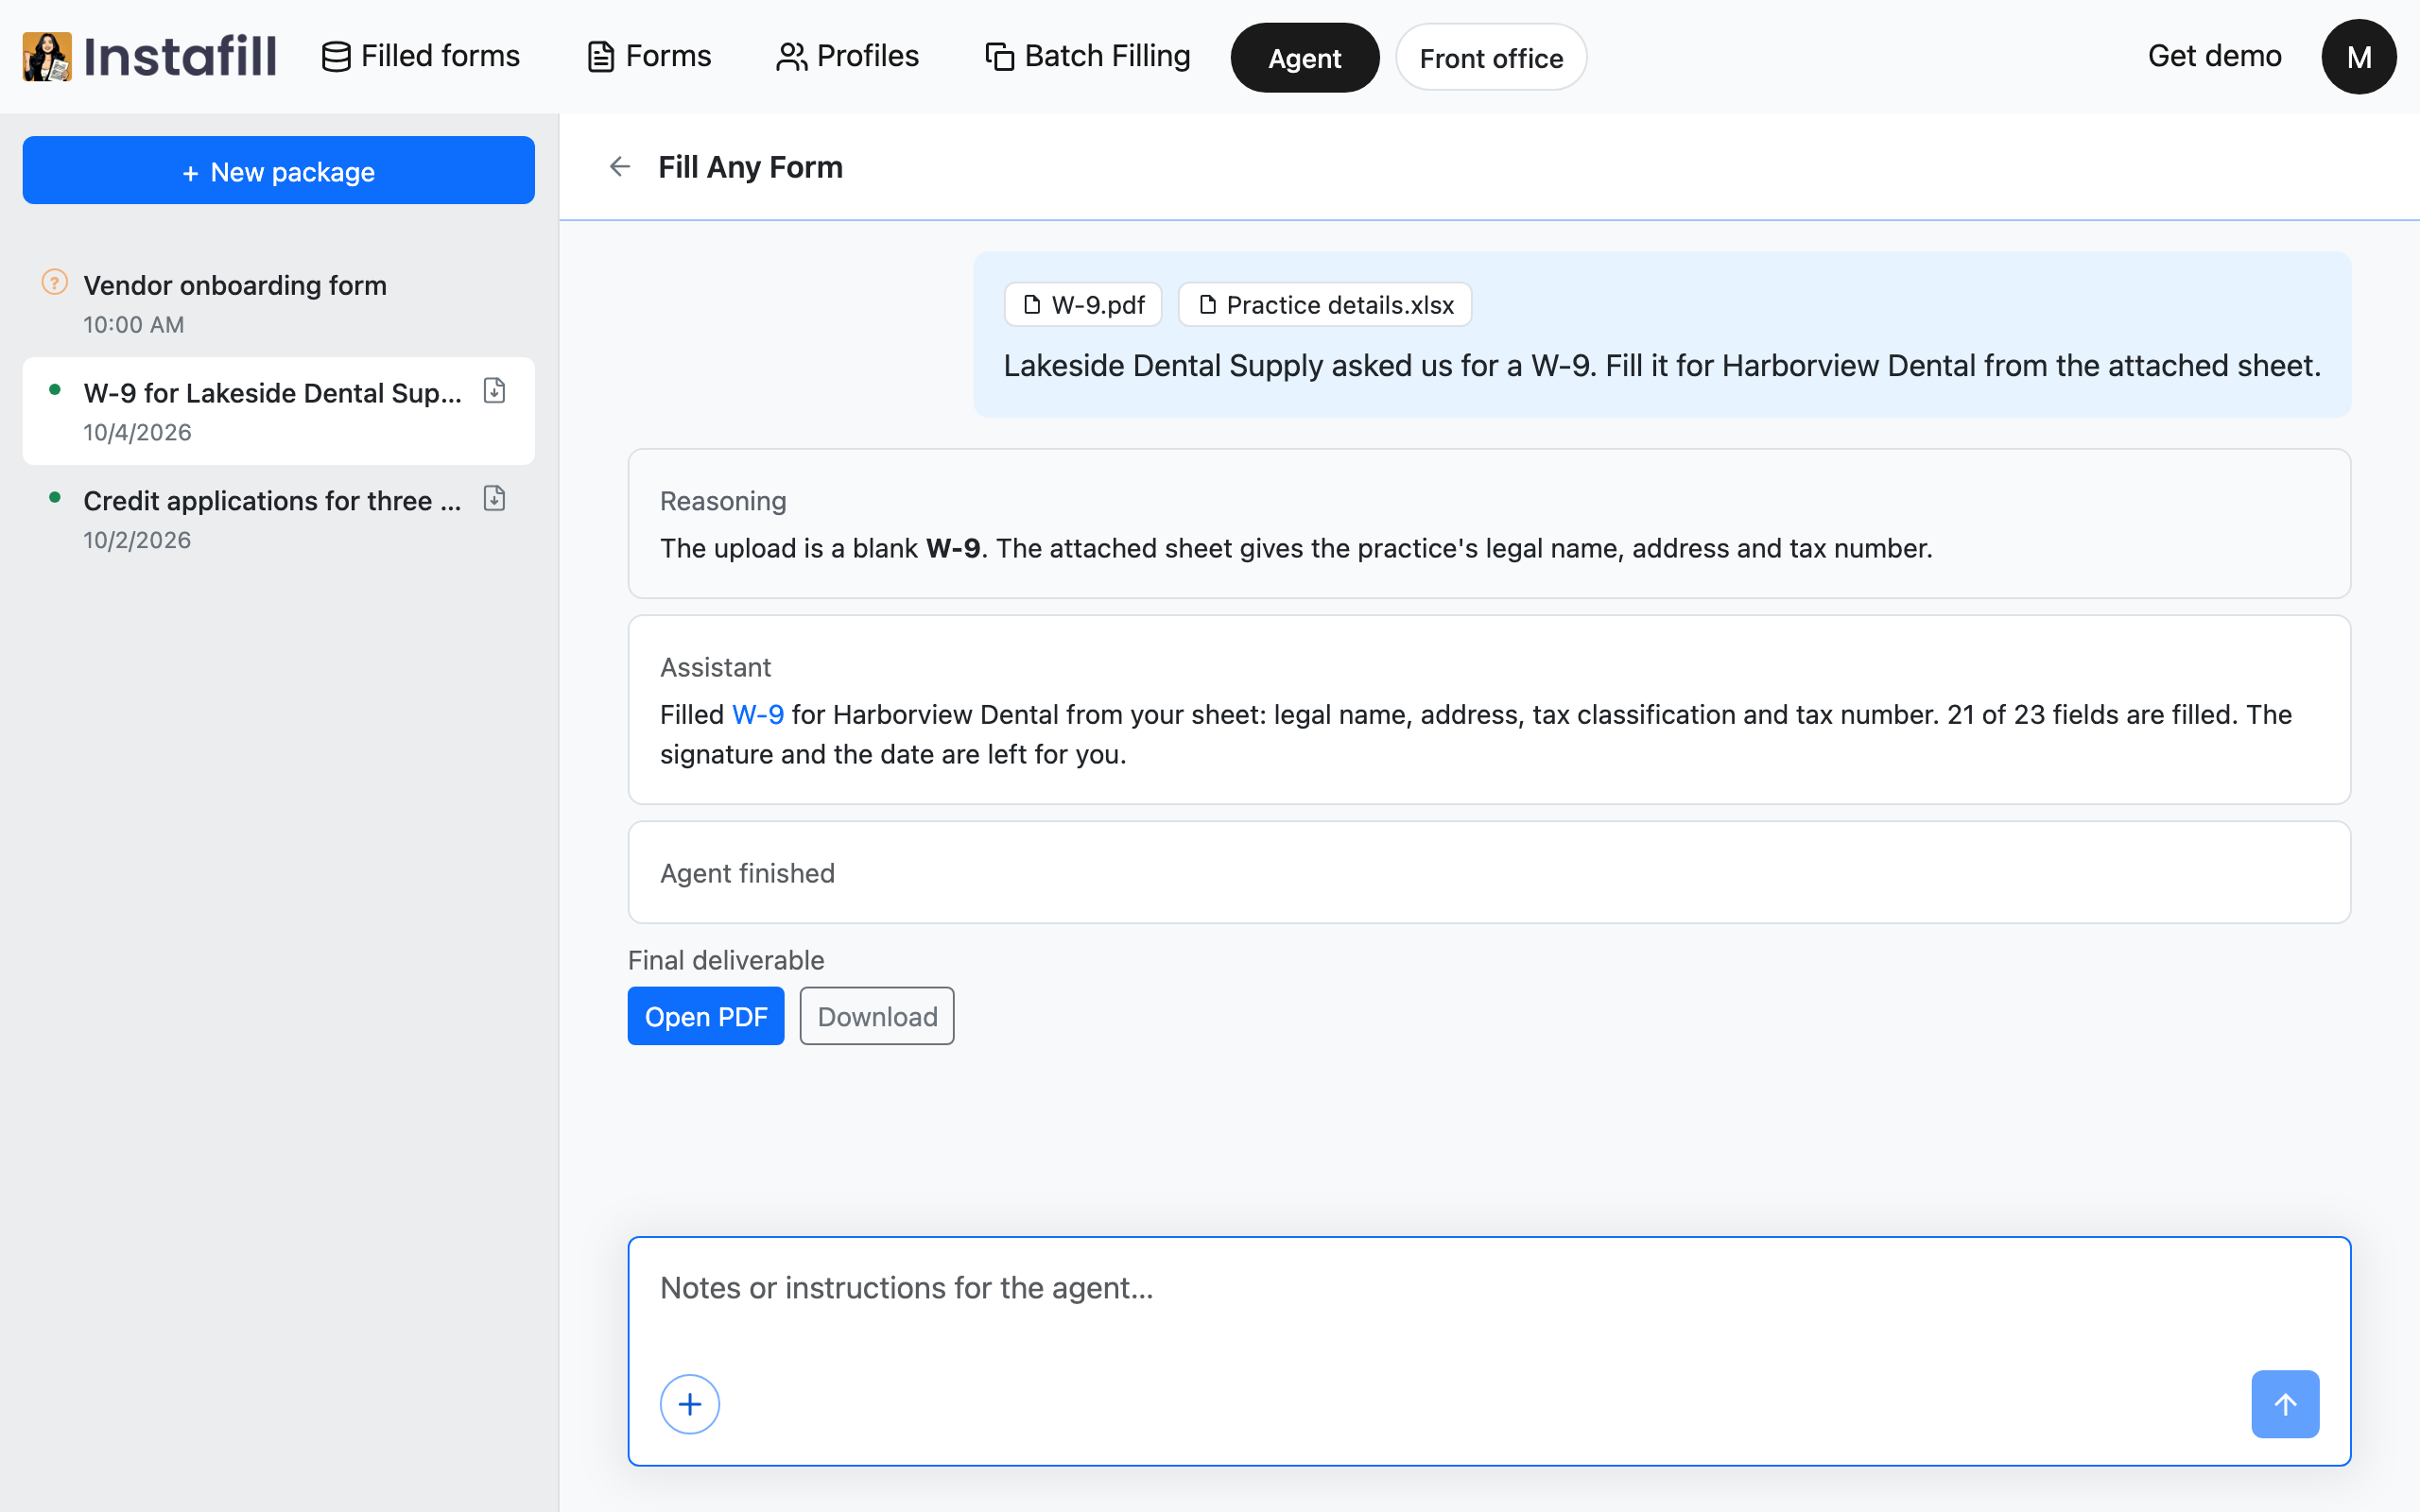
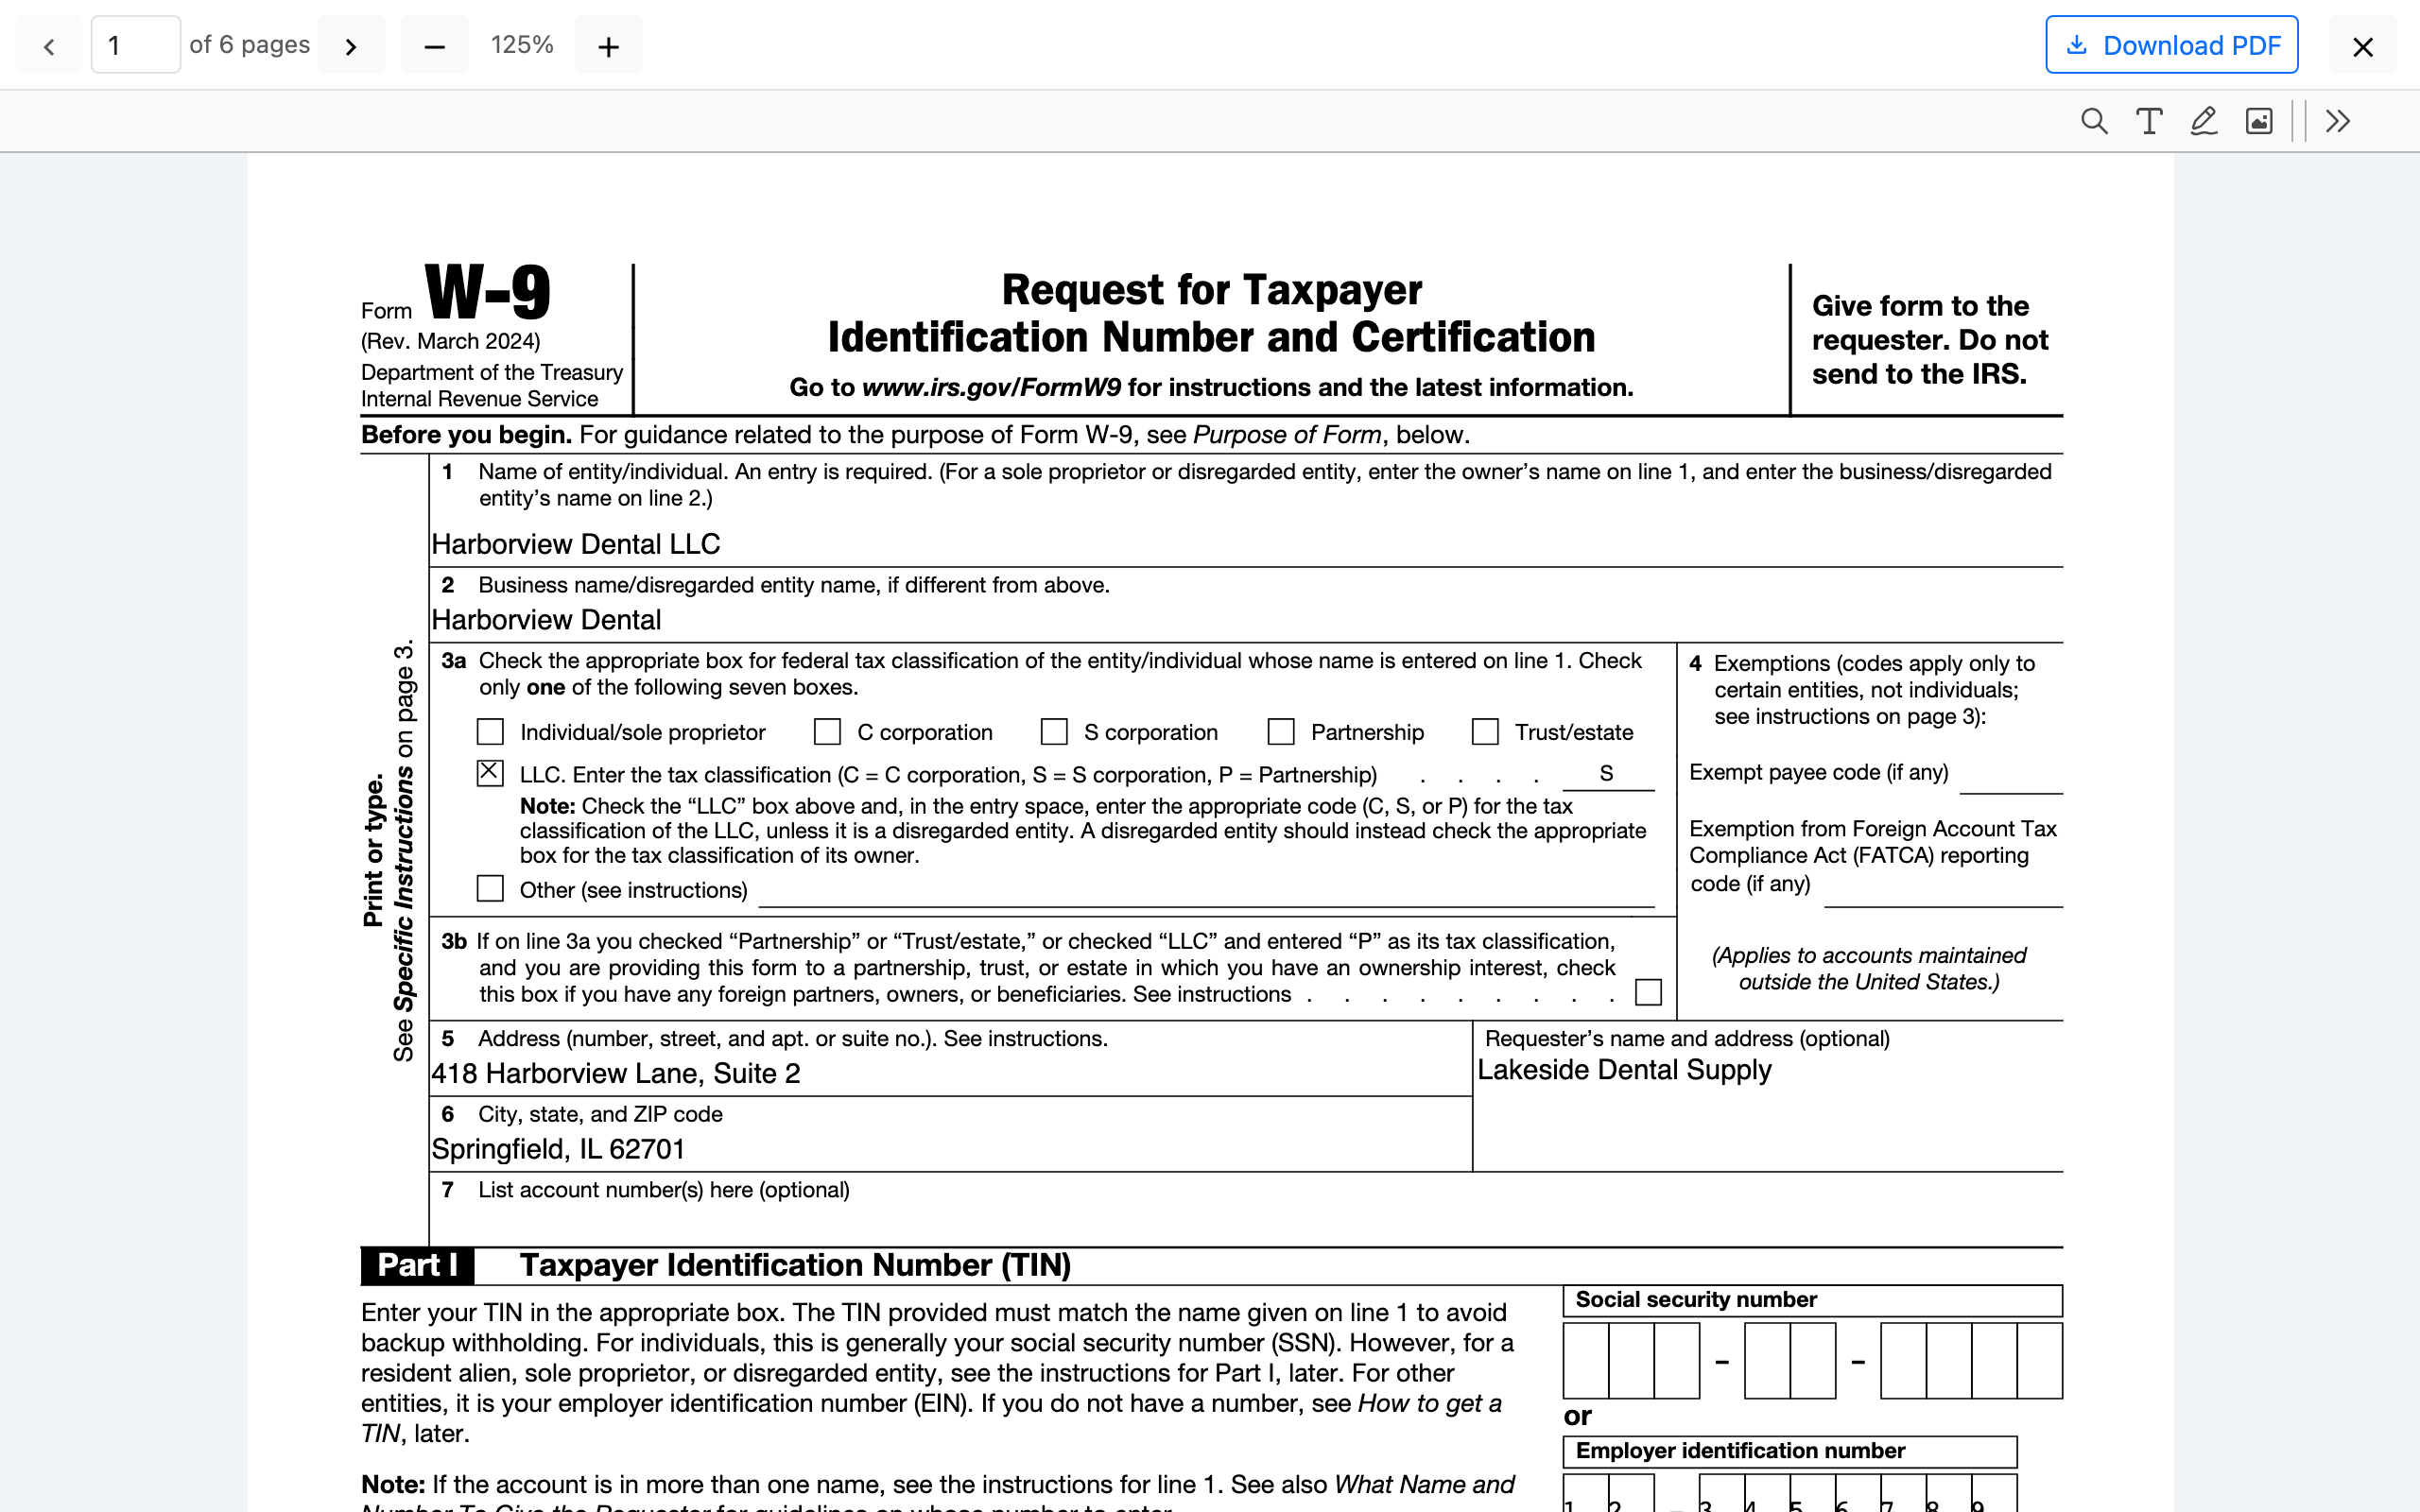
Read every answer. The Agent fills the form, and checking it and signing it off stays with you.
5. Update any value that is not as expected
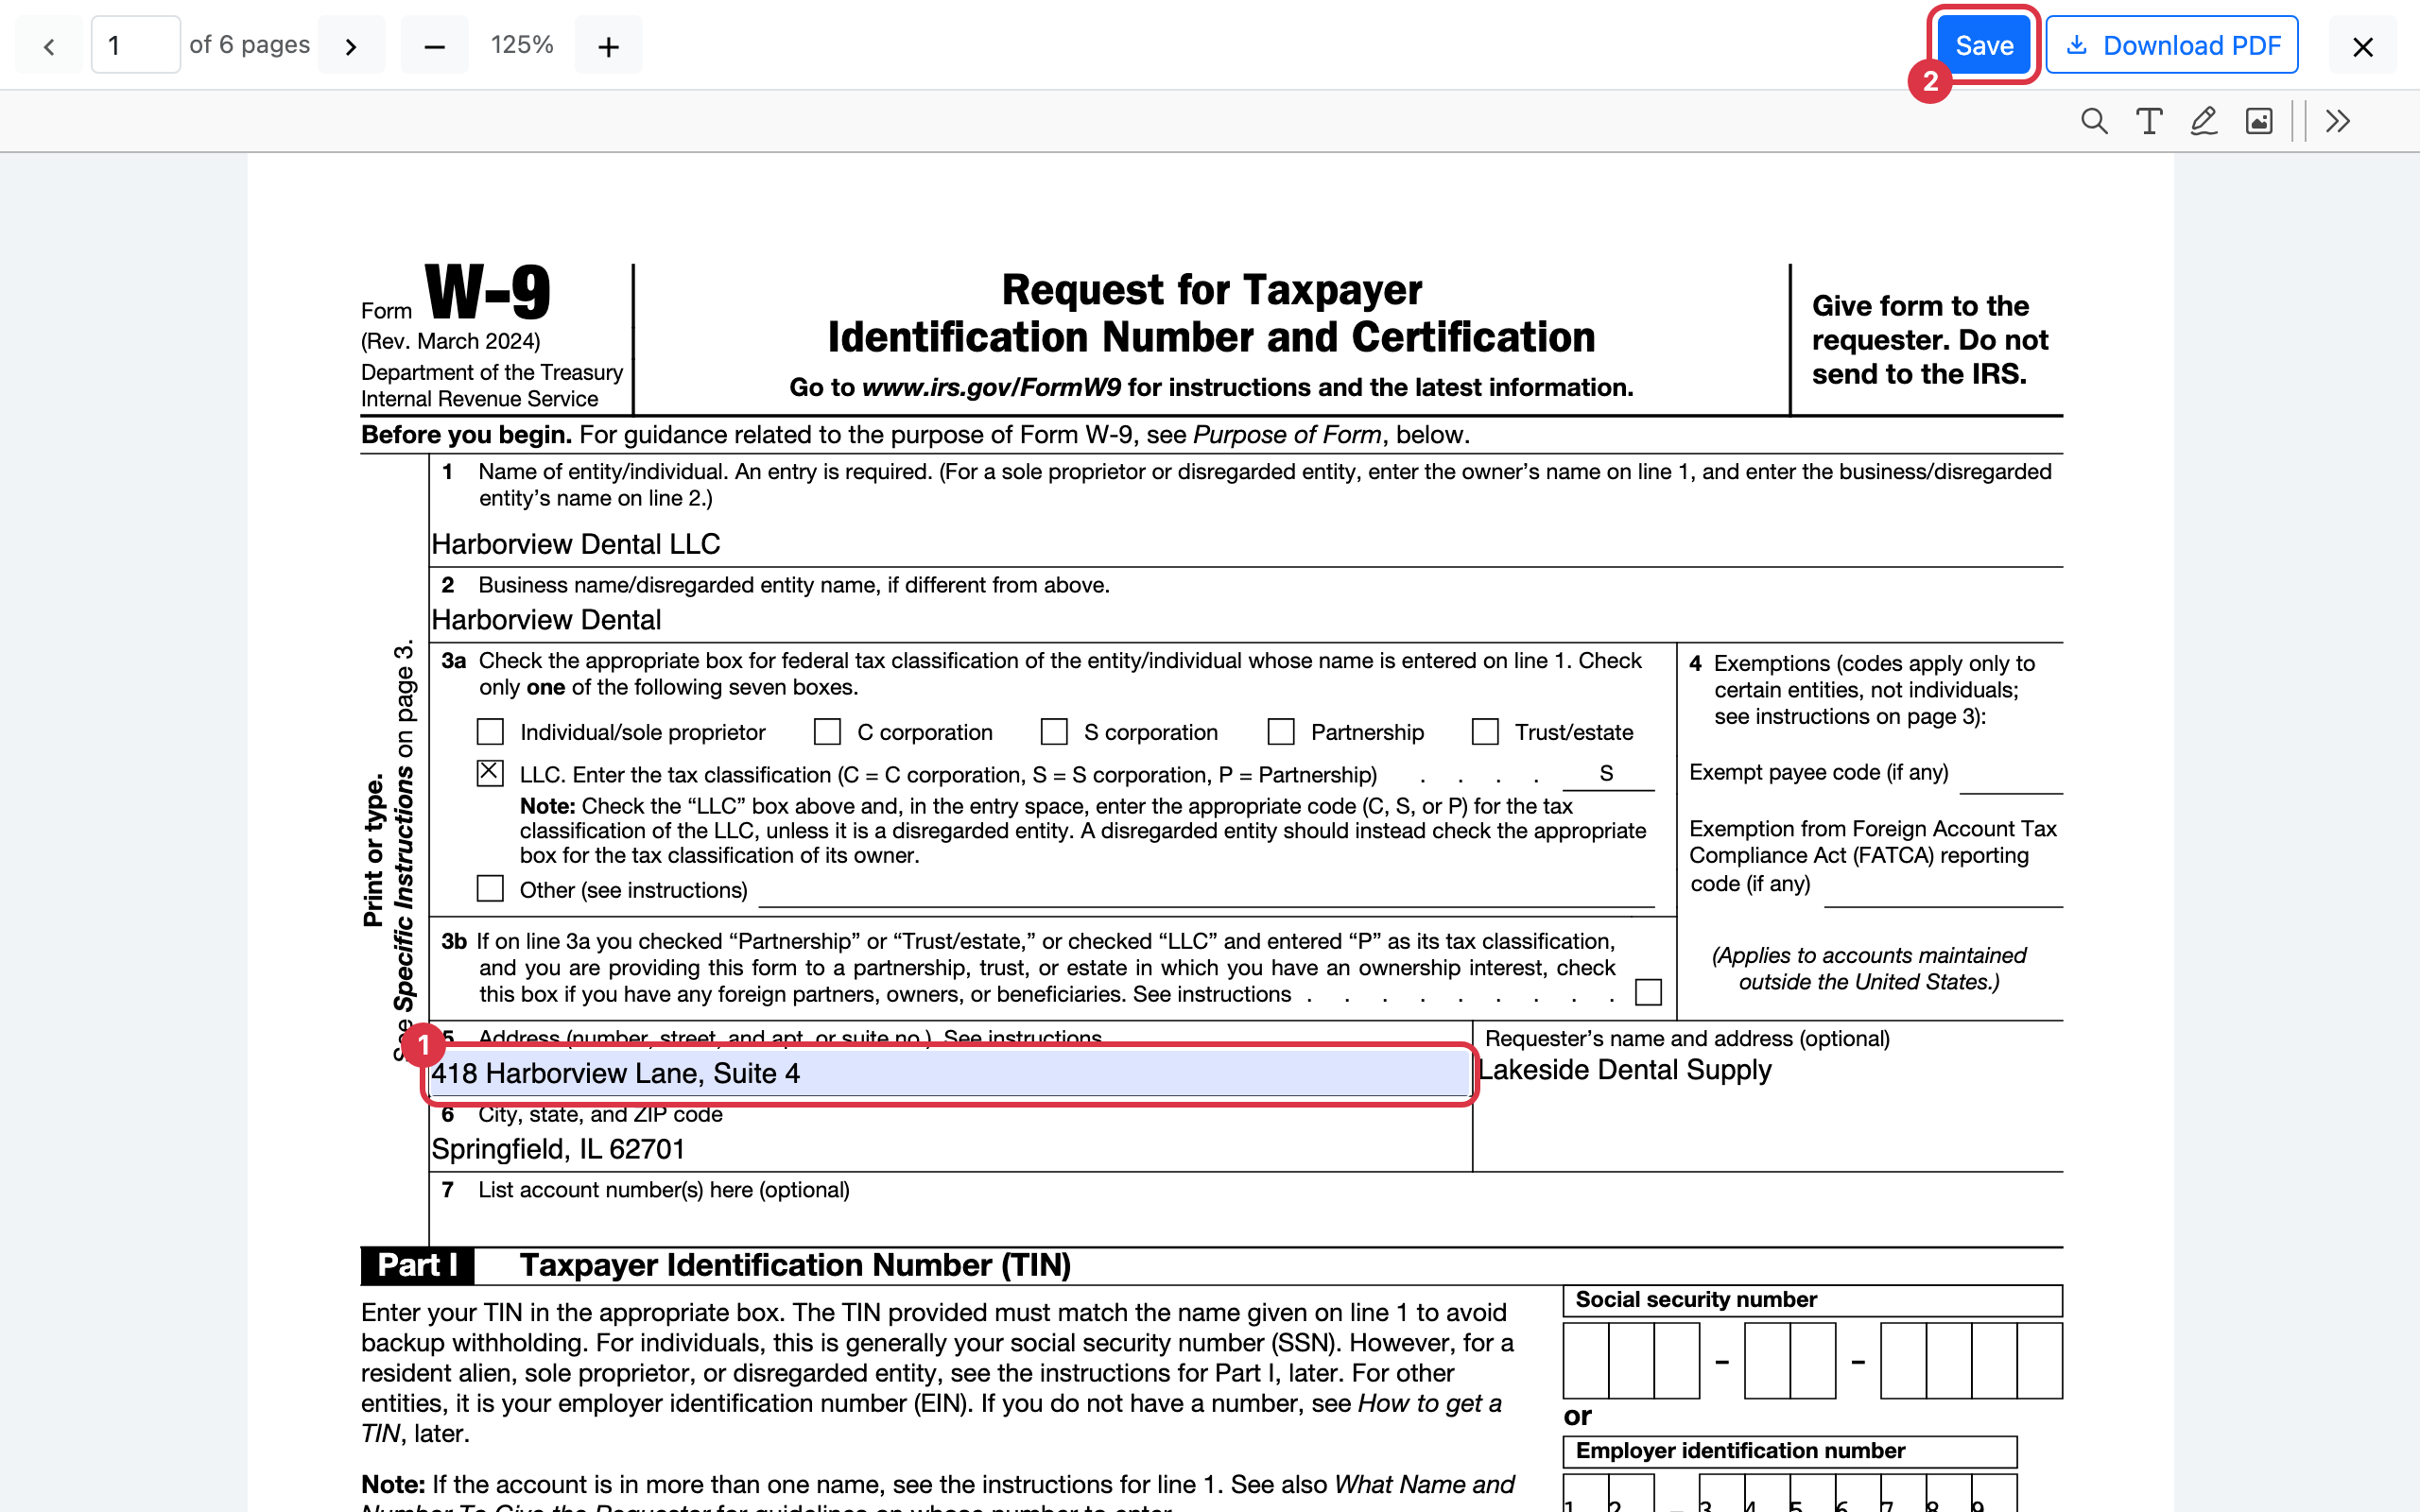
If anything needs to be updated, click that value on the form and retype it. A Save button appears as soon as you make a change. Press it to keep your changes.
6. Fill the form again in the same conversation
You do not have to start over to get a different result. Send another message in the same conversation, and the Agent fills the form again.
- Add a source file: Attach a file you did not include the first time.
- Change your instructions: Type what should be different this time.
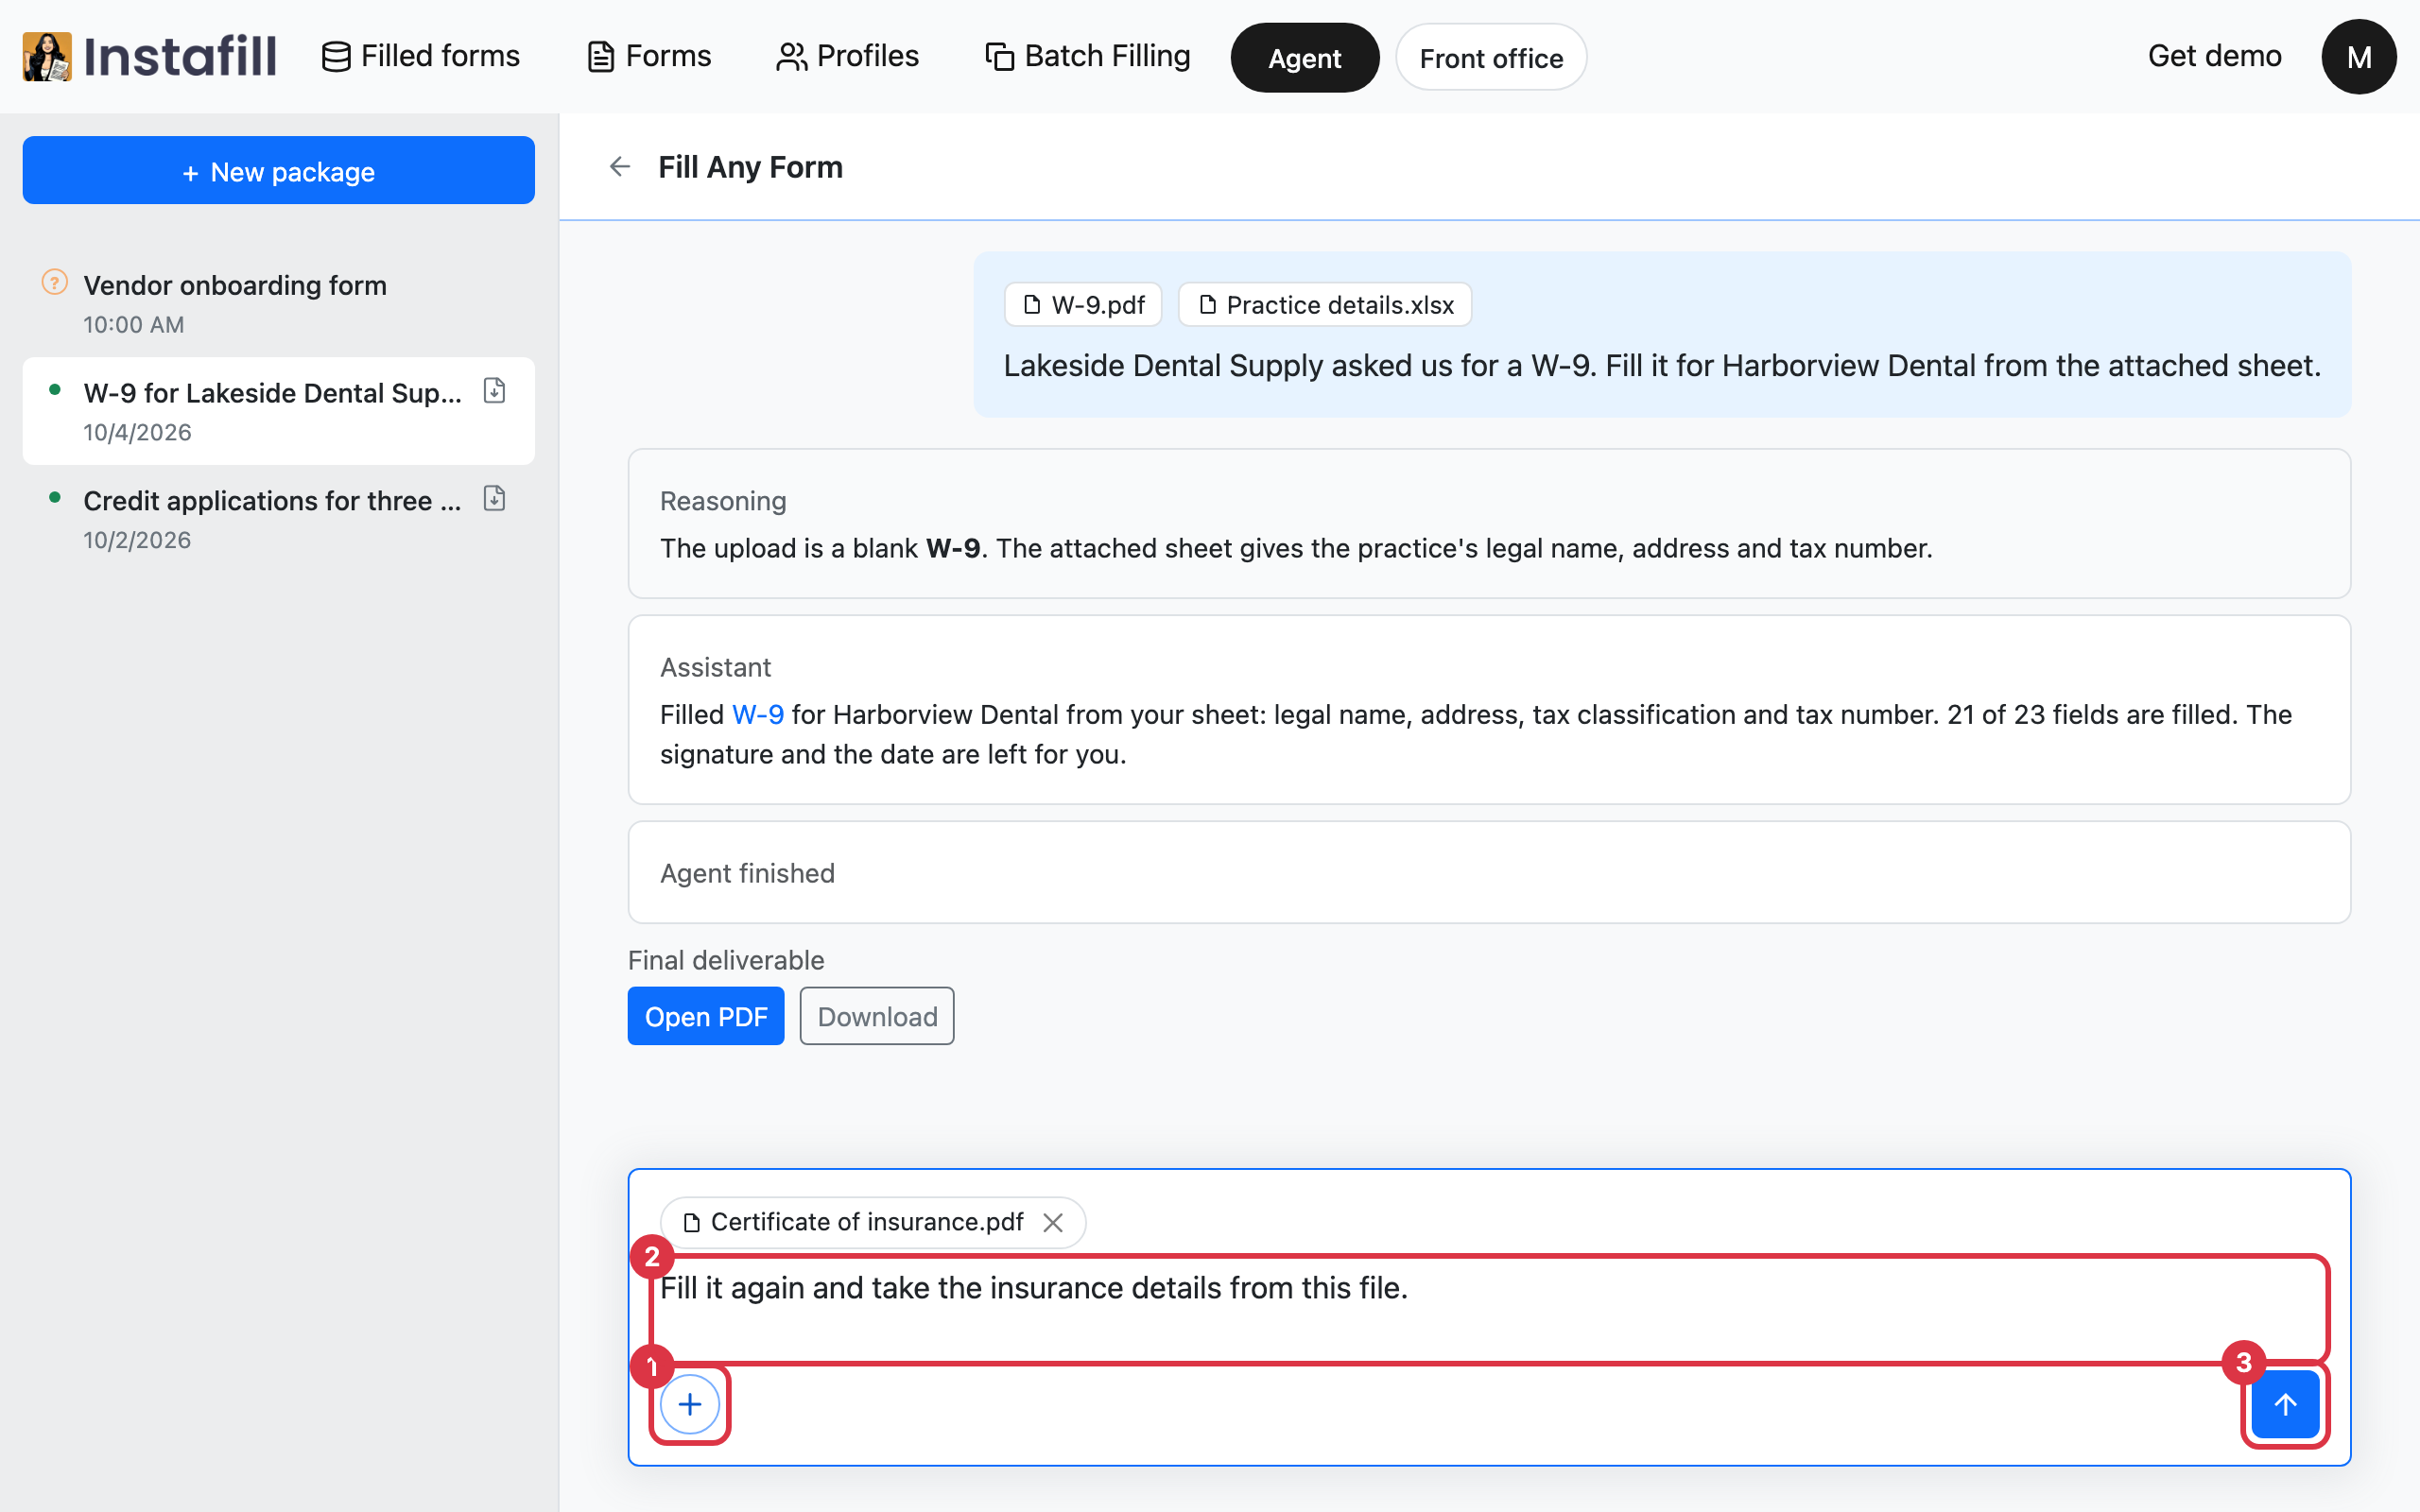
Each new message is a new run, and it holds a credit of its own. The form from the earlier run stays in the conversation.
7. Download the form
Press Download PDF to keep the finished form. Downloading needs a paid plan.
Fill out many forms at once
You are not limited to one form per request. There are two ways to fill many.
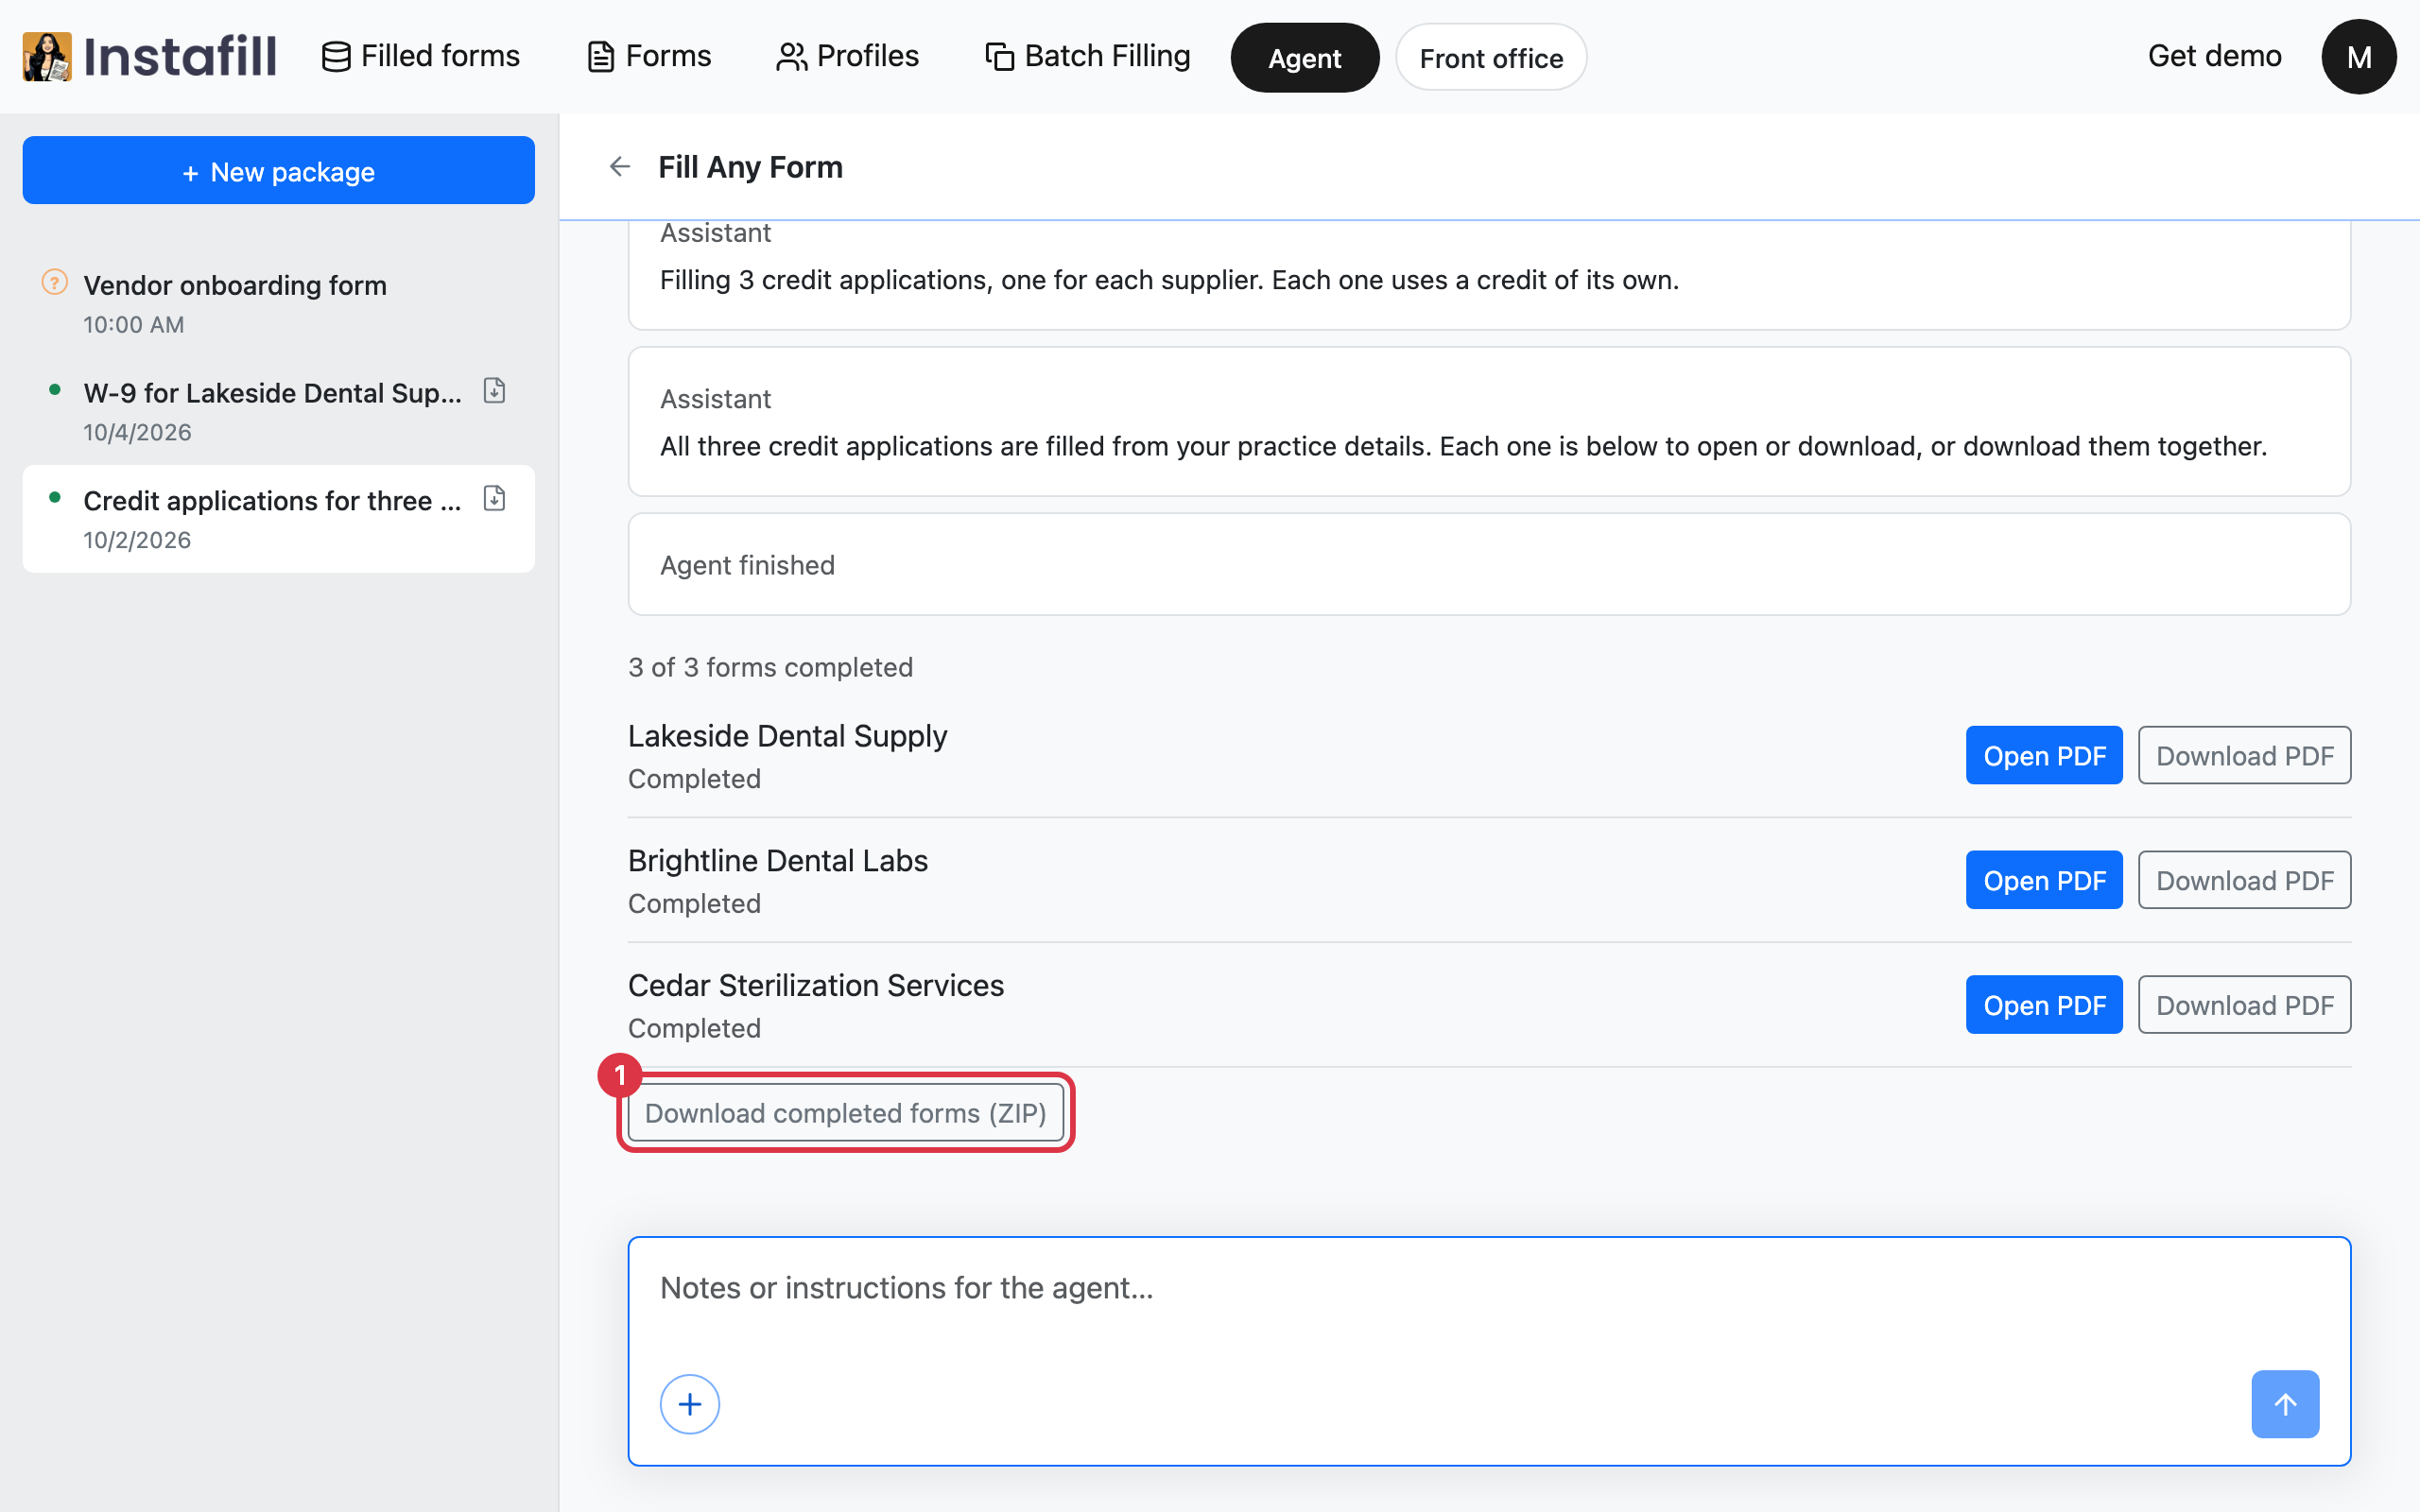
- Several forms in one request: Ask for up to 25 forms at a time. You download each one on its own, or all of them as one ZIP file.
- A spreadsheet of records: Attach the spreadsheet that holds your data along with the form. The Agent fills one copy for each row.
How your credits are used
- One run: A run holds 1 credit when it starts.
- When the credit comes back: It is returned if you stop the run, if it fails, or if it ends with nothing to deliver.
- Several forms: Each form that is filled uses its own credit.
- Spreadsheets: Each row uses one batch-fill credit. Batch-fill credits come with a paid plan.